
DIY hand-stamped advent calendar
November is here! It’s nearly Christmas! And I am trying to contain my inner Christmas elf for just a little longer so I don’t go completely festive crazy too early. But I had to bring you this beautiful DIY as my first Christmas post of the season, because advent is just around the corner, and now is the time to get making!
This is the first year I haven’t plumped for shop-bought, plastic-laden advent calendars, and I’m super excited to fill this baby up with all manner of exciting little gifts for Clem. I’m thinking of adding homemade gingerbread, little wooden toys like these beauties and stickers and paintbrushes for our crafting times. Plus each day will have a Bible verse for each day, to help us think about the fact that Christmas is all about the arrival of Jesus.
If you’d prefer to buy, then you can always check out the plastic-free options out there.


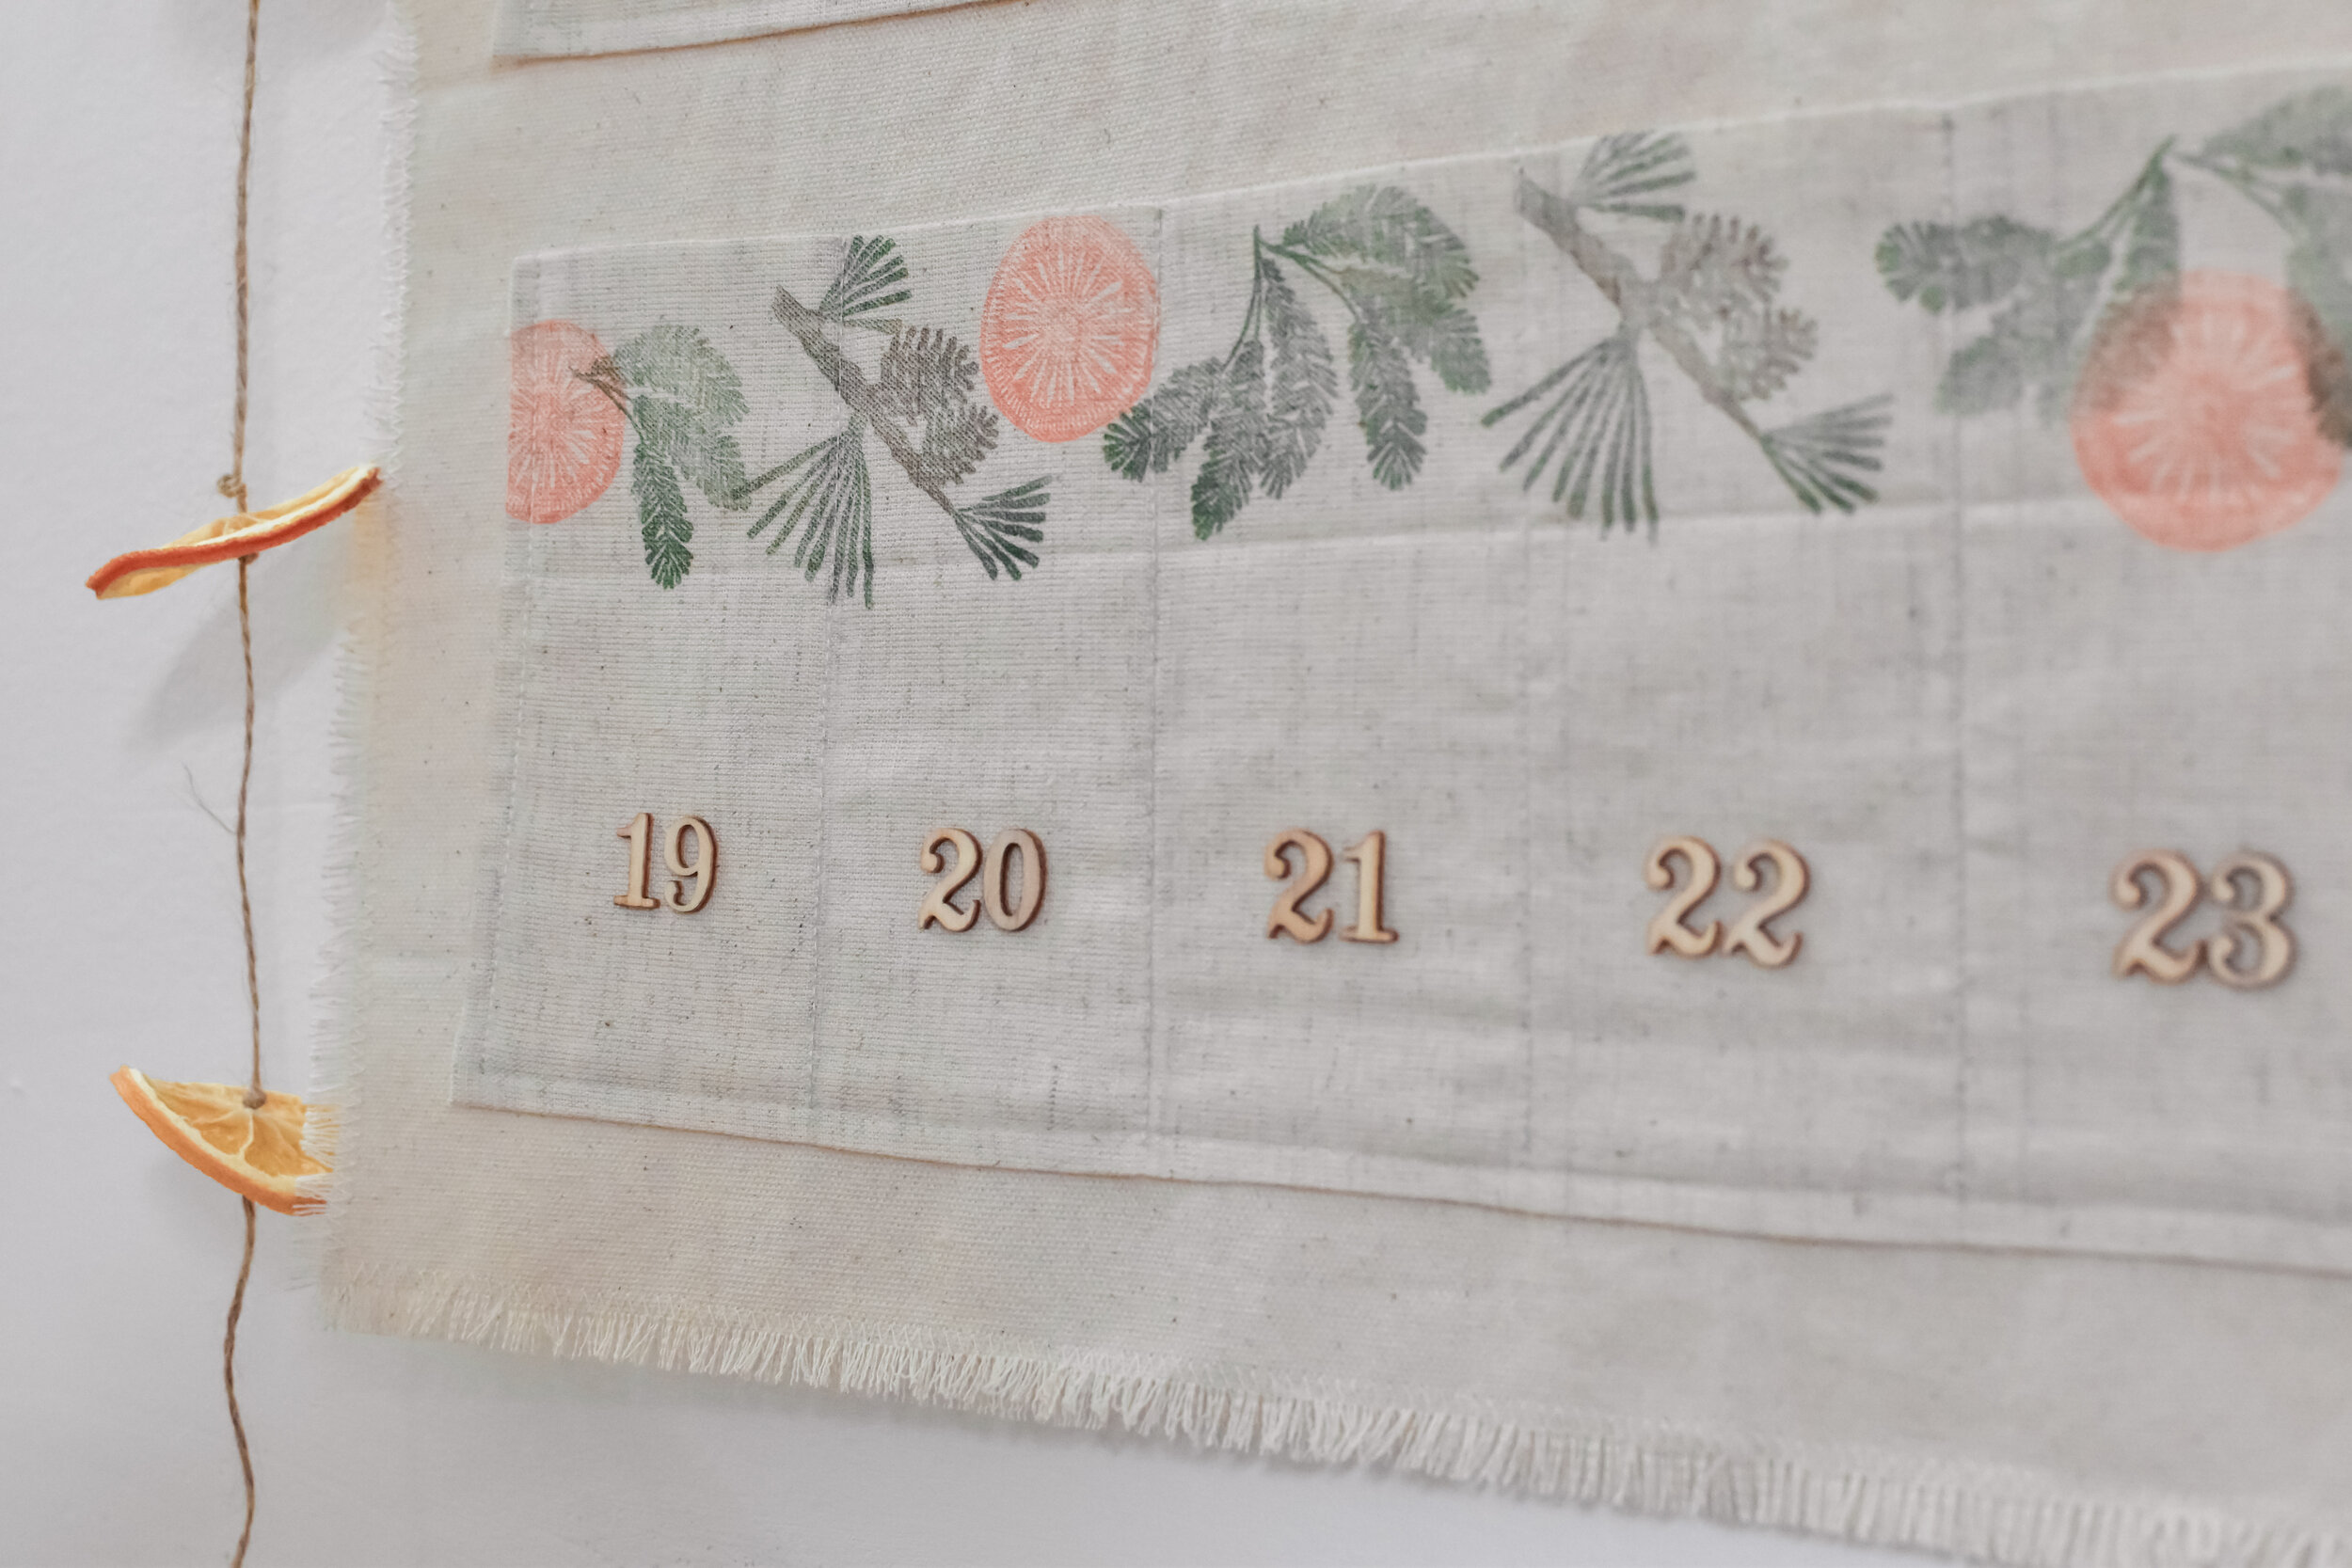
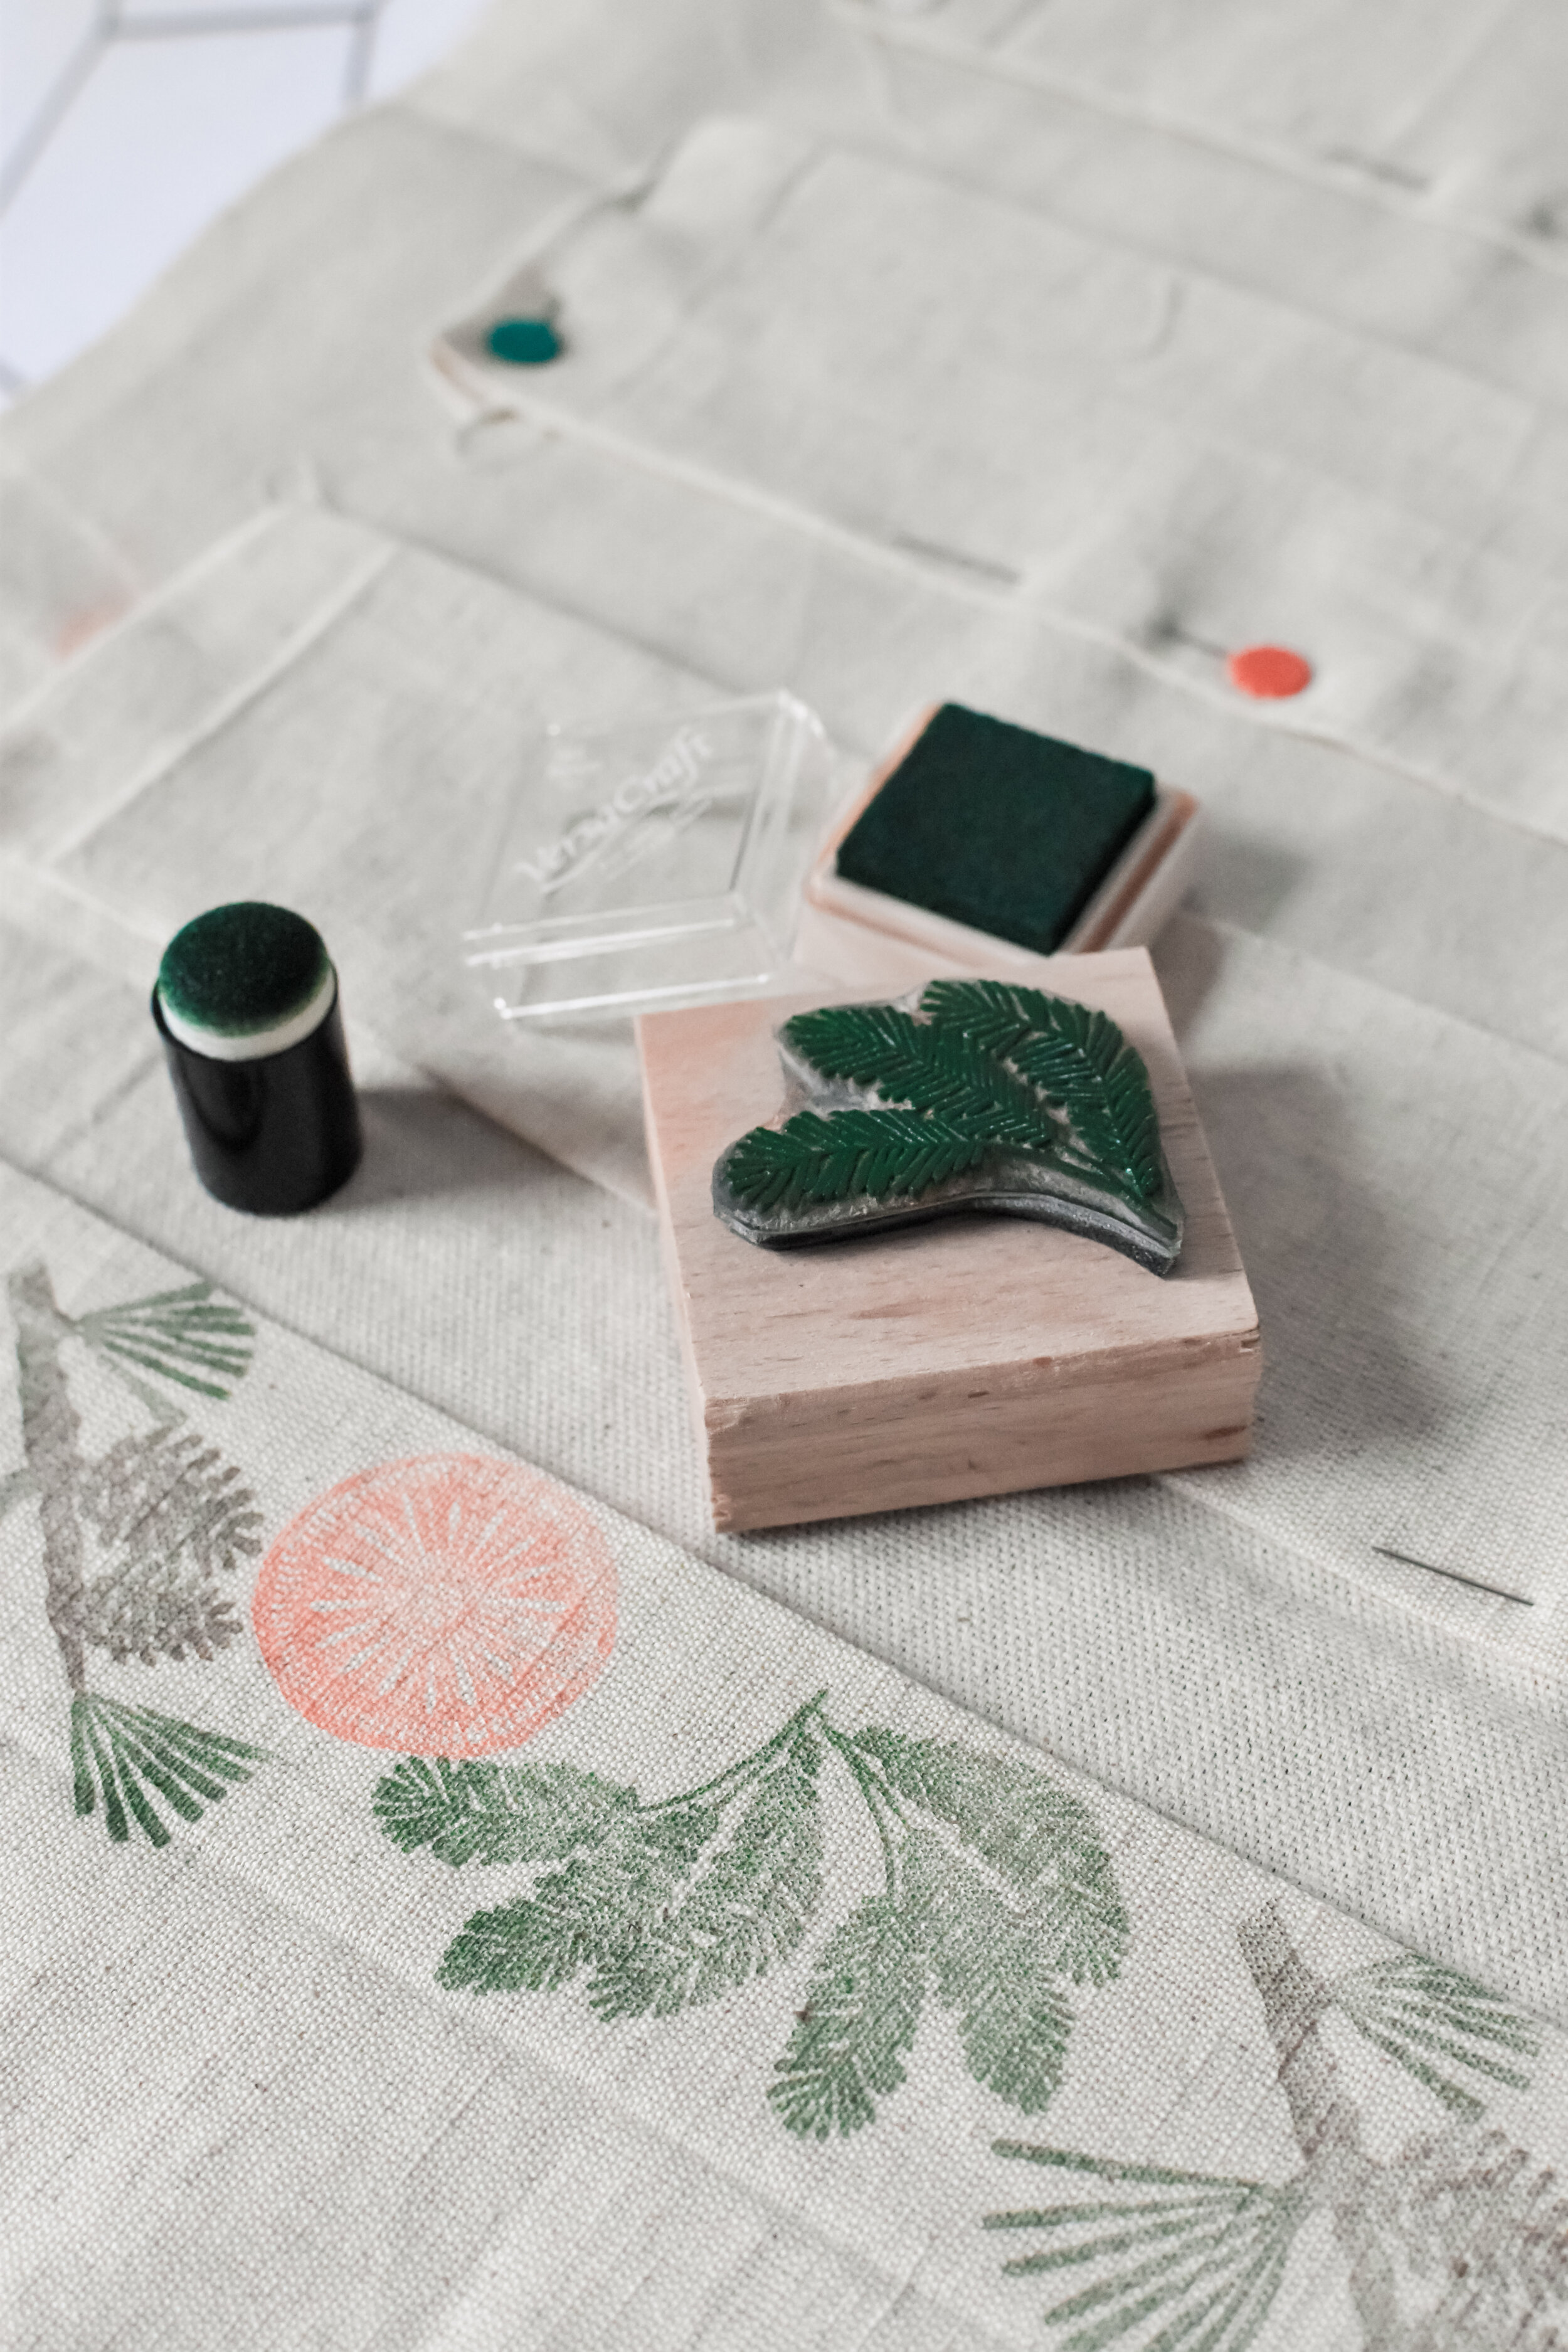
This project involves a bit of sewing, but it’s super simple and only takes a few hours in total. Using hand stamps gives a lovely rustic effect - just make sure to use fabric-safe ink like Versacraft if you plan to wash your calendar. For ease, I chose to use wooden numbers to mark my days, but if you wanted something a little more durable, you could use fabric paint or embroider the numbers.
You will need:
A couple of fat quarters (or a half yard length) of fabric
Fabric scissors or a rotary cutter
Thread in a colour matching your fabric
Ink in colours of your choice (I used Versacraft in Forest, Chocolate and Tangerine)
Glue
20” length of ½” diameter wooden dowel
50 cm string
This project involves a bit of sewing, but it’s super simple!
Begin by cutting your fabric. One of your fat quarters will form the base of the calendar. From the other fat quarter, cut four strips to form your pockets. These can really be any size you like, just remember to add ½” seam allowance on each edge. My strips were xxxxxx.
Fold back the seam allowance to the wrong side along each edge of your strips and press in place using an iron.
Using your sponge daubers, ink and stamps, stamp your desired design onto the fabric strips.
Pin your strips to your backing, leaving approximately an inch between each and 2 inches at the top.
Sew along three sides of each strip backstitching at the start and end and leaving the top edge of each strip open.
Divide your strips into six equal width sections each and mark the line between the sections with your vanishing marker. Sew along these lines, making sure you backstitch at the start and end of each.


7. Trim your backing so that there is 1 ¼” inch of backing to the left, right and bottom of your strips.
8. Sew a line of zig zag stitch ½” along the left, bottom and right hand sides of your calendar. Use a seam ripper or needle to tease the lengthways threads out and create a frayed edge.
9. Along the top edge of the backing fabric, fold back ¼” and press, and then another ½” and press again. Sew the fold down along the long edge, creating a channel for your wooden dowel.
10. Insert the wooden dowel and tie string around either end.
11. Glue your wooden numbers to each section.
12. Fill your advent calendar with all manner of goodies!
This page contains affiliate links, which earn me a little bit of commission if you make a purchase, at no additional cost to you. Thank you!