How to Sew on a Button So It Actually Stays (2-Hole and 4-Hole)
Learn how to sew a 2 hole button and how to sew a 4 hole button so they actually stay put. This easy, beginner-friendly method includes the shank technique for extra durability.
Equipment
- Needle
- Scissors
Materials
- 1 button (2-hole or 4-hole)
- Thread (matching color)
- Fabric garment
- Scrap fabric (optional, for reinforcement)
- Erasable fabric marker (optional)
Instructions
Thread the Needle.
Cut about 40 cm (18 inches) of thread. Thread the needle and tie a knot at the end. For extra strength, double the thread.Prepare the Fabric.
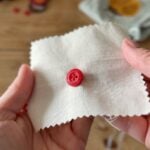
Identify where the button should go. If needed, place a small piece of scrap fabric underneath for reinforcement. Make a few small stitches to anchor your thread.Sew the Button (2-Hole or 4-Hole)
For a 2-hole button: sew up and down through both holes.For a 4-hole button: sew in parallel lines or a cross pattern.Repeat stitching 4–5 times for durability.Create a Thread Shank
Wrap the thread around the base of the button 4–5 times to create a small shank. This allows space for the buttonhole.Pass the needle to the back of the fabric.
Pass the needle to the back of the fabric. Make a few small stitches, loop the thread, pull tight, and trim excess.
Notes
- Creating a shank is the key step that prevents buttons from loosening.
- A cross pattern for 4-hole buttons is slightly stronger.
- Hand sewing is more reliable than using a sewing machine for buttons.