How to Paint IKEA Kallax (DIY Hack for Laminate Furniture!)
Painting IKEA Kallax (and other laminate furniture) is easier than you think! Learn how to paint this affordable furniture piece so it actually lasts.
Lots of people think that painting IKEA laminate furniture is complex, that it requires lots of sanding or that the paint will end up peeling. I’m glad to say none of these things are true! Painting IKEA Kallax is actually really straightforward, doesn’t require any sanding, and can give you a beautiful finish that lasts for years.

The IKEA Kallax cabinet is one of those products which nearly everyone has in their house. They’re super simple and practical, with cubes in different combinations that can be used as cupboards, drawers or shelves to display all manner of stuff. Their simplicity makes them super versatile, but it also means they’re very obviously an IKEA piece.
This was my concern with our own IKEA Kallax. I love its practicality – it makes fantastic toy storage. But I wanted something that looked just a little more special in our space. So I decided to give our old unit a little IKEA Kallax hack.
Painting IKEA Kallax and Other Laminate Furniture
Most of the cheaper IKEA furniture is made of MDF or particle board covered in laminate. Laminate is super hard to paint, because it’s shiny and the paint doesn’t easily stick to it. Here are some tips to help you get a finish that actually lasts!
Tips for Making Your Painted Laminate Furniture Last
1. Give your unit a really good clean before you start.
2. Use the right primer to help the paint adhere to the surface. I chose to use Dulux Difficult Surfaces primer, which worked really well, but the best primer to use would be a shellac-based one like Zinsser BIN primer.
3. Use eggshell or gloss paint for a durable, wipe-clean finish. If you’re using any other kind of paint, put two coats of a durable varnish over the top of your paint.
4. Do plenty of coats – I used two layers of the primer, two coats of paint and two coats of a durable varnish.
5. Leave plenty of time between coats (ideally at least 24 hours) to help your paint to be extra durable and withstand heavy traffic. This is the time to be patient!
Frequently Asked Questions
What kinds of IKEA furniture can I paint using this method?
This method of painting laminate furniture will work on any IKEA furniture that’s made of laminate. That includes IKEA Kallax, Pax, Billy, Expedit, Trofast, Mosslanda, Malm, Brimnes, Hemnes, Alex and loads more.
It will also work on laminate furniture bought from other stores like Dunelm, Target, TK Maxx, La Redoute and Next.
Do you need to sand the piece when painting IKEA Kallax?
Lots of people say it’s necessary to sand laminate IKEA furniture before painting it, to help the paint stick. I started off trying to sand the laminate and found that it made no impact whatsoever. After an hour of so of hard work with very little to show for it, I gave up and just decided to use a really good primer.
Five years later our cabinet is still looking perfect, so I don’t think sanding is necessary. That’s right – you really can paint IKEA furniture without sanding!
If you are looking for a really smooth finish, you might like give your piece of IKEA furniture a light sand in between coats of paint. I didn’t do this and it turned out fine, but if you want the smoothest finish, this will help!
What kind of paint is best for painting laminate furniture?
The best type of paint to use for painting laminate furniture is eggshell or gloss paint, which will give you a durable, wipe-clean finish.
If you’re using any other kind of paint, like matt/flat, chalk paint and most kinds of spray paint, make sure to add a couple of coats of varnish. People often ask if you can use Frenchic paint, and you definitely can! Just bear in mind that you’ll probably need to add a top coat.
The paint I used was ‘pink 01’ by Lick – the perfect shade of pale pink. I love Lick paint because it’s low in VOCs and reasonably good for the environment, but you don’t need to use expensive paint to get a lovely result.
How much paint, primer and varnish will I need?
You’ll need one 750ml tin of primer and if you’re using varnish you’ll need one 400ml can of that too.
For paint, it’s best to check the coverage of whichever paint you decide to use to see how much you’ll need. I used 5L of my paint choice.
Can I use wood stain on IKEA Kallax?
No, unfortunately wood stain doesn’t work on laminate furniture. However, you can always paint your unit a dark brown colour to mimic the colour of your chosen stain.
How to Paint IKEA Laminate Furniture
Supplies
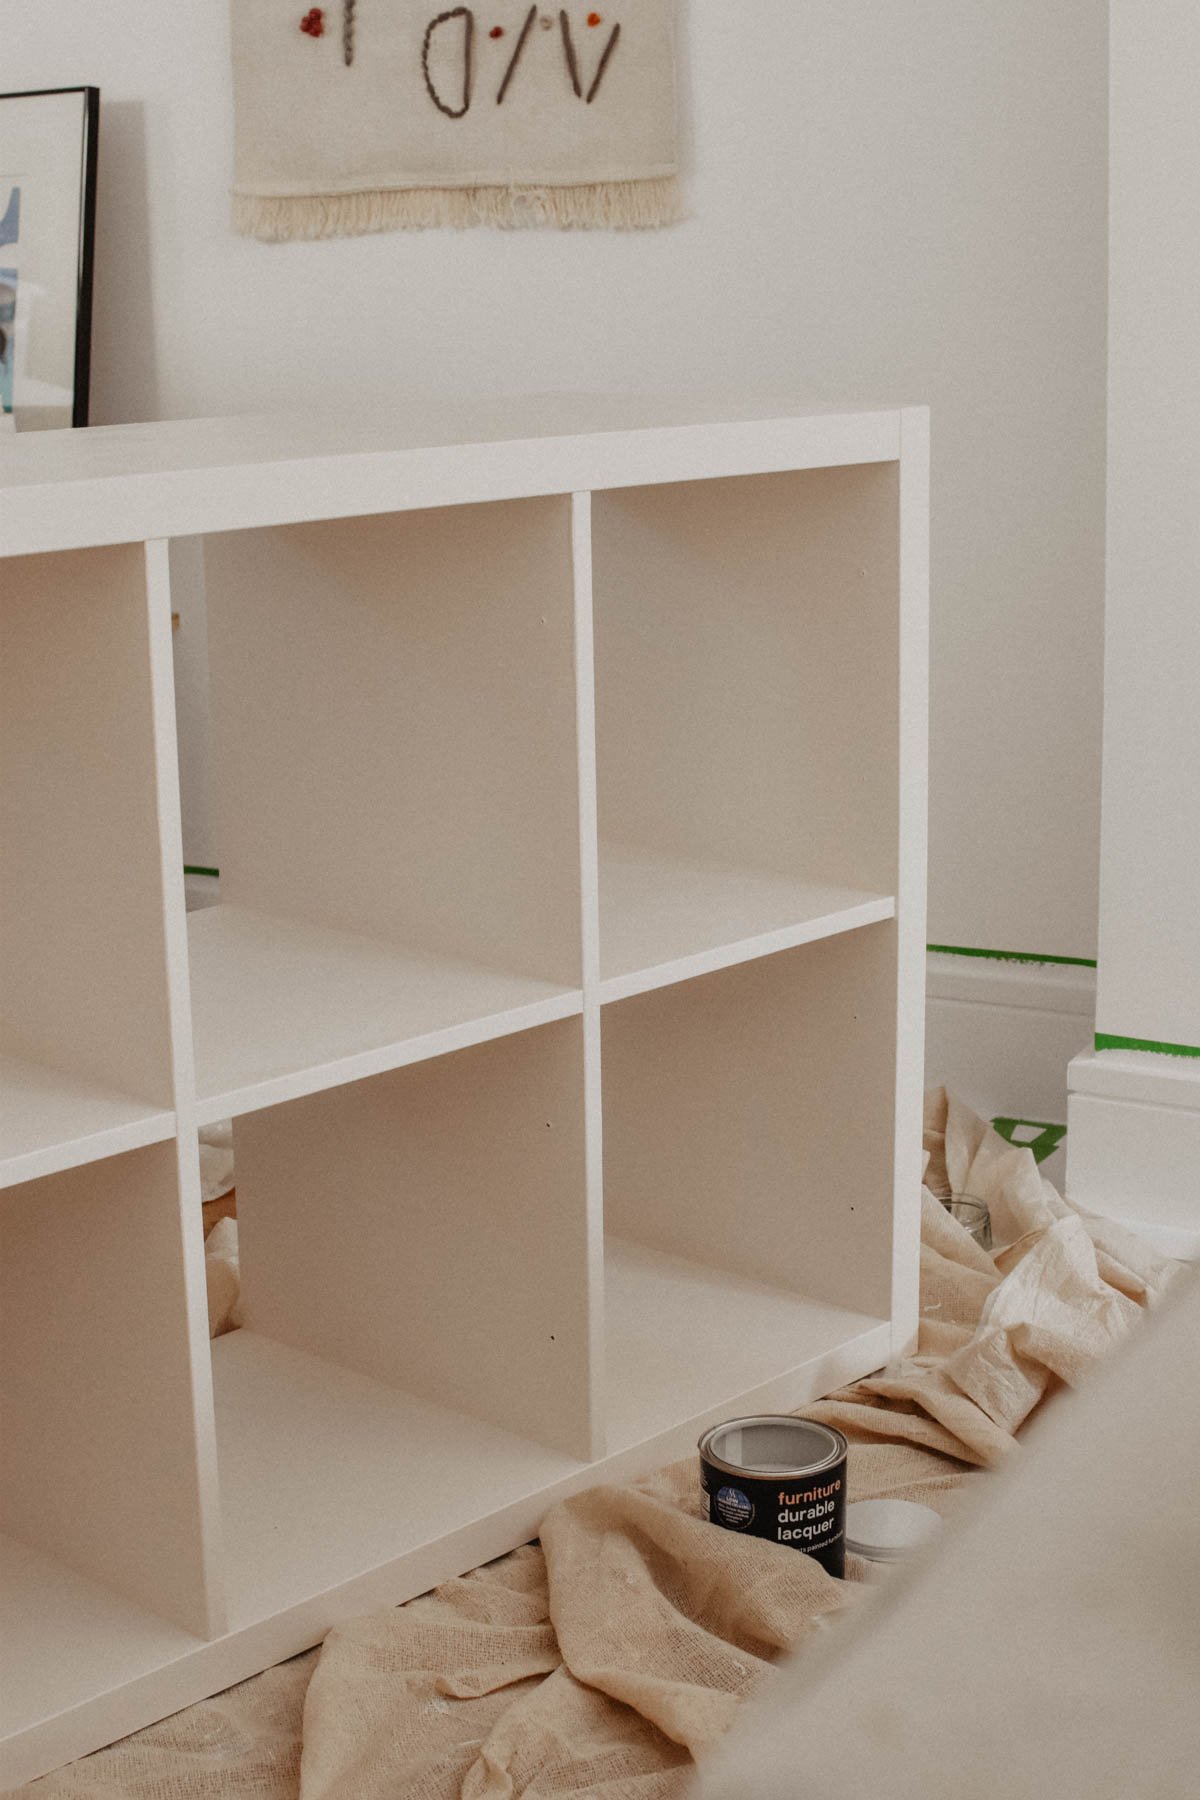
Prep the Unit
If your furniture piece isn’t assembled, the first step is to put it together. It will be much easier to paint the unit assembled. Then wipe down the entire cabinet with a damp cloth so it’s really clean.
Prime the Laminate Surface
Start by applying a coat of primer to all the flat surfaces of the unit, then leave plenty of drying time before applying a second coat. The best way to apply the primer is using a mini foam roller as much as possible and then use brushes to get into the tight spaces. If you have a paint sprayer that will work well too.
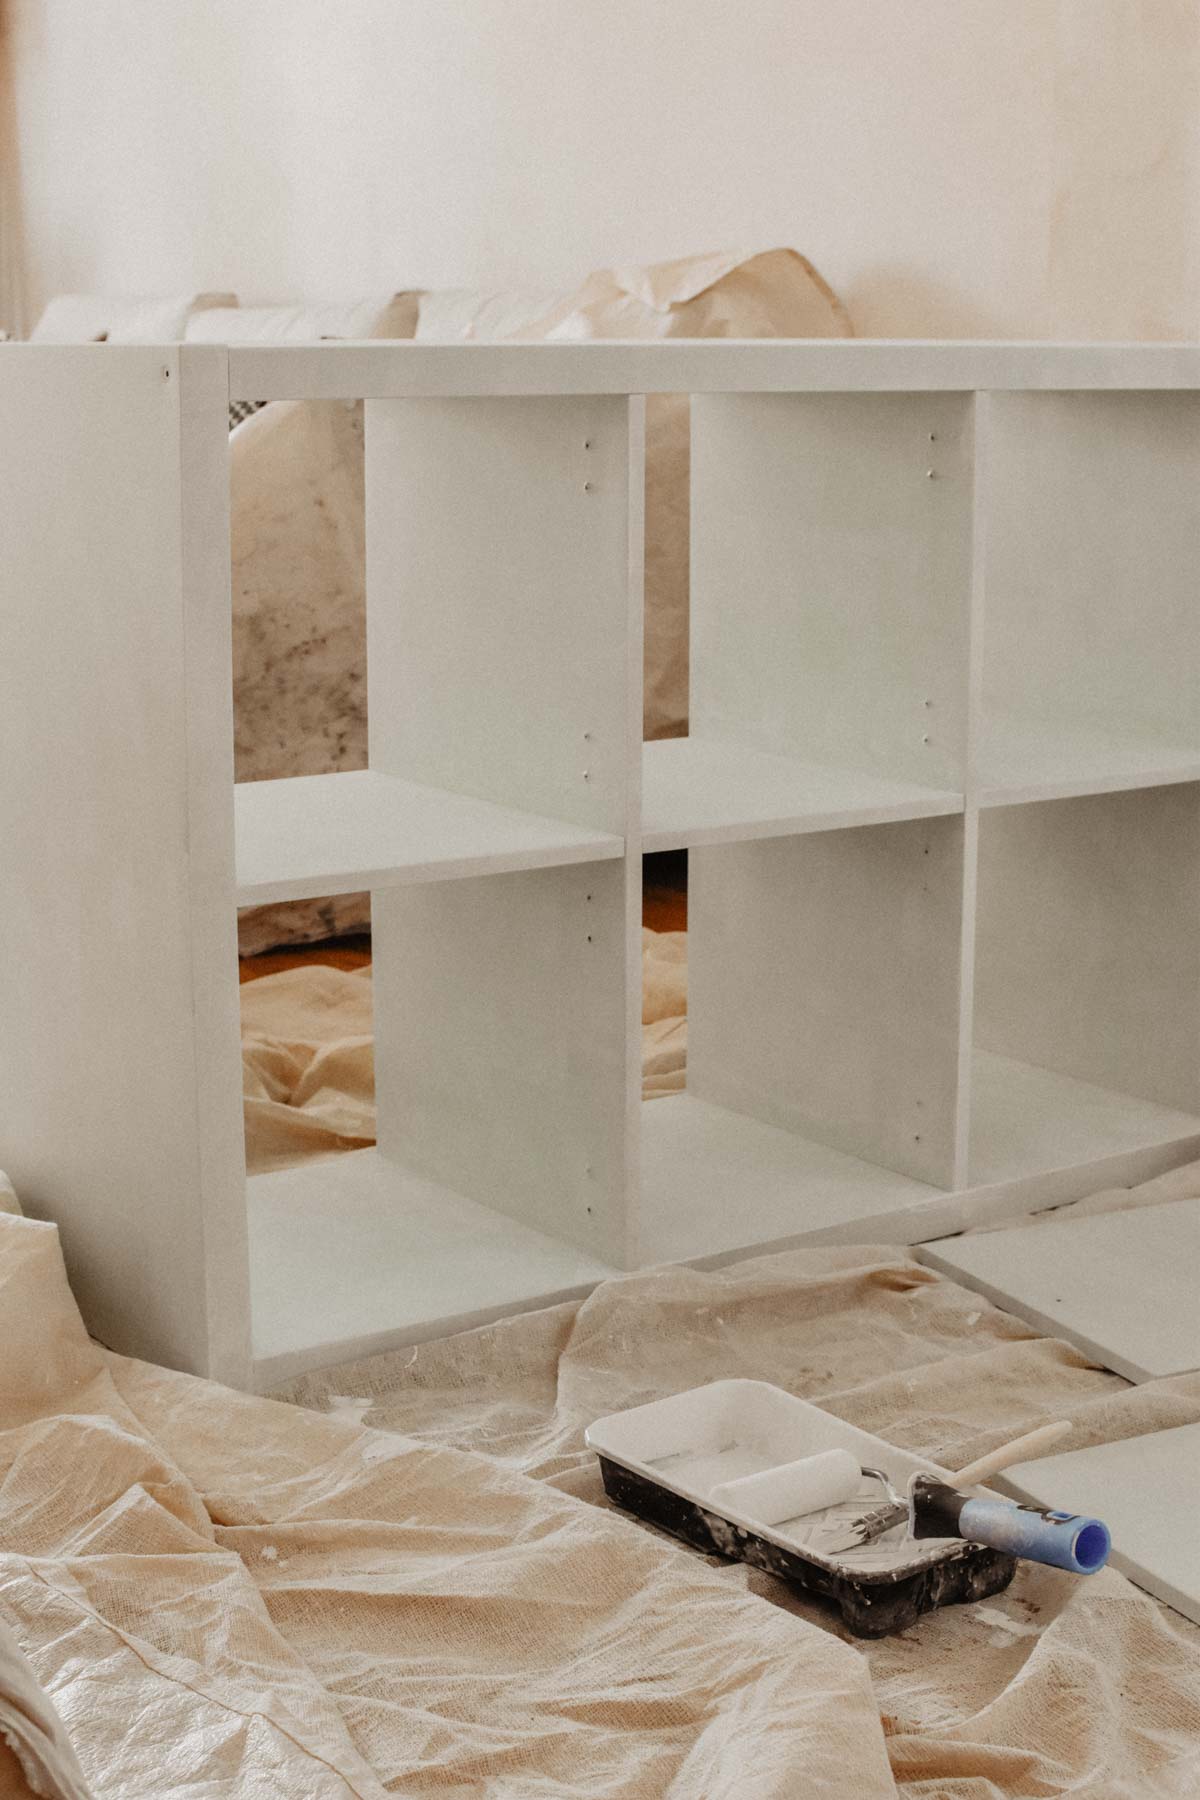
Painting ikea kallax
Apply your first coat of paint, again using a mini roller where possible (to avoid visible brush strokes). Leave for 24 hours and then apply a second coat. For some kinds of paint you may even wish to do a third coat.
Apply Top Coat
This is an optional step that will give you a super durable finish. If you’d like to, apply one or two coats of varnish.
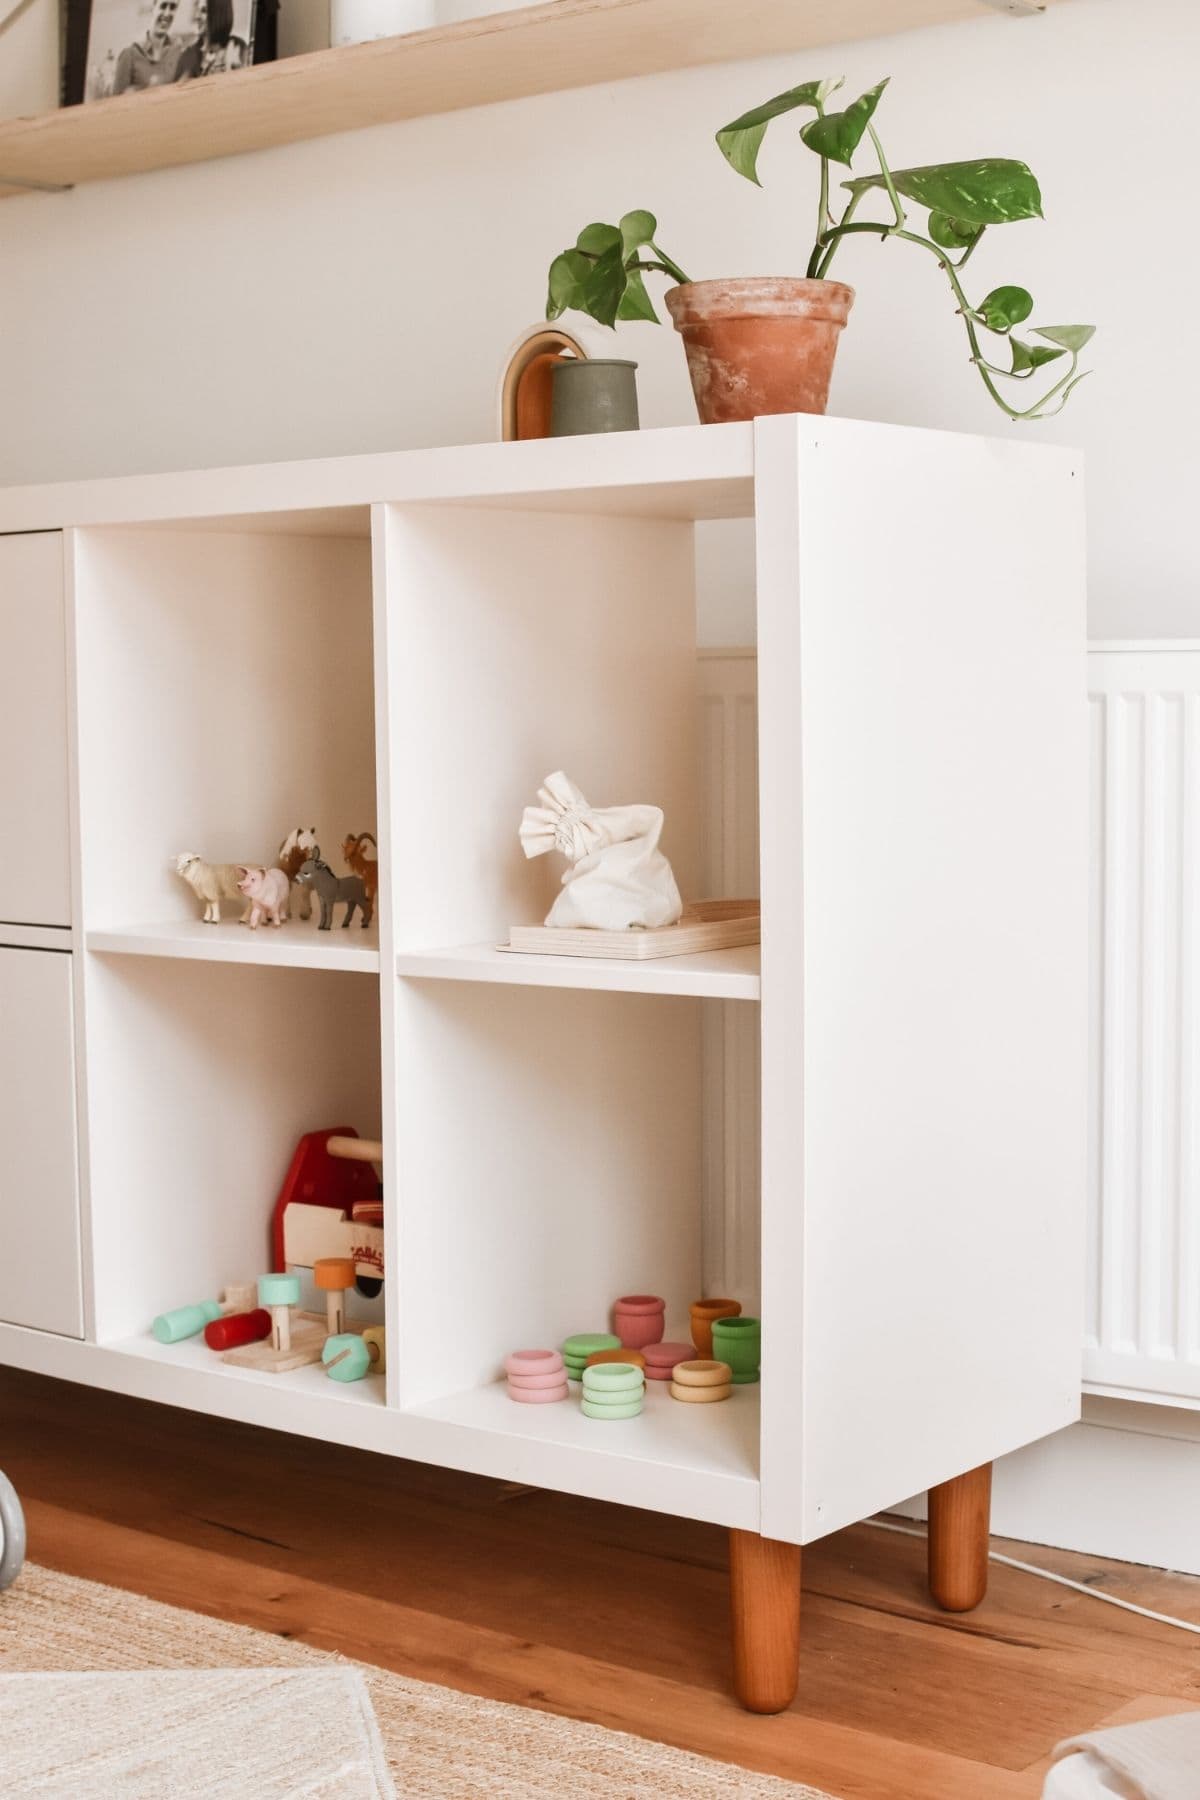
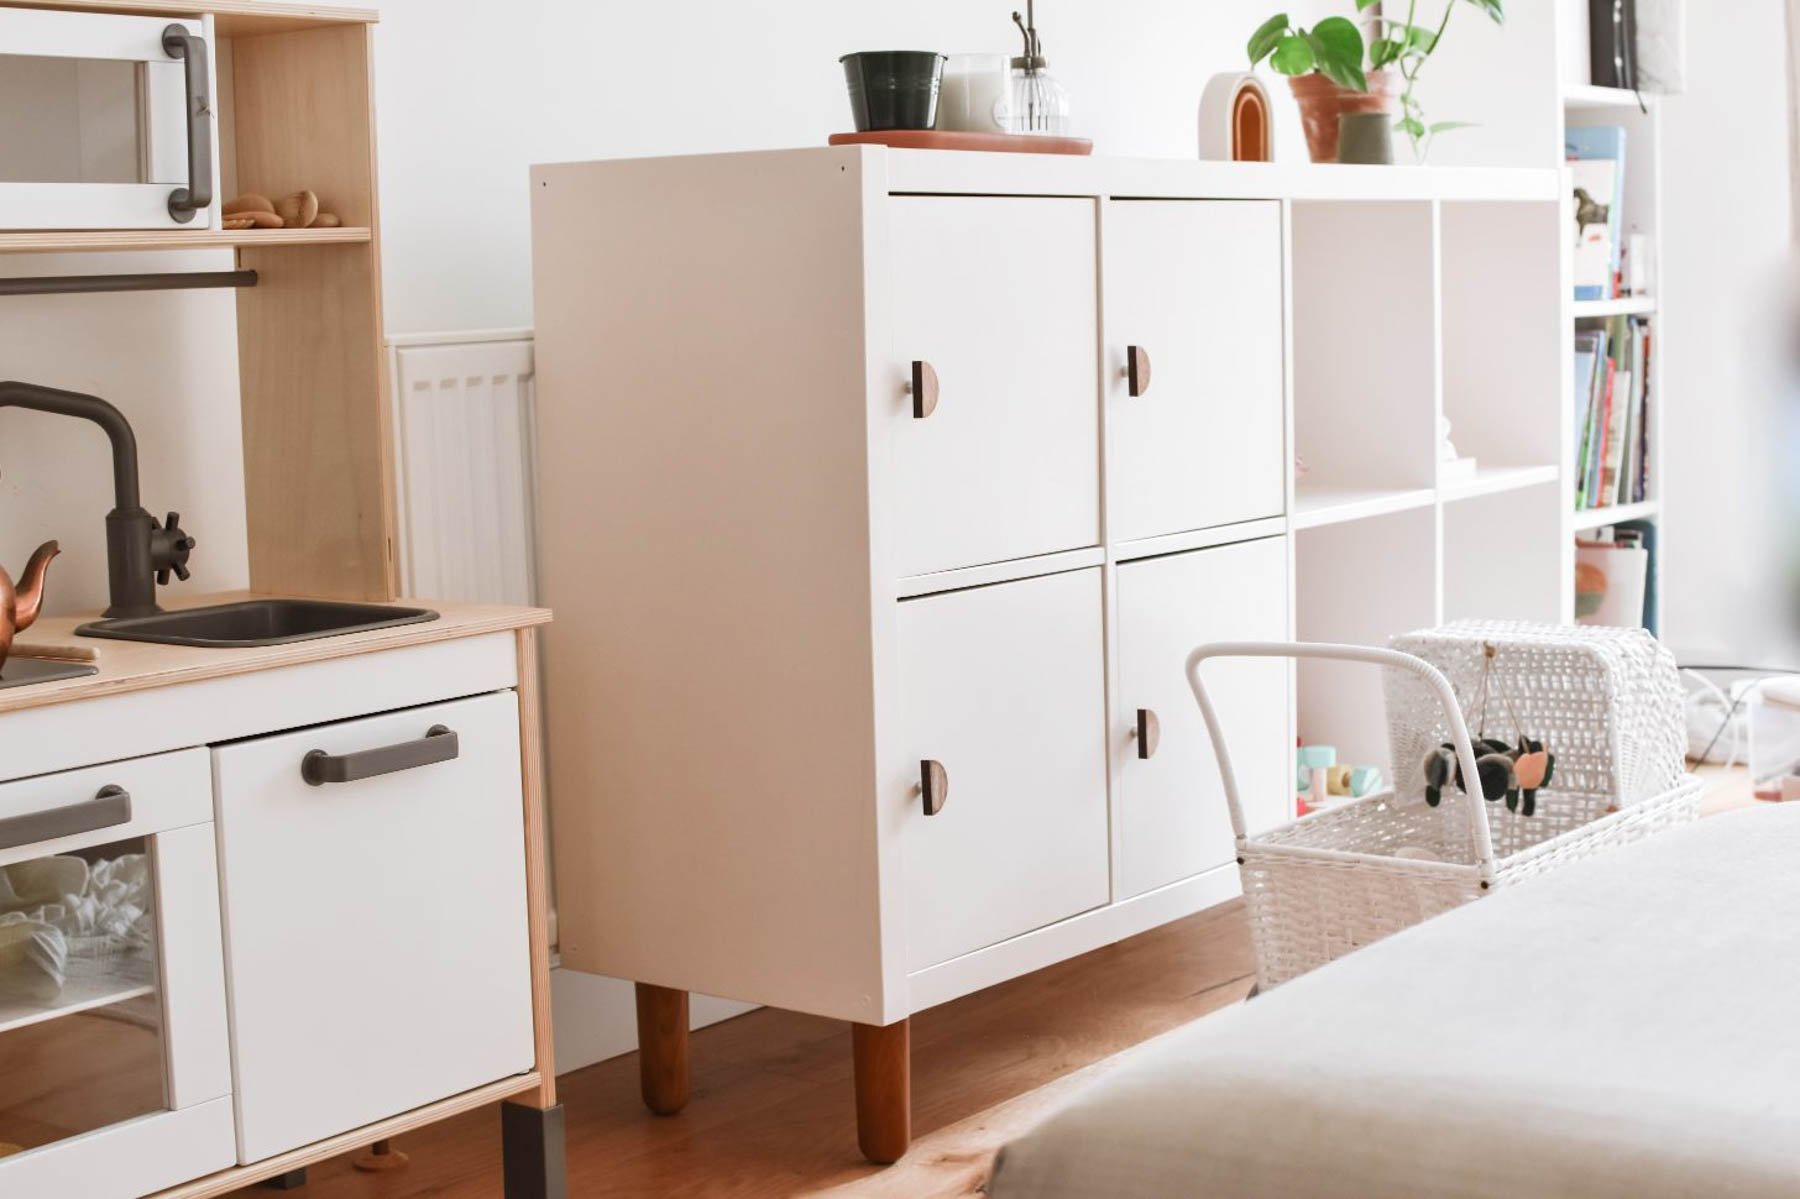
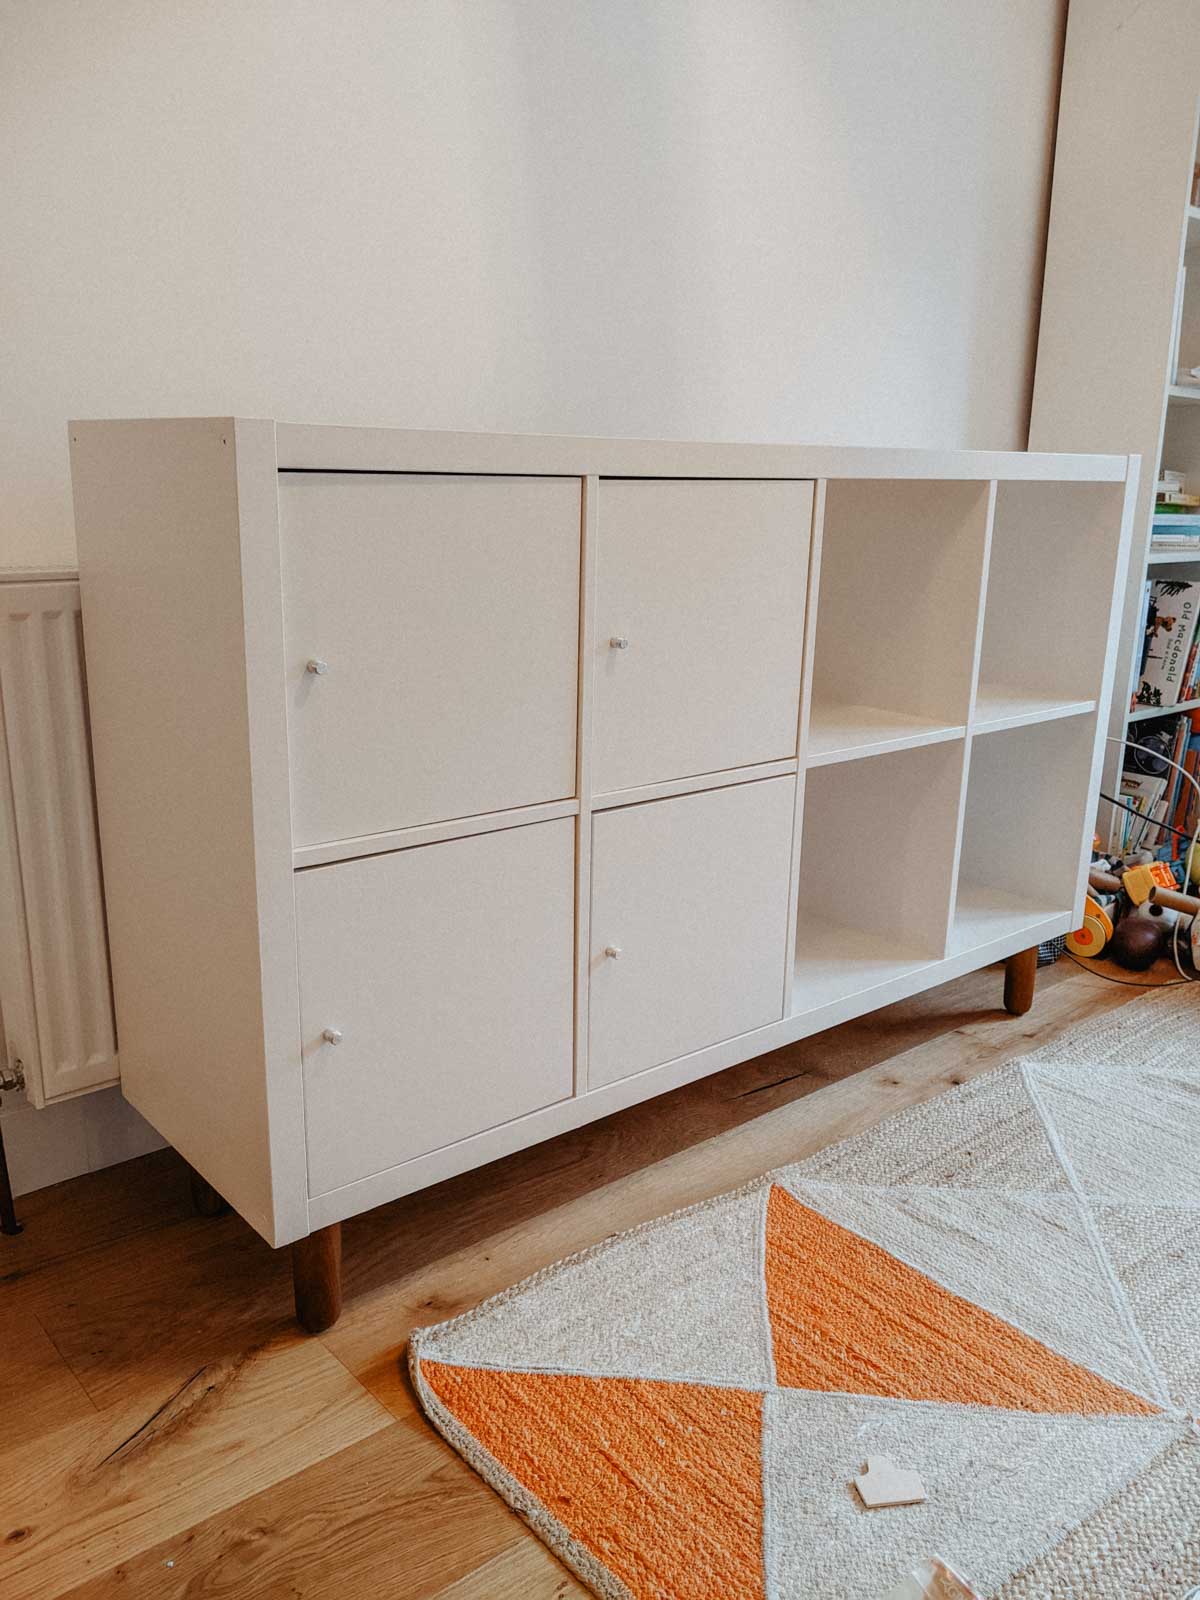
May 2025 Update: How has my IKEA Kallax Hack held up?
Five years have passed since I finished my IKEA Kallax hack, and I wanted to share how well it’s lasted. The unit has gone through two house moves since I first painted it, and it’s been well used by our four boisterous children. All of this means it’s sustained a couple of small chips.
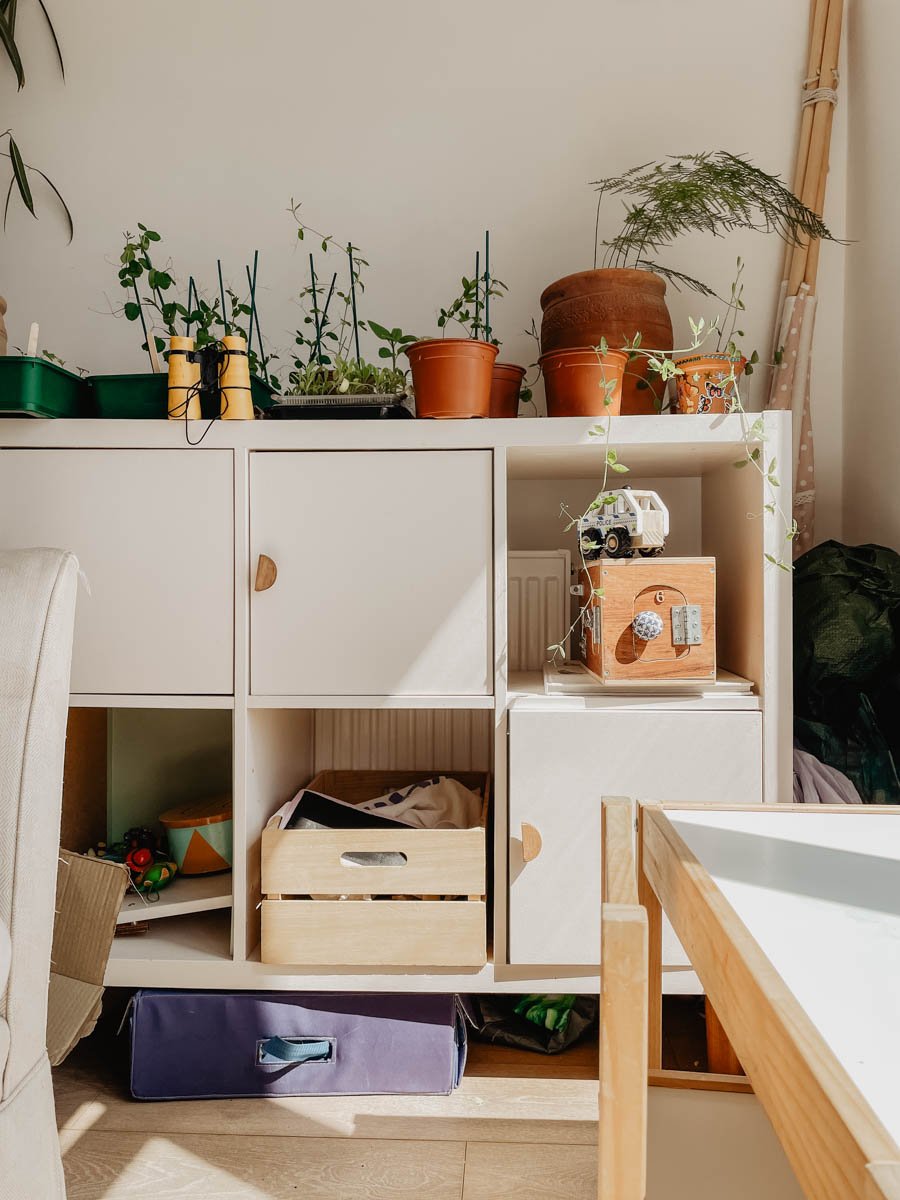
However, as you can see from the pictures, overall it has held up excellently. There is no peeling or bubbling paint, and the little chips are barely noticeable from a distance.
The biggest issues we’ve had with the unit is that several times the doors have been pulled off by our small children. If I bought another IKEA Kallax unit I probably wouldn’t get the doors. They are really poorly made and flimsy!
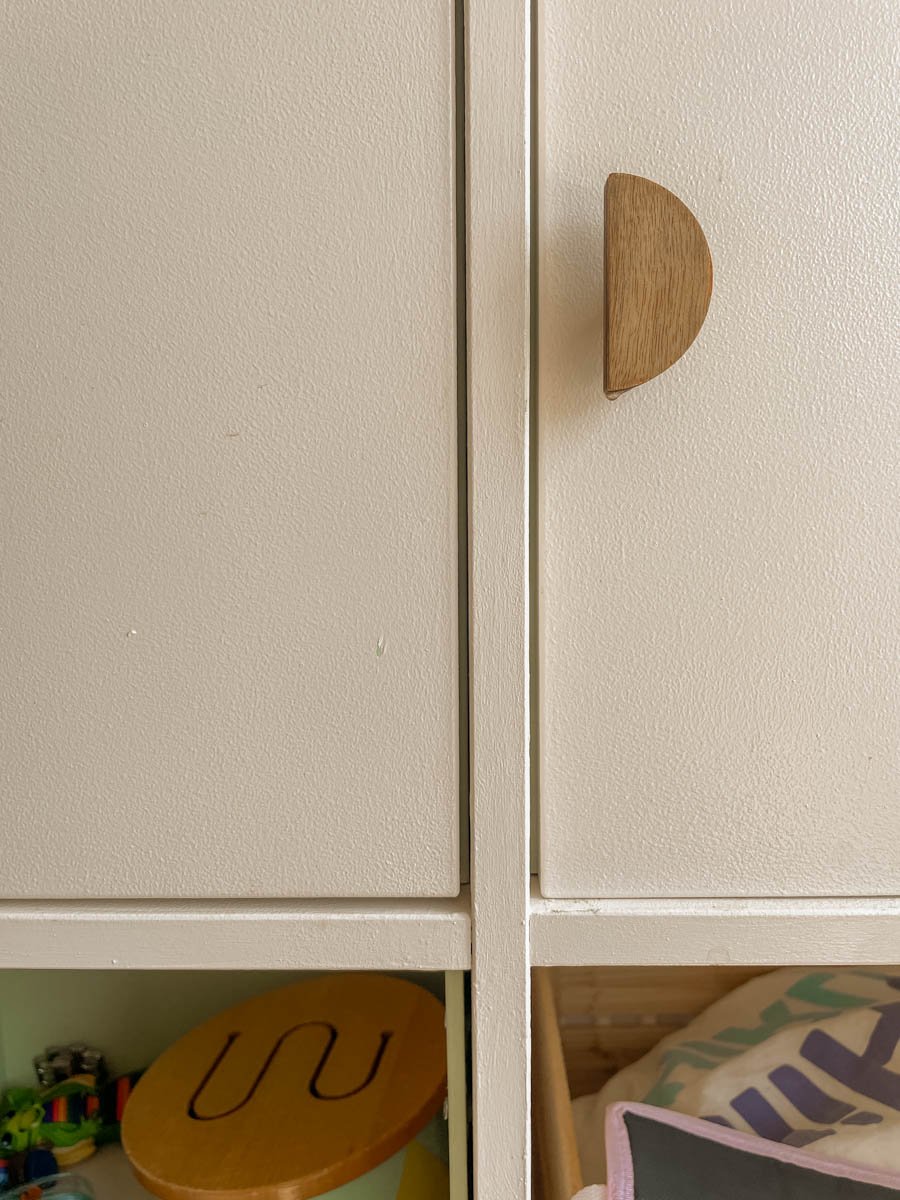
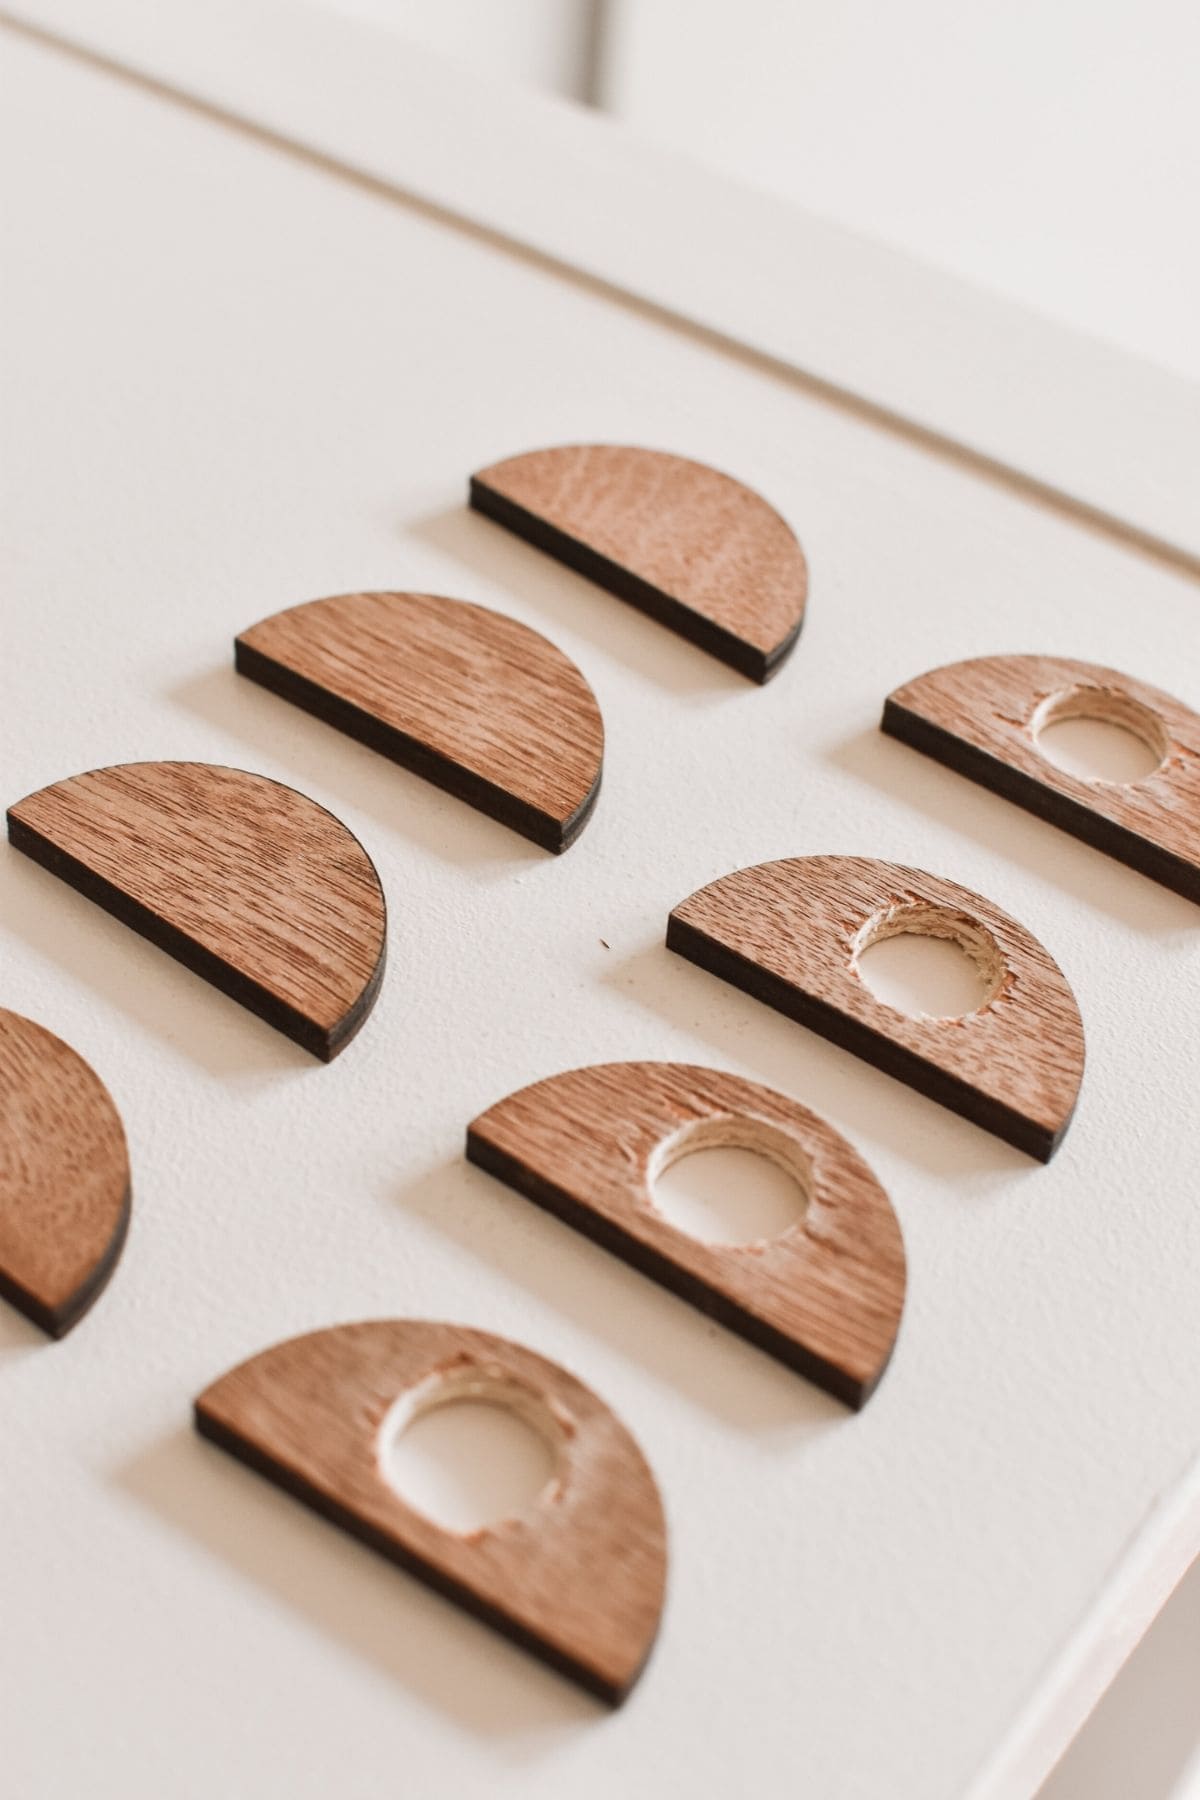
How to Make Your Own Plywood Handles
The cupboard handles that come with the Kallax are boring at best, but I didn’t have the budget (or the inclination!) to buy brand new handles. So I managed to turn the Kallax handles into something a little more special with a few cheap plywood shapes that I got on eBay.
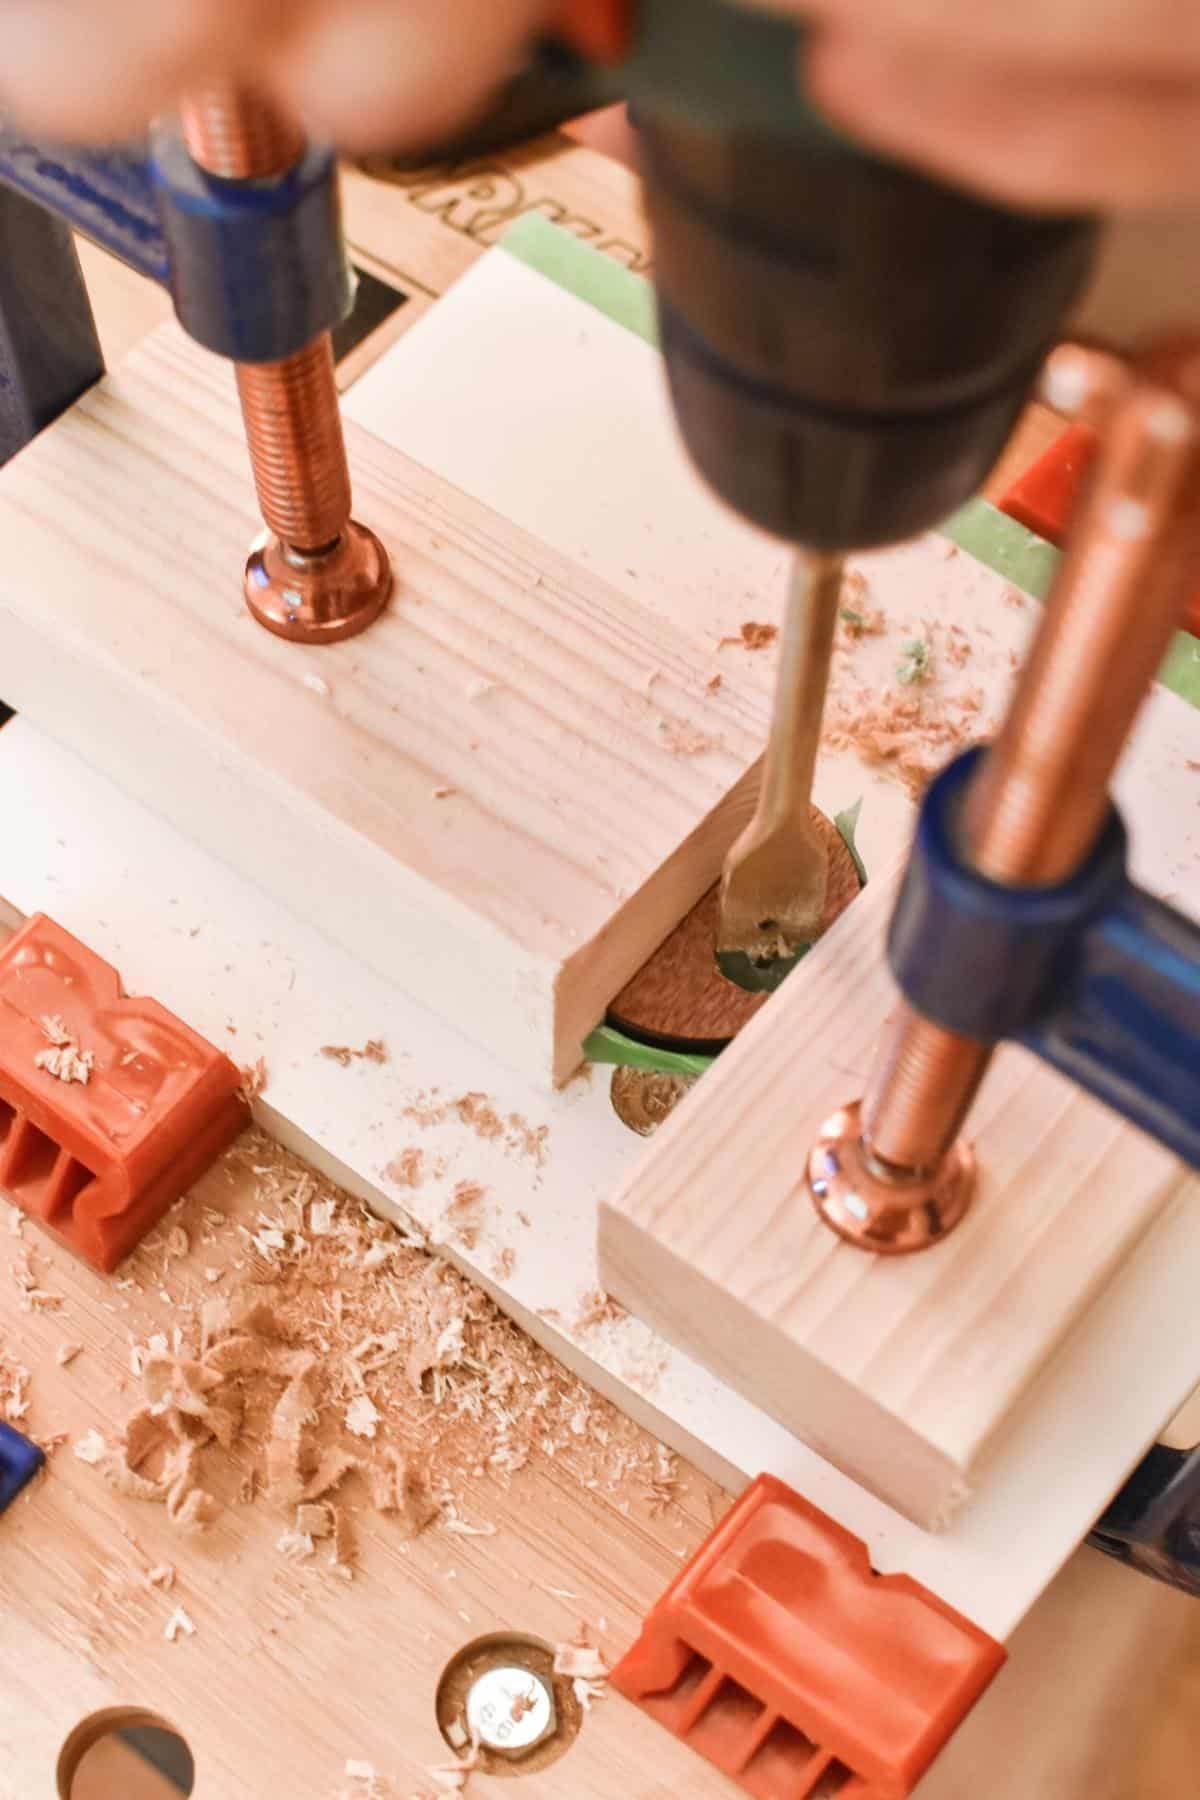
You will need:
- 2 plywood shapes (like these) for every handle (so I used 8 to make 4 handles)
- A drill with 16mm drill bit
- A piece of scrap wood
- Two clamps and two wooden blocks
- Some wood glue or strong multi-surface glue (I used Gorilla glue)
- Mark the centre of one of your plywood shapes and place it down on a piece of scrap wood. Place your two wooden blocks either side of your plywood piece so that they’re holding it in place, then clamp the two blocks to your bench or table. All this does is stop the shape turning as you drill through it. You can see in the pictures below how we set it up.
- Drill a hole through the centre of 4 of your plywood pieces.
- Glue one piece with a hole in to each of the four un-drilled pieces.
- Glue the shapes onto your Kallax handles, so that the handle sits in the little hole you’ve created.
- Attach your handles to the cabinet.
Adding Legs to your IKEA Cabinet
One final change that I made was to add new legs. Adding legs makes a huge difference to the look of your Kallax unit! We got ours from Pretty Pegs, who make legs, handles and fronts for IKEA furniture. We used the Svea 150 legs, but they have a huge selection so you could take a look and choose whichever you like.
If you’ve tried painting IKEA Kallax, I’d love to see how you got on! Drop me a message or tag me on Instagram @aboderie.
This page contains affiliate links, which earn me a little bit of commission if you make a purchase, at no additional cost to you. Thank you!