
Naptime DIYs : Easy beautiful handkerchiefs
In the ongoing attempt to cut down on our waste, I’ve been planning to switch to using handkerchiefs as much as we can. And there’s no better time than now, as we approach cold and flu season and Clem’s nose is constantly running! At the same time, my Dad handed down a couple of well-loved shirts that he wanted to turn into handkerchiefs, so I’ve been killing two birds with one stone and whizzing up loads of hankies while Clem naps.
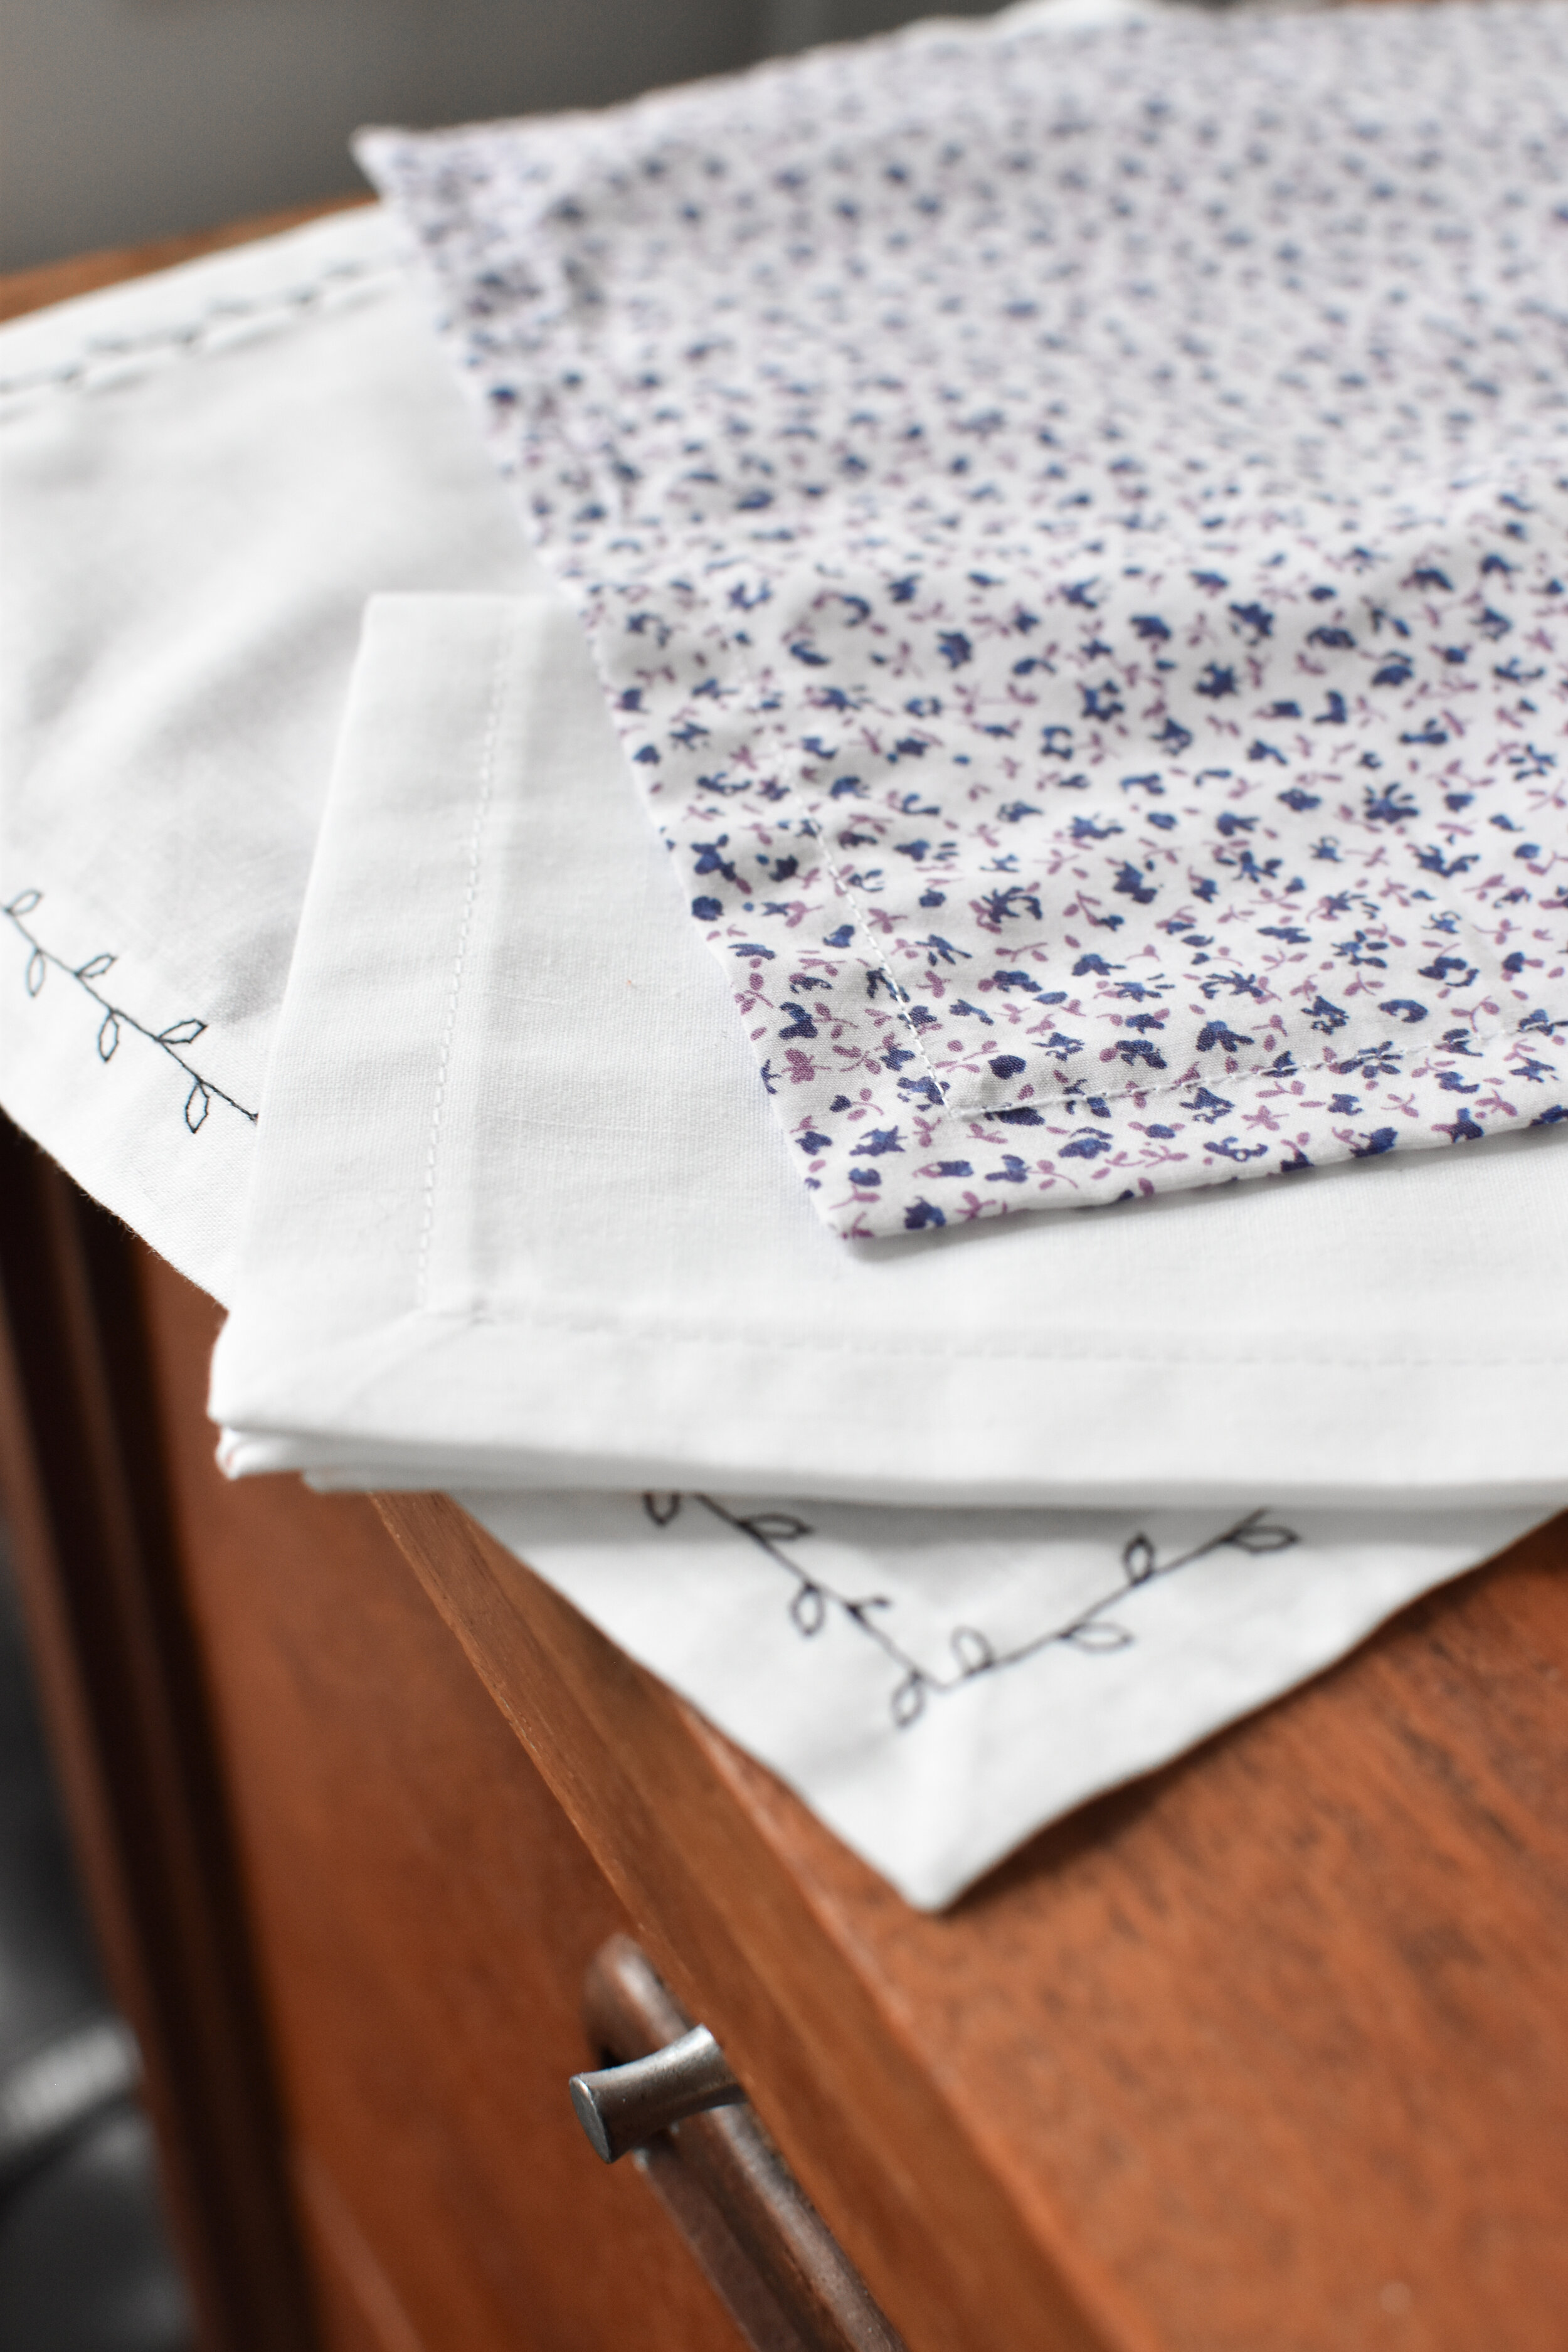
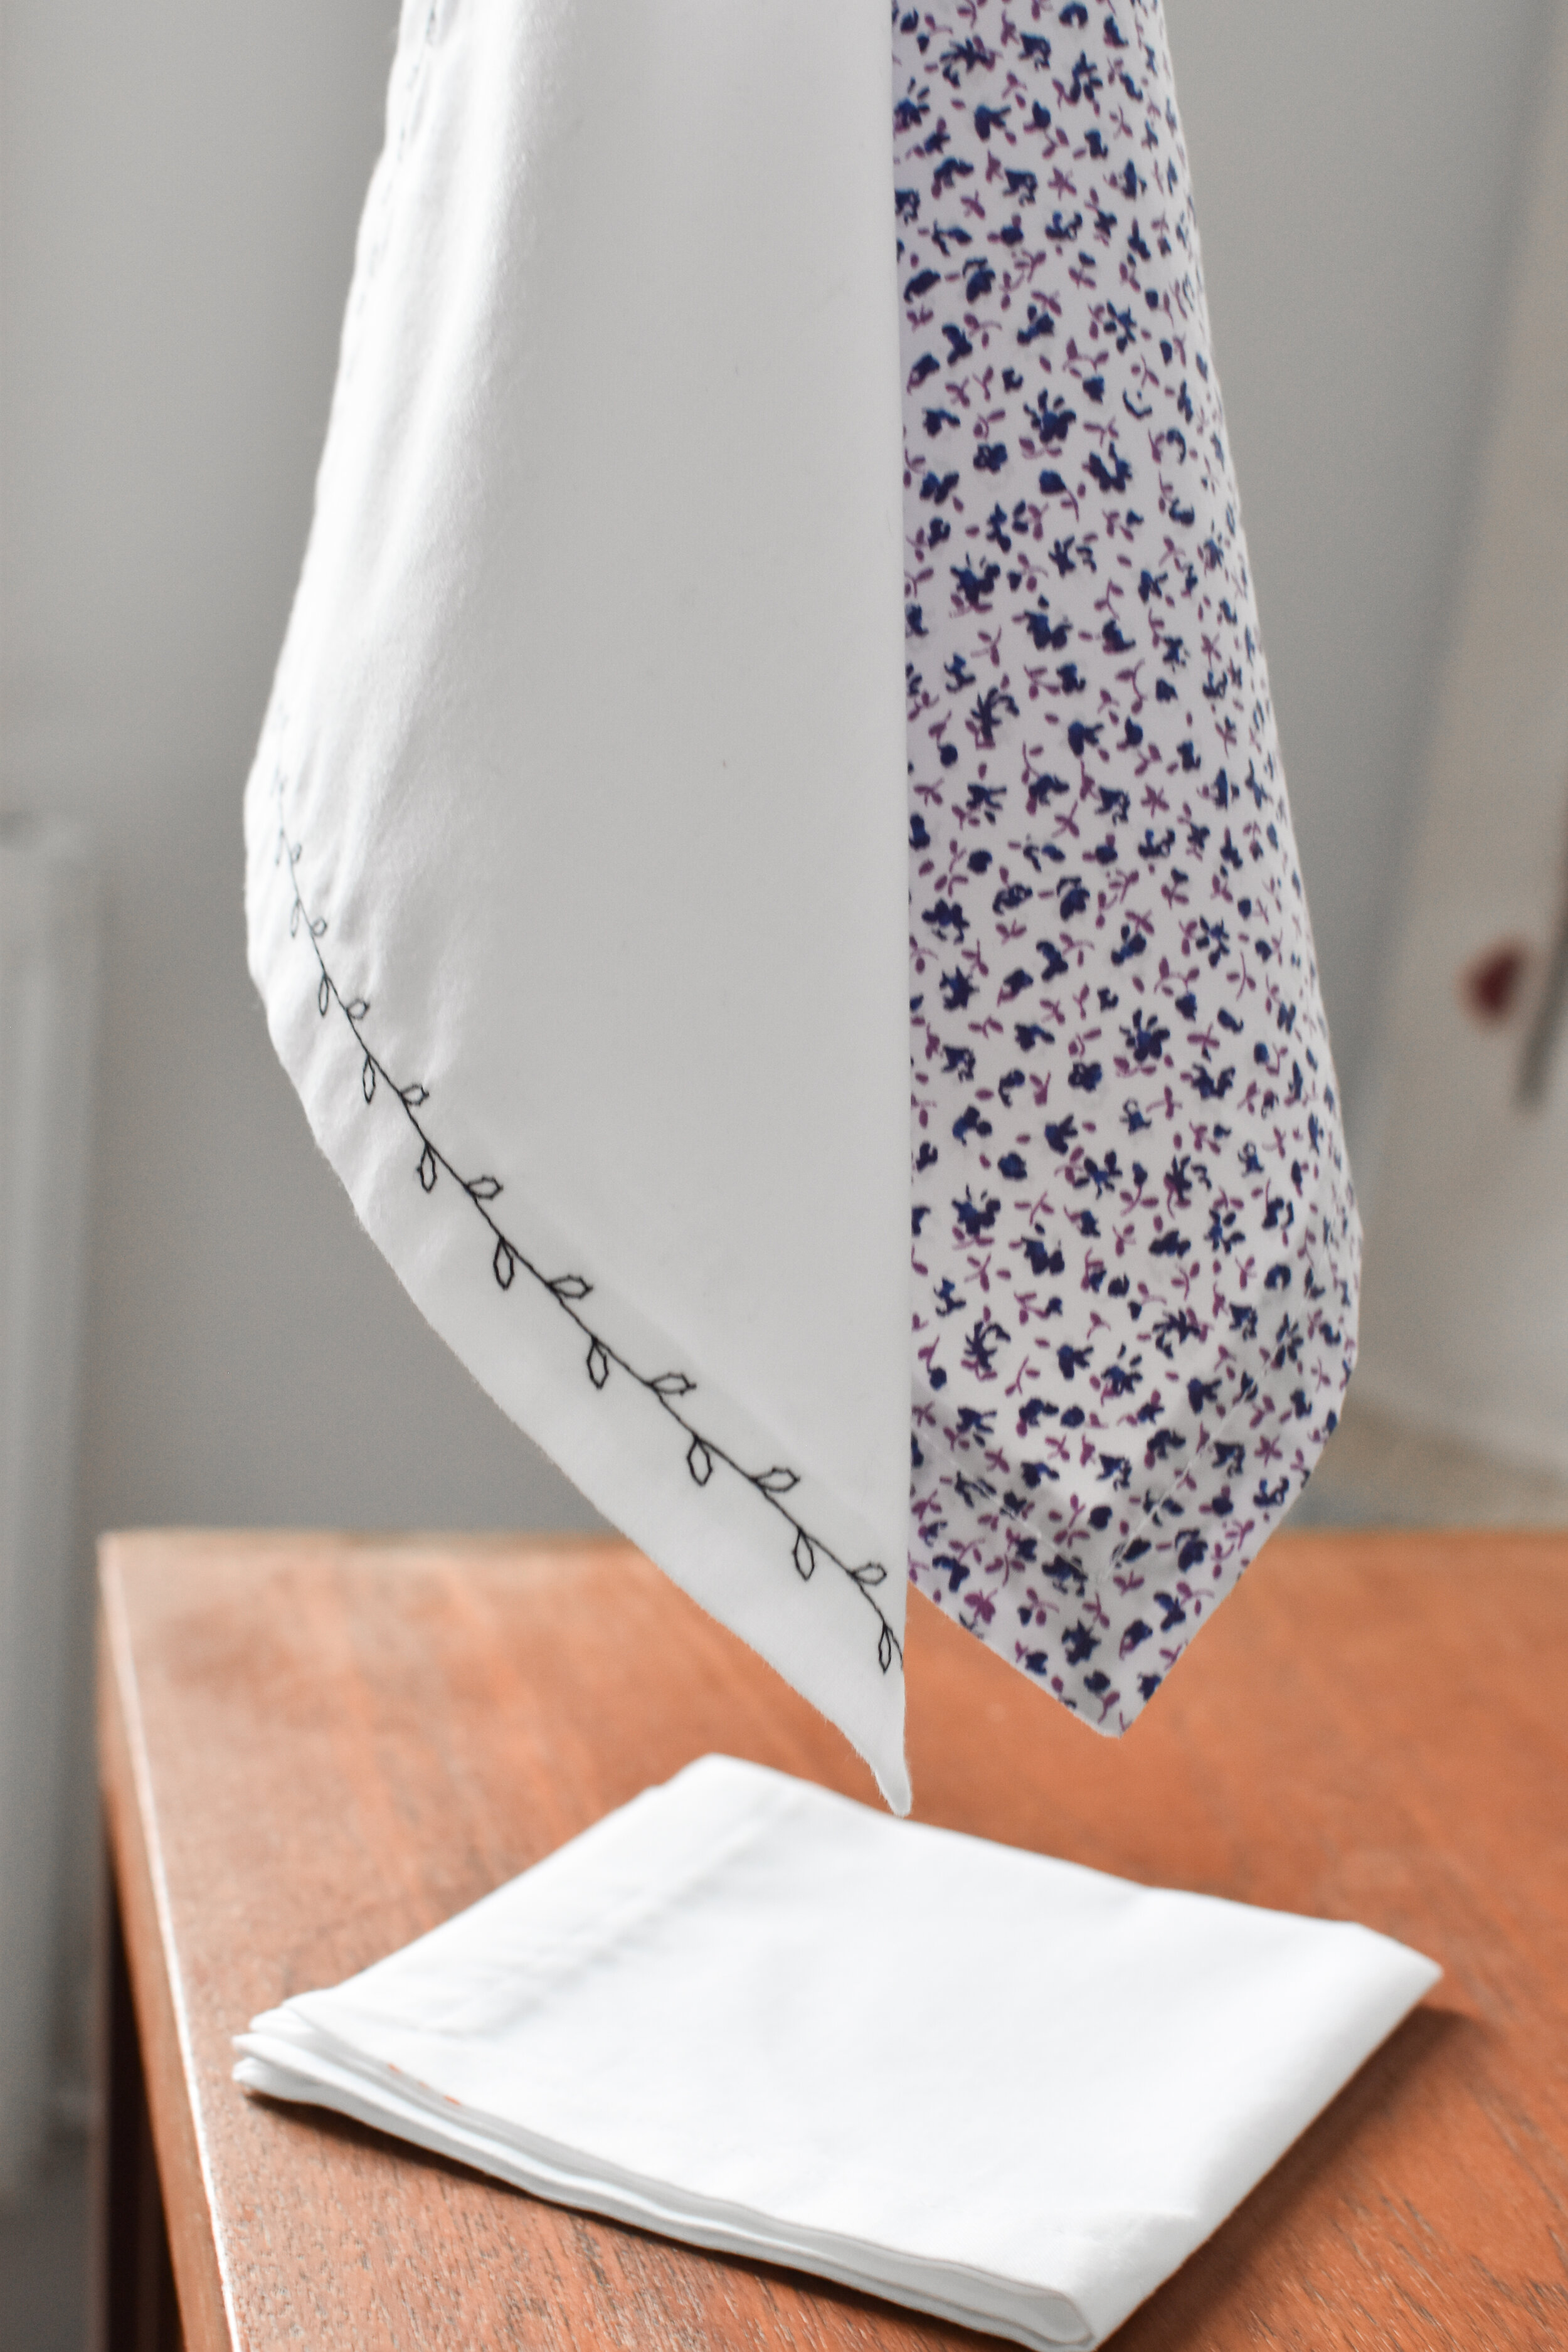
These are so easy and quick to make, and make great gifts. You could embroider them with initials or little images for a personal touch, or like I’ve done for my Dad, use old clothes that are meaningful or well-loved. Or, if you’re just making a load for round the house, use old sheets that have holes. It’s best to go for soft natural fibres like cotton, double gauze or silk. The softness matters! If your handkerchiefs feel rough on your nose you won’t use them. I machine stitched my hankies, just for speed, but these would also make a great hand sewing project if you don’t have a machine.
You’ll need:
Fabric of your choice
A measuring tape/ruler
An iron
Pins, thread, and your usual sewing supplies
1. Cut your squares of fabric. You need to cut the edges of your squares so that they’re the finished length you want plus 1 1/4" seam allowance on each side. A traditional men’s handkerchief is 12" x 12" so I cut squares 14 1/2" x 14 1/2".
2. We’re going to create what are called ‘mitred corners’, which sound scary but are very easy! Here is a step by step to help get you perfect corners.
3. Fold and press the edges of your square in by 1/2".
4. Next, fold and press the edges in by a further 3/4".
5. Unfold the second fold, keeping the original 1/2" fold in place.
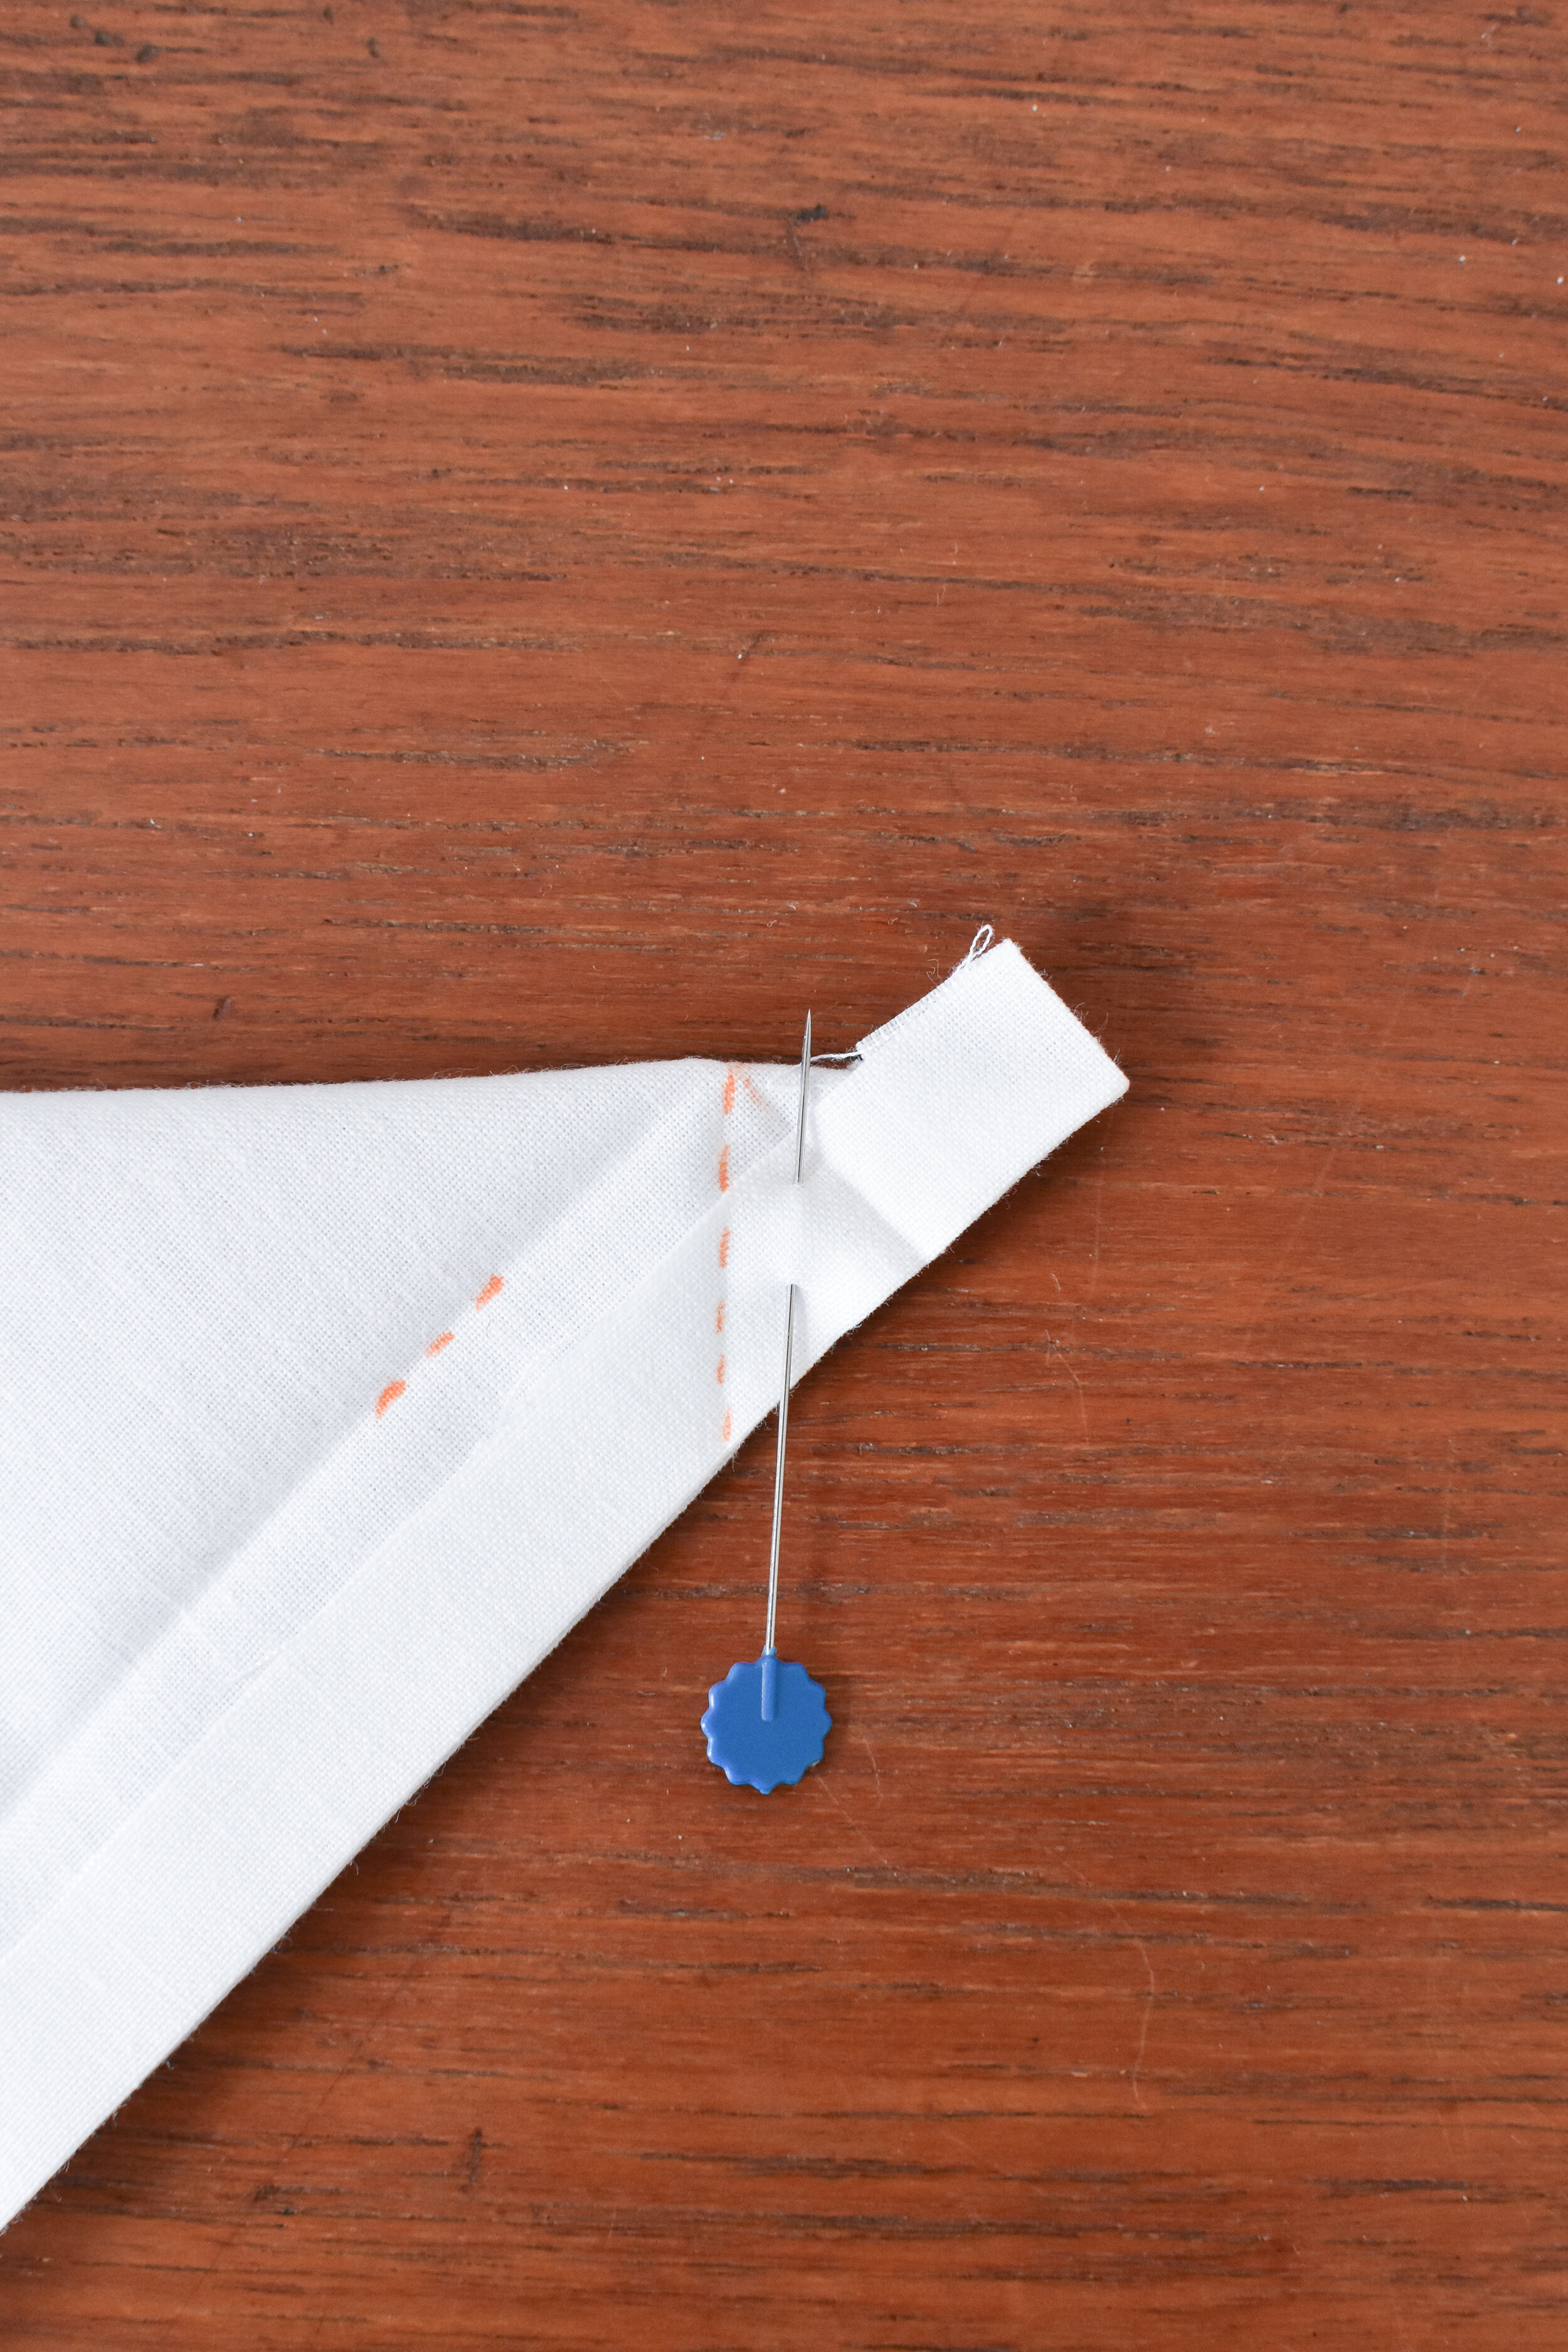
6. Press this diagonal fold (you might want to just finger press, where you run your nail along the fold - saves you going back to the iron!) When you open out the corner, you should have a perfect diagonal press line touching the corner of the innermost right-angle press line.


7. Now fold the corner in half lengthways with right sides of your fabric together. Check that all your pressed fold lines match up, and that the pressed outer edges of your hanky are lined up.
8. Stitch along the press line that runs at a right-angle from the corner and down to the outer edge, backstitching at the start and end. There are two press lines that go from the corner to the outer edge, so make sure you’ve got the right one! I’ve highlighted it in the picture to (hopefully!) make it really clear.
9. Snip off the corner, about 2mm from the stitched line.
10. Now turn your corner out to the right side and use something pointy like a knitting needle to push into the corner and make it nice and sharp.


11. Repeat this process for all remaining corners.
12. Press the edges and pin down the folded hems ready for stitching. Topstitch 1/2" from the edge of the finished hanky. You can use a straight stitch or another embroidery stitch if your machine has that setting.
13. Repeat for as many handkerchiefs as you’d like!
This page may contain affiliate links, which earn me a little bit of commission if you make a purchase, at no additional cost to you. Thank you!
you might like …


