How to make an embroidered abstract cushion
In just a few weeks' time, our little Victorian terrace will become a building site. We'll be knocking through several walls, ripping up floors and rewiring the whole house. Pretty much everything internal will be replaced or upgraded, so the house will look and feel completely different.
And the most exciting part of all this? I get to style everything after the work is done! I've been filling my spare moments browsing Pinterest (you can follow me here!) and gathering inspiration for our new space. Given that we're pouring just about every penny into the building work itself, furnishing and decorating needs to be affordable, so I've been getting creative with what we can DIY.
Today, I'm sharing this amazing DIY embroidered cushion, which was inspired by a rather more expensive version from The Conran Shop. I'm loving abstract and naive style art at the moment (as you might have been able to tell from my recent affordable art post) so I fell in love with this cushion, but knew we couldn't possibly spend £85 on it!
In the end, my DIY'd version came to just £12. I started with a linen IKEA cushion cover, which was reduced to £5 in the bargain corner. My acrylic yarn was only £2.25 from Hobbycraft, and my embroidery hoop and darning needle were also cheaper options from Hobbycraft. In spite of it being affordable, the cushion still looks luxurious. The linen helps lift it past being an ordinary cotton cushion, and three-dimensional effect of the embroidery shows its been hand-made. What's more, this was incredibly easy to make! Even if you've never sewn before, you'll find this really straightforward.
Here's how to do it.
How to make an embroidered abstract cushion
You will need:
Cushion cover
Ball of acrylic yarn (Note, it's better to use acrylic than wool if you plan to wash the cushion cover, as wool could shrink in the wash and ruin your cover. Whatever you use, check the care instructions on the label of your yarn so you know how to look after it.)
Darning or yarn needle
Embroidery hoop (The larger the better, so you don't have to move it too often. I used an 8 inch one which was fine if a little small.)
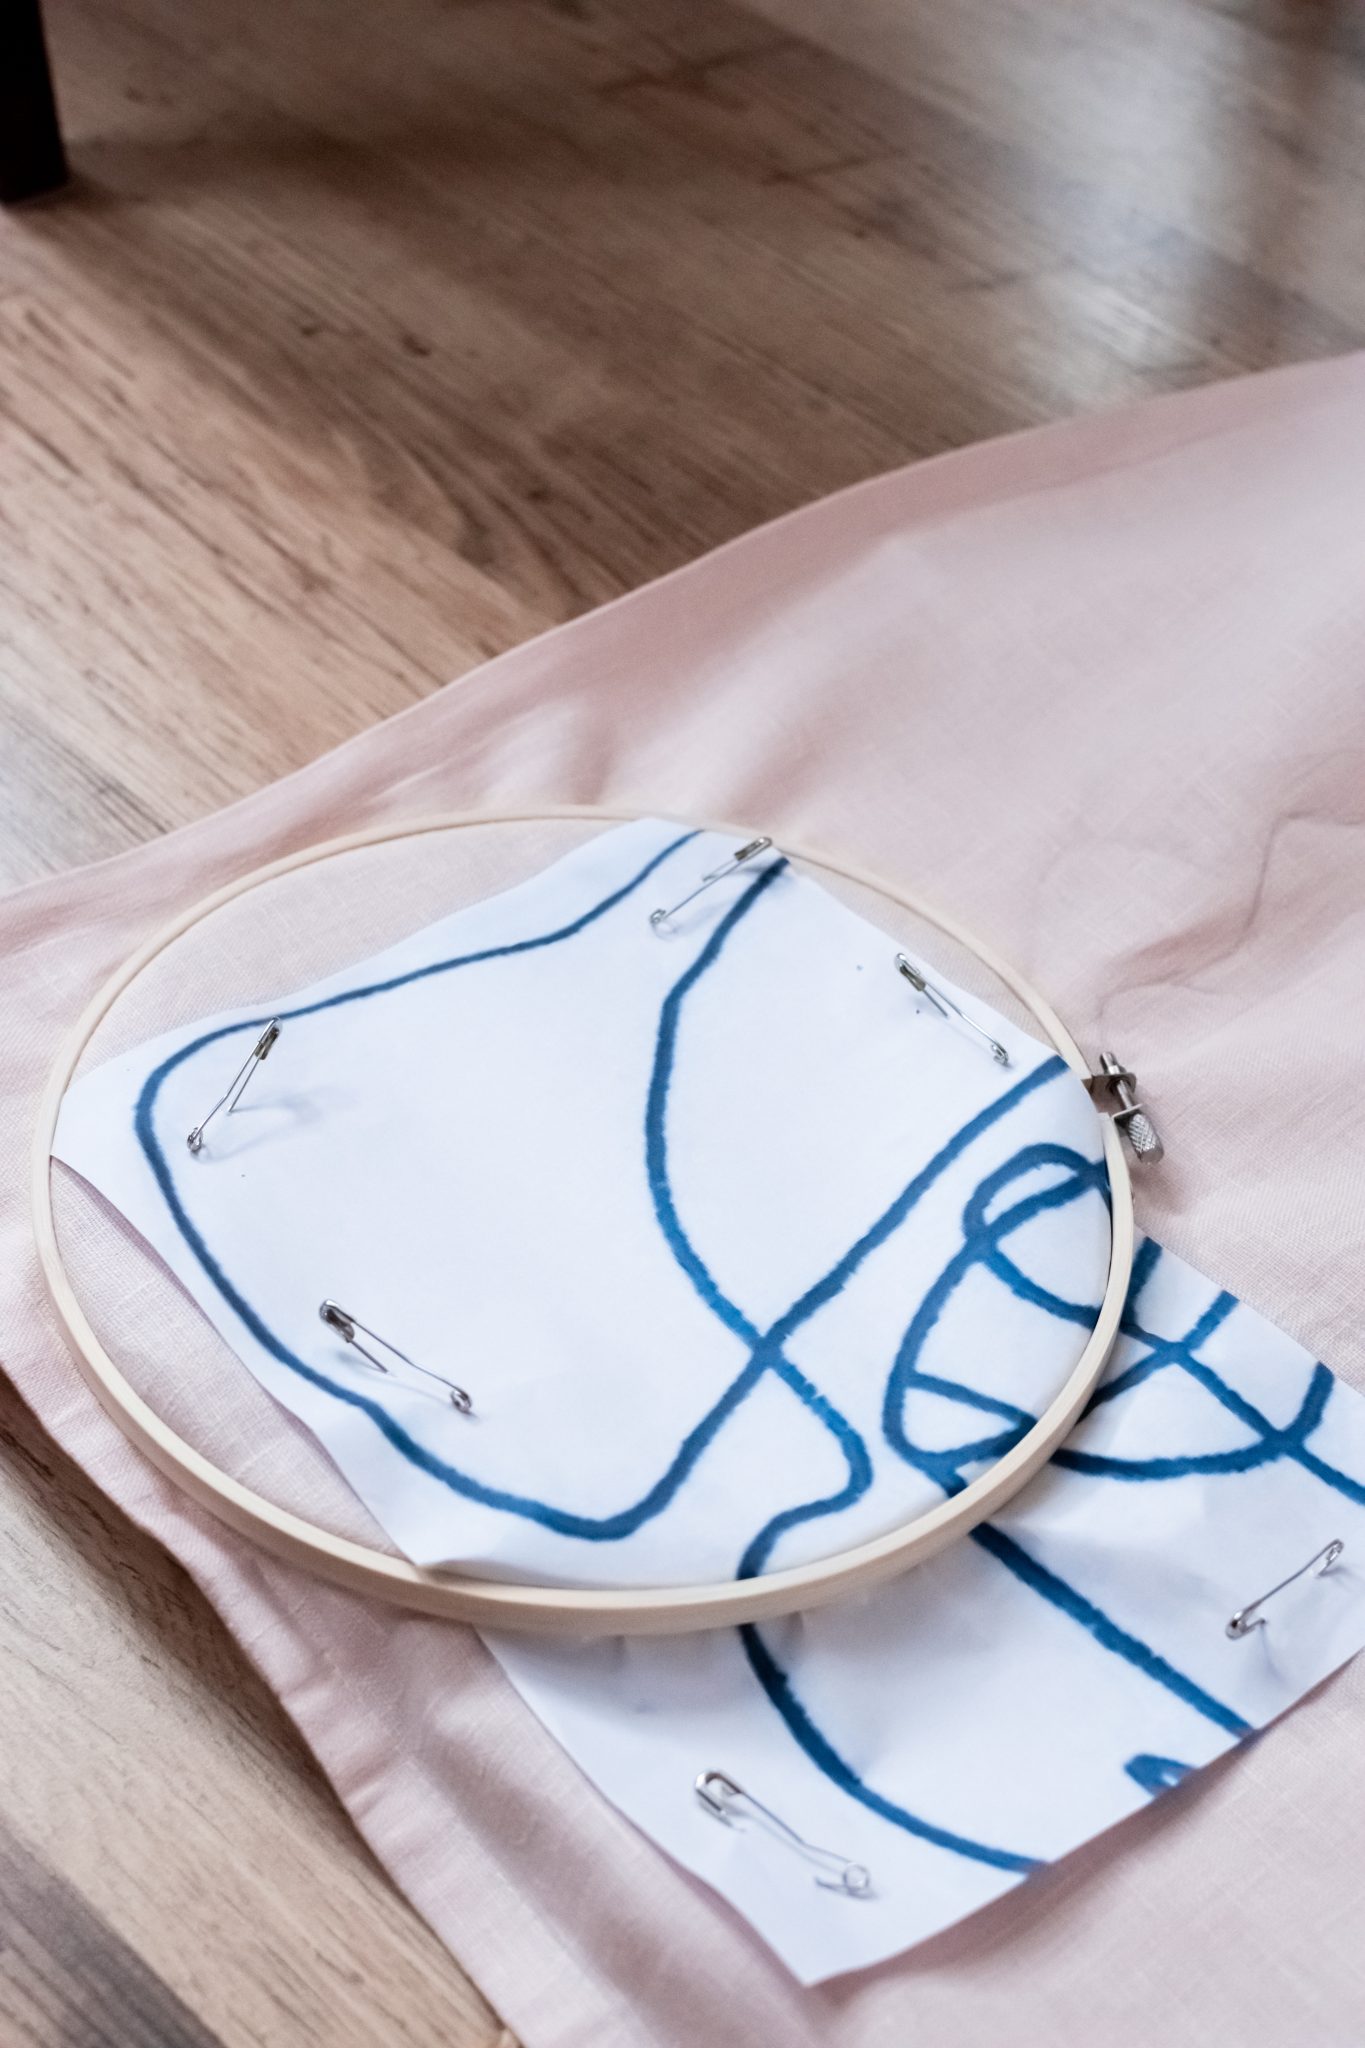
Use a pencil to draw your design on to your cushion cover. Or, if you're like me and have no drawing ability, print your design out and pin it to your cushion.
Place your embroidery hoop over the area you'd like to start.
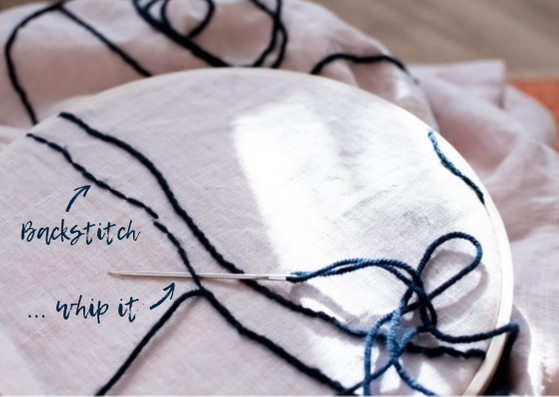
Thread the needle with a length of yarn, knot the end, and begin backstitching along the lines. Note that acrylic yarn often has some stretch to it, so you may need to be extra careful that you're pulling your stitches tight. If you're not sure how to do a backstitch, this tutorial is helpful.
As you reach the edge of the embroidery hoop, move it to a new area, continuing to backstitch until your entire design is sewn.
Once you've completed your design, go back over your stitches to 'whip' them. Take another length of yarn, knot it and pass the needle to the top of the fabric. Then pass your needle horizontally under each stitch you created with your backstitch, so that this second length of yarn winds around the stitches you've already created.
You're done!


