Naptime DIYs : how to make a quick tapestry-style wall hanging
It’s no secret that I absolutely love making things. There are so many benefits: the sustainability of repurposing things you already have, the cost saving vs buying ready made, and the myriad health benefits. For example, did you know that knitting has been proven to lower blood pressure, reduce depression and anxiety and slow the onset of dementia?! The world would probably be a happier place if we all took up our tools and started crafting.
But I know not everyone feels the same! Without question, the biggest reason people tell me they haven’t started DIY’ing is because they don’t have time. And I totally get that! Between work, studying, raising kids and keeping yourself clean and fed, there’s often not a lot of time for much else. So I’m starting a new series here on the blog, which I’m calling Naptime DIYs. The aim is for these to be projects you can complete in a toddler naptime (that’s about two hours for those of you without little ones!), so you can fit a little of bit of making into your busy day.
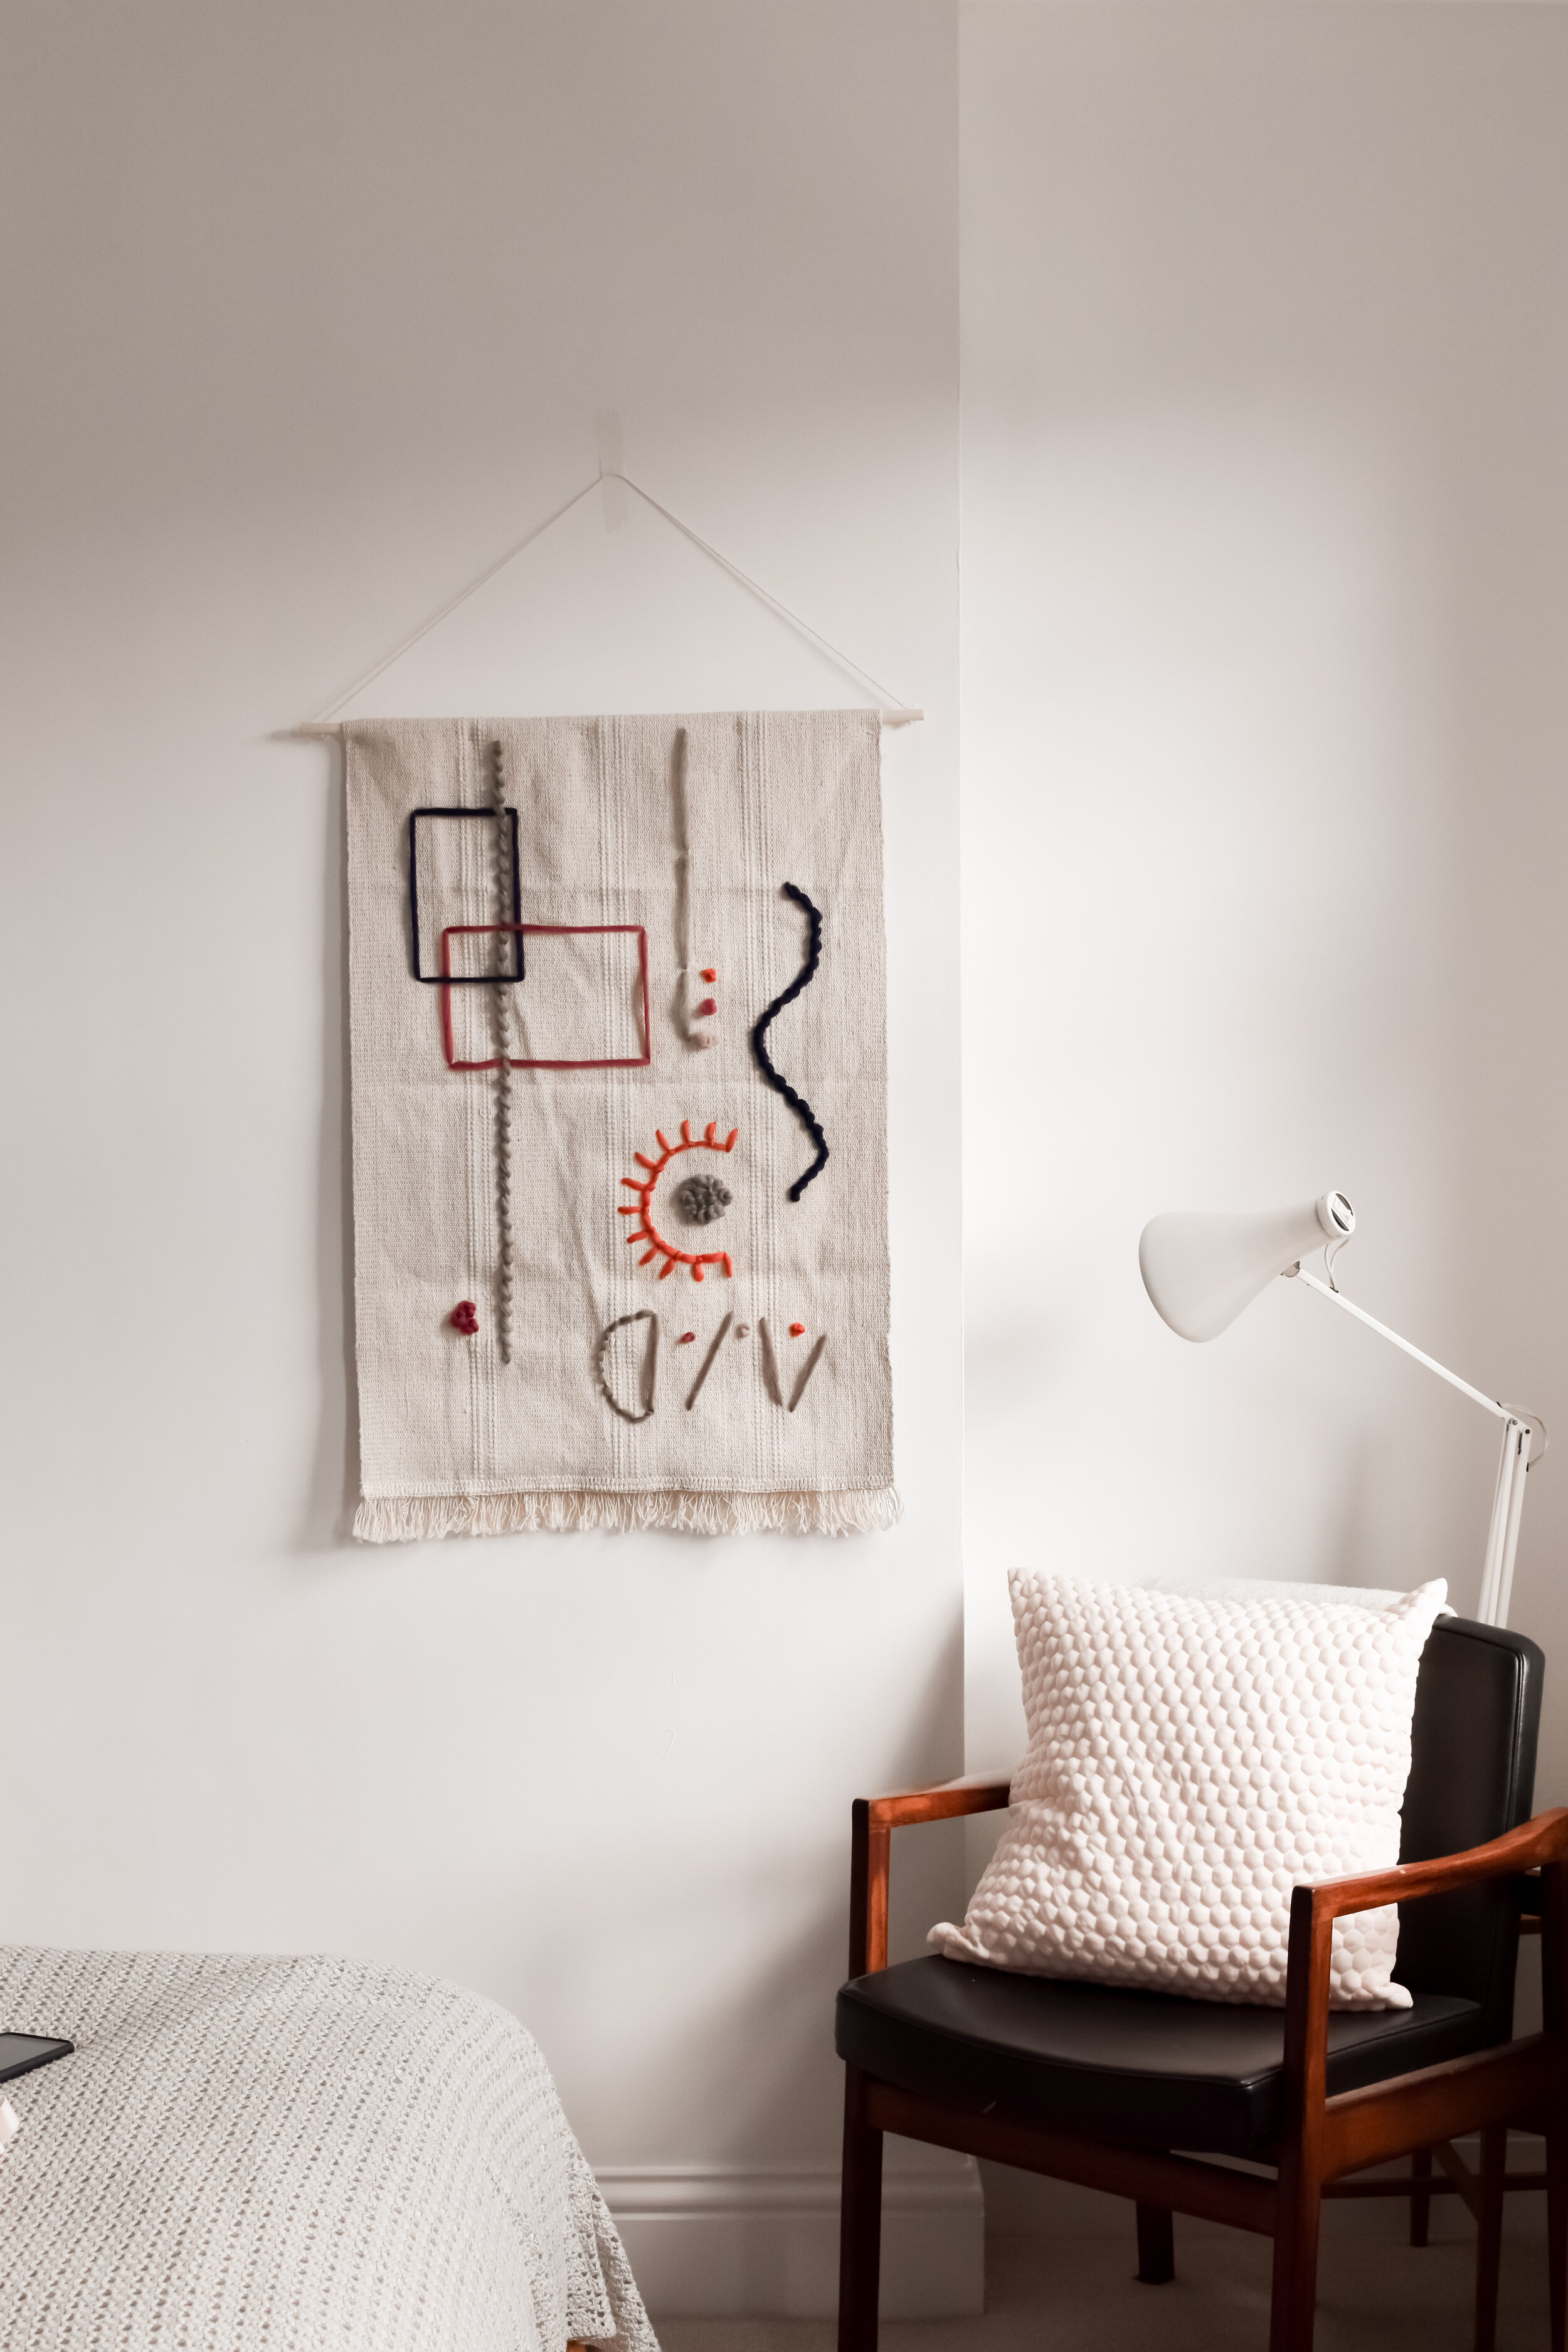
First up is a little IKEA hack that takes no time at all but ends up looking amazing! This wall hanging uses the IKEA Sortso rug as a base - at only £3, this rug is so cheap, and makes the perfect foundation for a fun abstract wall hanging. In total this project cost me less than £5! Here’s how to do it:
You will need:
I CHOSE TO SEW MY WOOL ON, BUT YOU CAN GLUE IT IF YOU LIKE!
For this DIY, I chose to sew my shapes onto the rug because I wanted the hanging to be a little bit more durable, and I enjoy sewing. However, if you’re not a sewer you could totally use hot glue or fabric glue to attach your wool to the rug. Plus that would make this DIY even quicker!
1. Arrange your wool roving or yarn on your rug in a pattern you like. Take a picture on your phone to refer back to while you’re making.
2. Attach your wool to your rug using your yarn needle (or glue, if you’d prefer). I used a variety of different ‘stitches’. For the long straight sections, I basically did one large stitch. On others I did long stitches and then wrapped another length of roving around that, catching a thread on the rug as I went, to give a twisted effect. I also used french knots to create dots and texture here and there. You can get creative here - try doing different things with the wool to see what you like!
3. Once you’re happy with your design, wrap one end of the rug around the dowel and glue down. Tie a piece of string around each end (or drill a hole if you’d prefer!) to hang.
This page contains affiliate links, which earn me a little bit of commission if you make a purchase, at no additional cost to you. Thank you!


