
How to Do Smocking: The Surprisingly Easy Sewing Technique You’ll Love
Learn how to do smocking with simple, helpful tips from a seasoned sewist.
This page contains affiliate links, which earn me a little bit of commission if you make a purchase, at no additional cost to you. Thank you!
When I was six years old, my mum bought me a beautiful pink dress with the most gorgeous smocking detail on the front. When I wore it I felt like the most beautiful girl in the world.
Something about that little hand-stitched panel of lovely even stitches transformed a simple little dress into something really special.
So naturally, I had to try learning this ancient craft for myself, so that I could make some heirlooms for me and my daughter.

While I’m no expert, it sometimes helps to get the perspective of a newbie who actually remembers what it’s like to get started! I’m also prone to doing a ridiculous amount of research before I start a new craft, so I’m excited to share all of that here with you.
Here are some helpful tips to learn how to do smocking.
So, what is smocking?
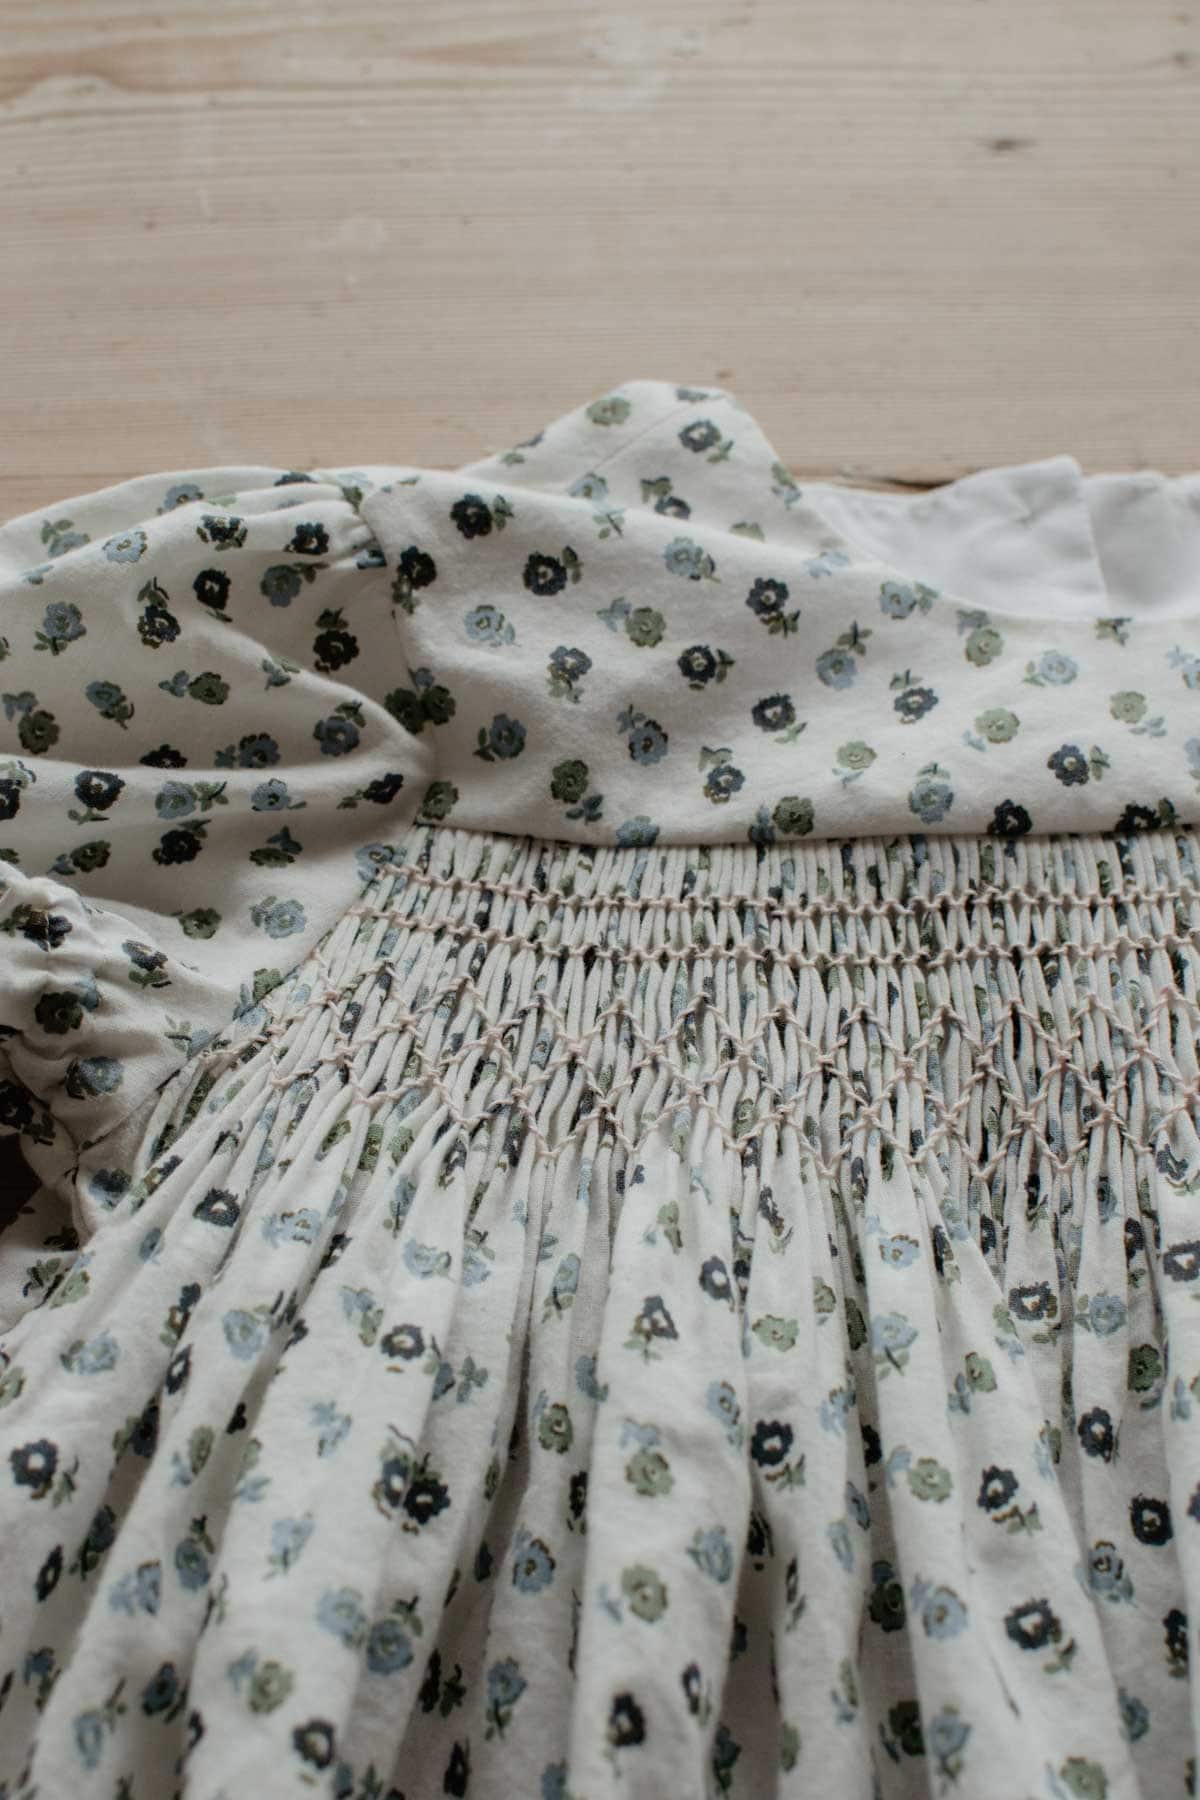
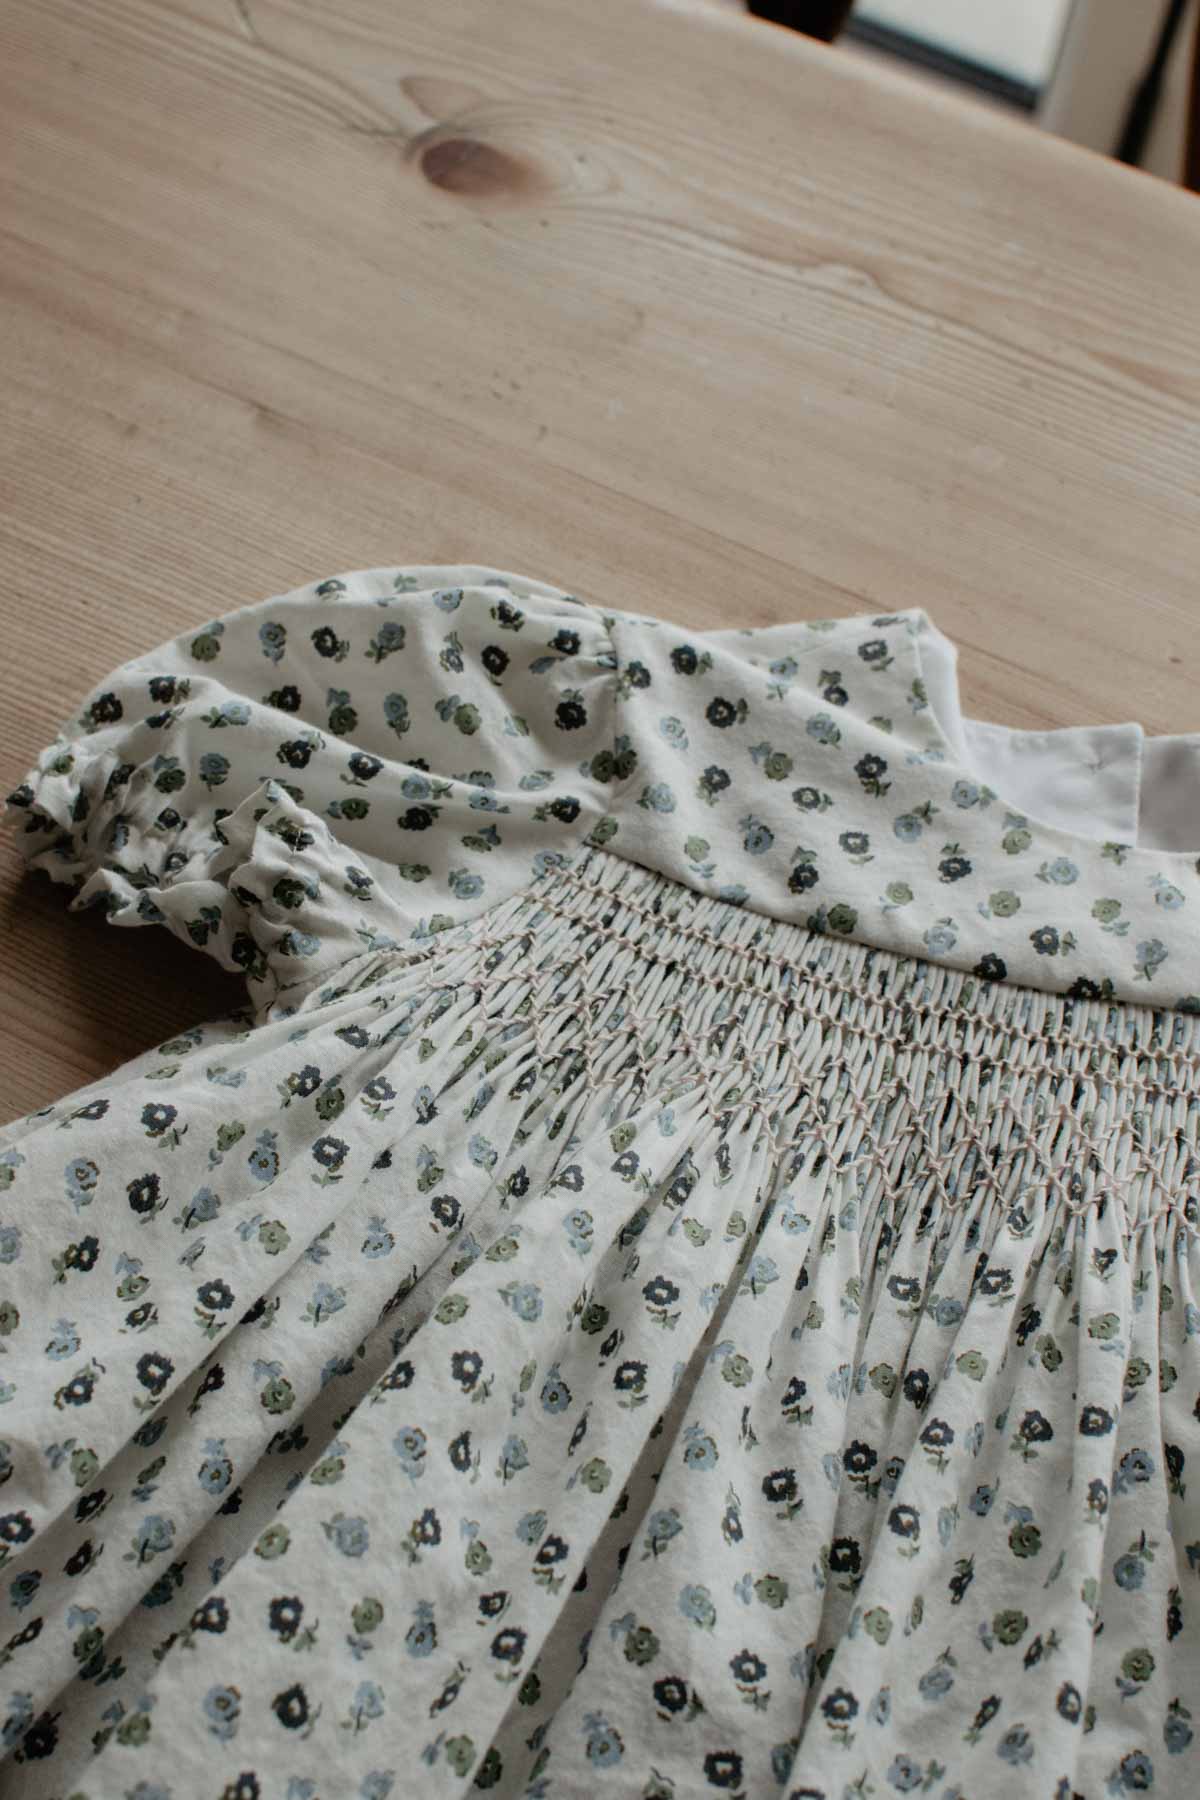
If you’ve never heard of the art of smocking, you might be wondering why it’s even worth your time! Smocking is a sewing technique where embroidery stitches are done over little pleats. It can be purely decorative, or it can be used to add fullness to a piece of clothing, in the same way that you might use normal gathering.
Smocking is very often confused with shirring. Shirring uses elastic thread to make a springy, stretchy panel. While a finished smocked piece will have some elasticity, it isn’t as stretchy as shirring.
There are lots of different kinds of smocking from all over the world, but the one I know best is English smocking, so that’s what I’m focussing on today. English smocking in its current form can be traced back to the mid-19th century, but various forms of embroidery on pleats have actually existed since the Middle Ages.
Some traditional smocking is decorative, while some was used on workers’ smocks to show what job they did or where they were from. This post has lots of interesting history on smocking.
Other types of smocking include american smocking, canadian smocking, elastic smocking and honeycomb smocking.

But how easy is smocking, really? Is it suitable for beginners?
I put off learning smocking for a really long time, because I’d heard (over and over again!) that it was really difficult. But while it does require some basic sewing skills and a bit of comfort with a needle and thread, it’s actually not that hard!
In fact, the trickiest part of smocking actually isn’t the embroidery, but the pleating of the fabric. Hold tight for more tips on that later!

What will I need to start smocking?
Contrary to what the internet might tell you, you really don’t need much to get started with smocking. Here’s a list of basics that you’ll definitely need, and a few “nice-to-haves”.
Fabric
Smocking works best on light- to medium-weight fabric like cotton lawn, silk, or linen. I particularly love Little Cotton Clothes fabric for smocking.
Always check how much fabric you’re likely to need for your final piece by doing a test of your pleating on a smaller piece of fabric first. Measure it before and after pleating to see how much your fabric ‘shrinks’ by when it’s pleated.
Since smocking requires lots of tiny little pleats, it requires quite a large amount of fabric, often 3-5 times the width of the final piece. So make sure to buy plenty of your fabric!
Needle and thread
You’ll need some form of thread to create your pleats and your smocking stitches. For the pleating thread, you can use any kind of normal sewing thread like Gutermann Cotton Thread (my favourite!).
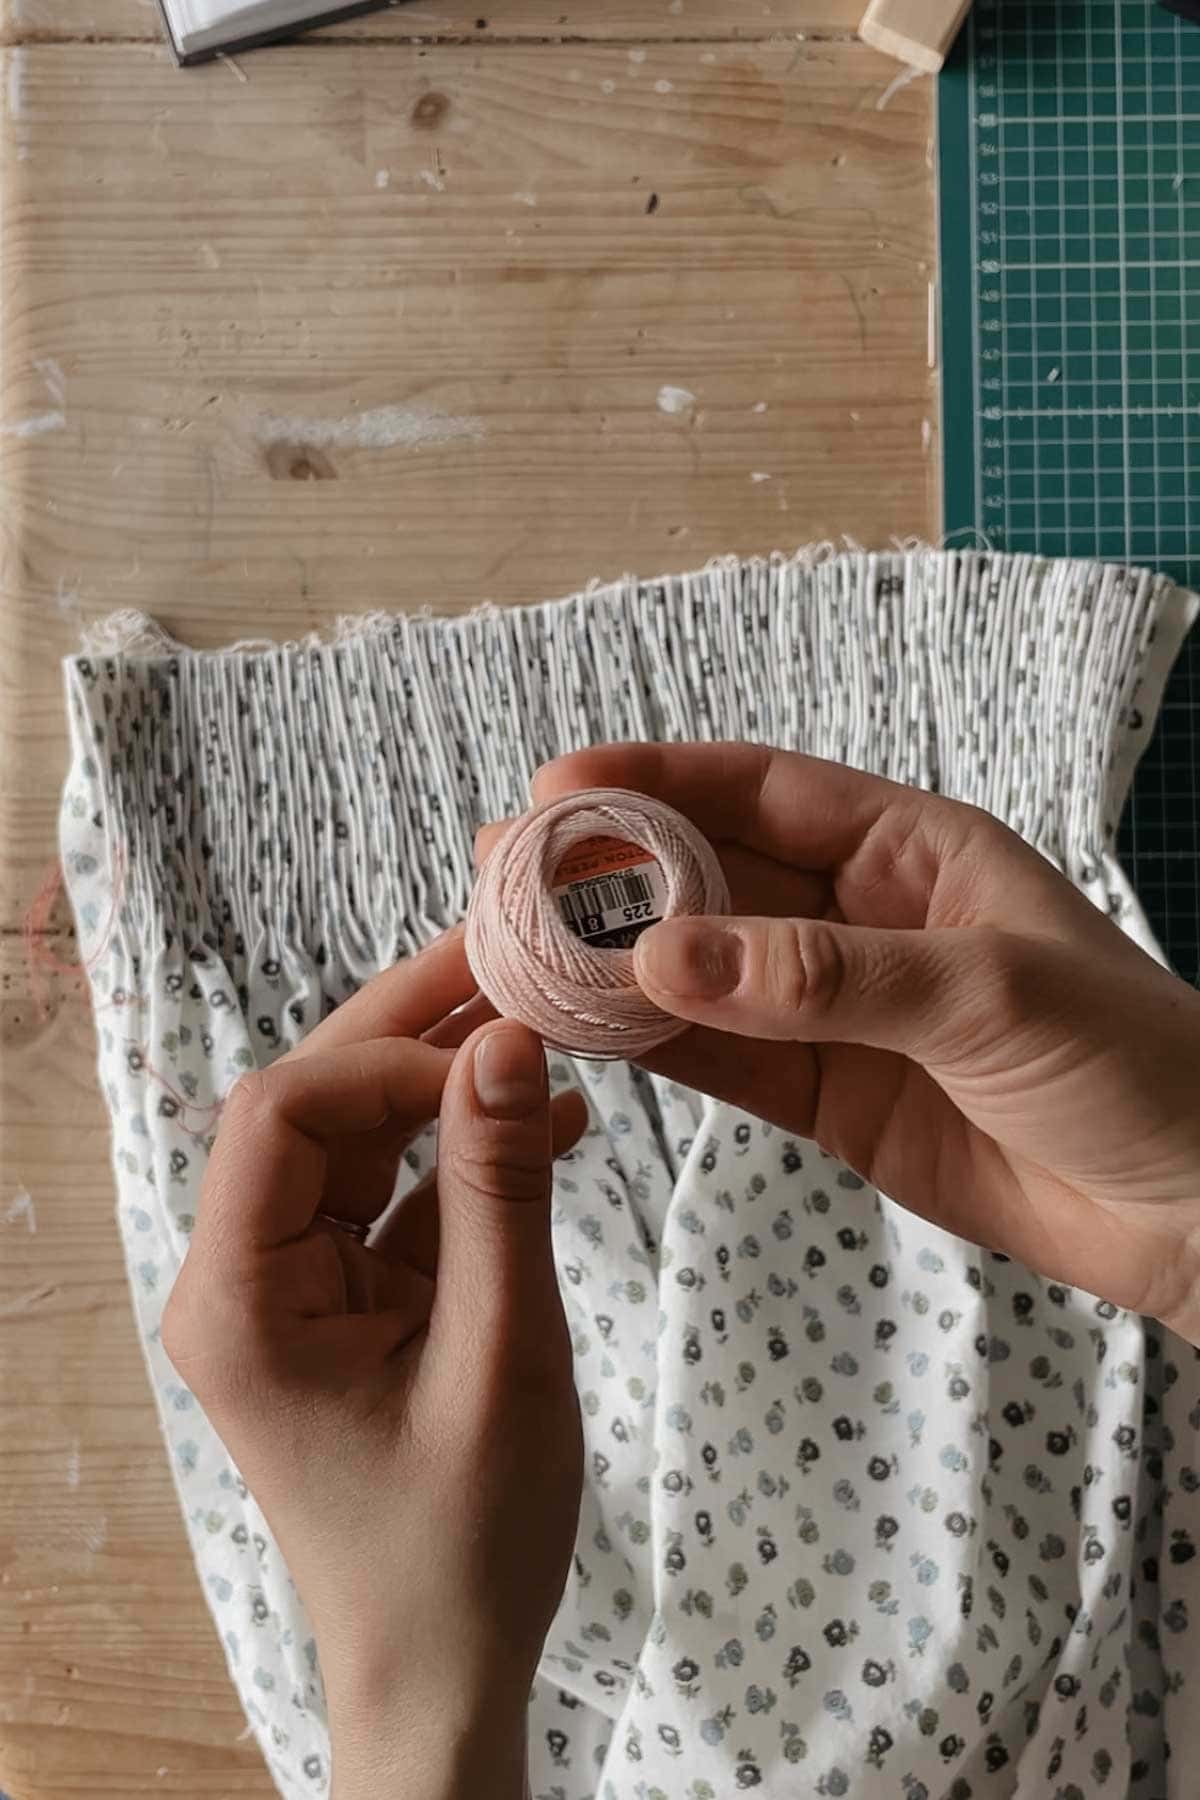
For the embroidery stitches, there are different schools of thought on the best thread to use. Lots of people use standard embroidery floss (DMC is the best), and separate three strands to use at a time. Others recommend using something like DMC Coton Perle (in size 8). I tried both and much preferred the Coton Perle.
For your needles, use an embroidery needle with a large eye to fit your smocking thread, like these ones.
Ruler and erasable marker
Before you create your pleats, you’ll need to mark dots at 1cm intervals to help you space your pleating threads precisely. A big clear ruler and erasable pen will massively help you as you’re doing this.
To be completely honest, marking the dots manually with pen and ruler is really tedious (it took me a couple of evenings!), so if you can, try to get hold of some special smocking dot transfer paper to help you iron on the dots in much less time.
Nice-to-have: A smocking pleater
If you have some money to invest in your smocking hobby, and you plan to do lots of it, you will definitely want a smocking pleater. While they’re expensive (running into the hundreds of pounds), it will cut your pleating time down to minutes, so that you can spend more time actually smocking.
More Sewing Projects
How to Make an Embroidered Abstract Cushion
How to Sew a Cute Poncho (with Free Easy DIY Sewing Pattern)
18 Adorable Children’s Sewing Patterns: Made and Loved by a Sewing Mama
A to Z of Smocking
While you can learn most smocking stitches on YouTube, I often find that you can learn more from a well-written book, and that is the case for smocking too.
I found this book, the A to Z of Smocking, super helpful in my learning process. When I was searching for my copy, quite a number of places didn’t have it in stock, so you may need to look at several shops before you find one.
What are the different kinds of smocking stitches?
The simplest smocking technique is cable stitch, and it’s close cousins stem and outline stitch. Then there are fancier stitches (though still the same basic action – so not that complicated!) such as trellis stitch and wave stitch.
Explaining all the individual stitches is more than I have space for in this post, so I’d recommend looking up the different stitches to see what you like.
How to Do Smocking
There are many different smocking stitches but they all include the same basic steps with slight variations. Here’s a step-by-step for the basic stem stitch. Once you’ve got the hang of this, you should find every other smocked stitch very straightforward.
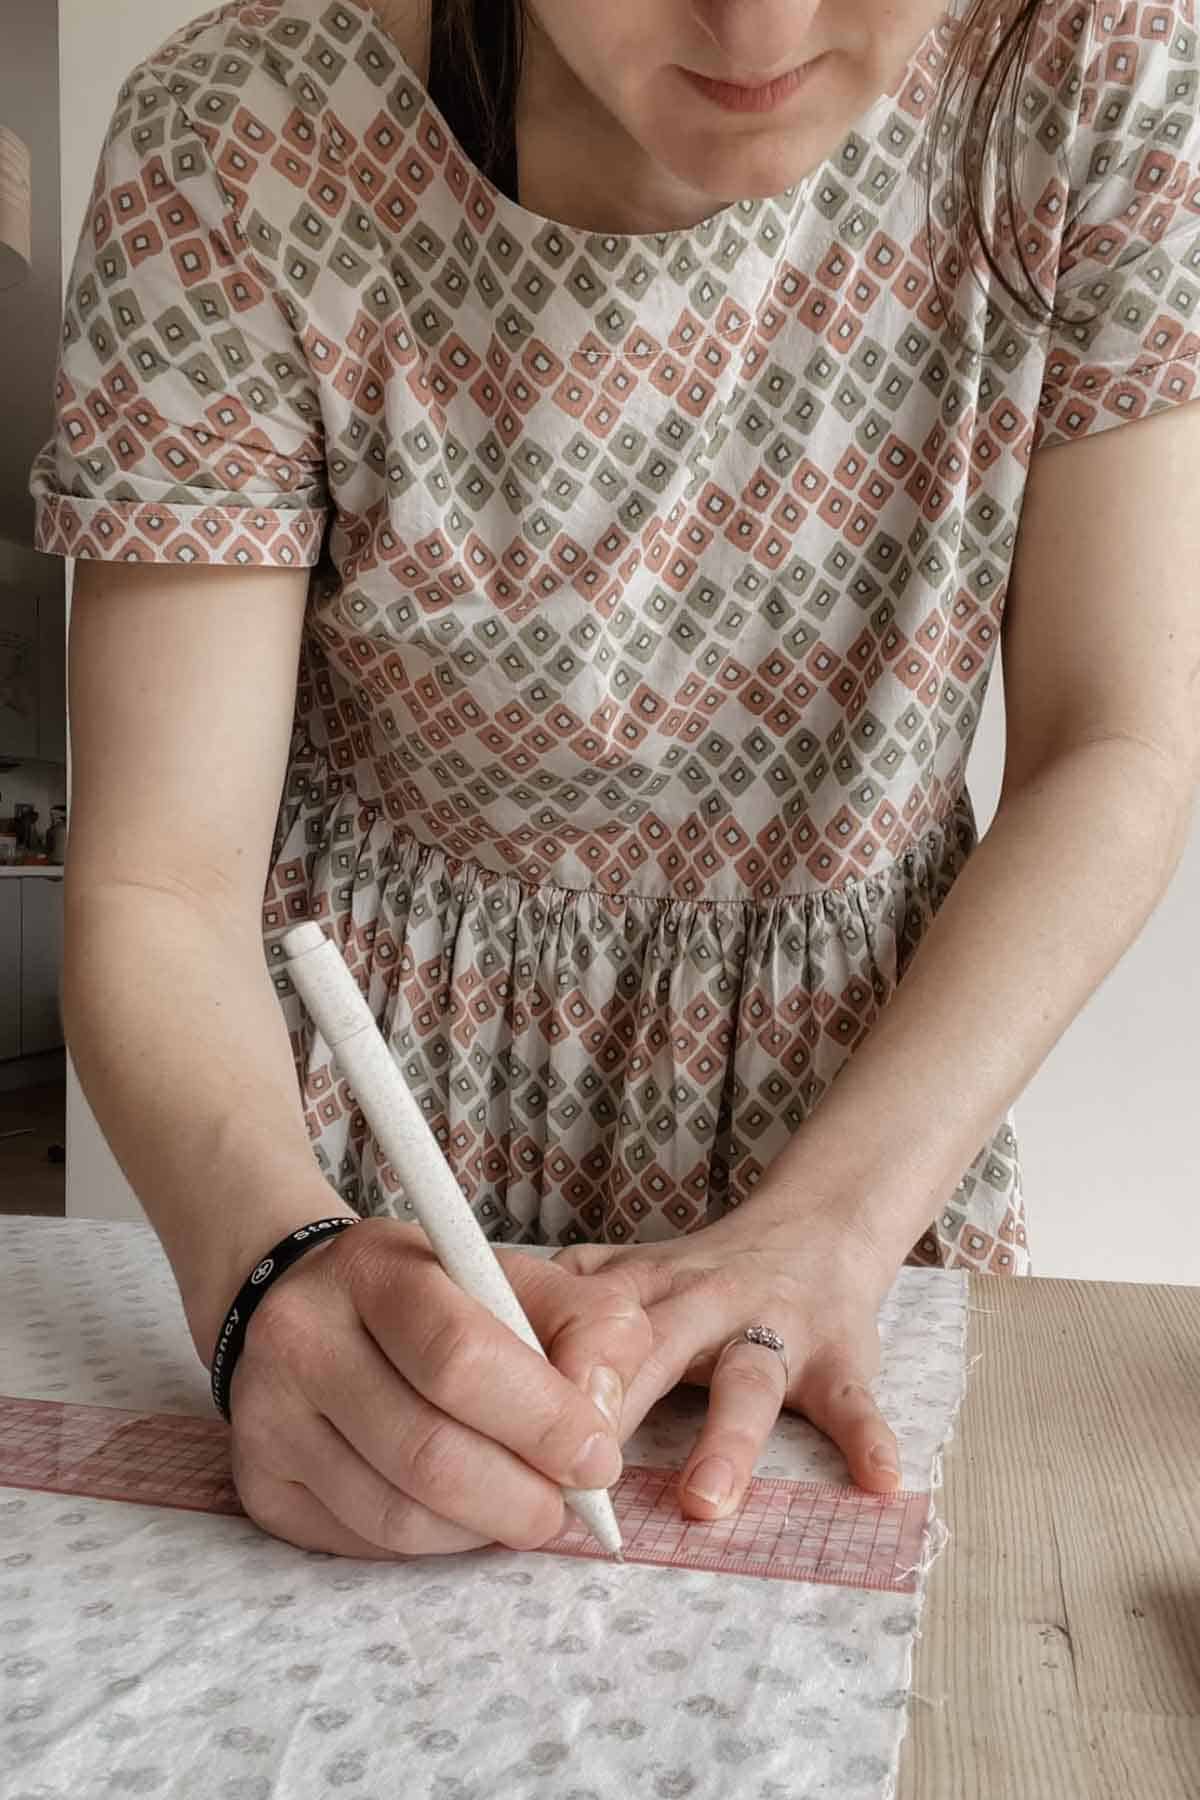
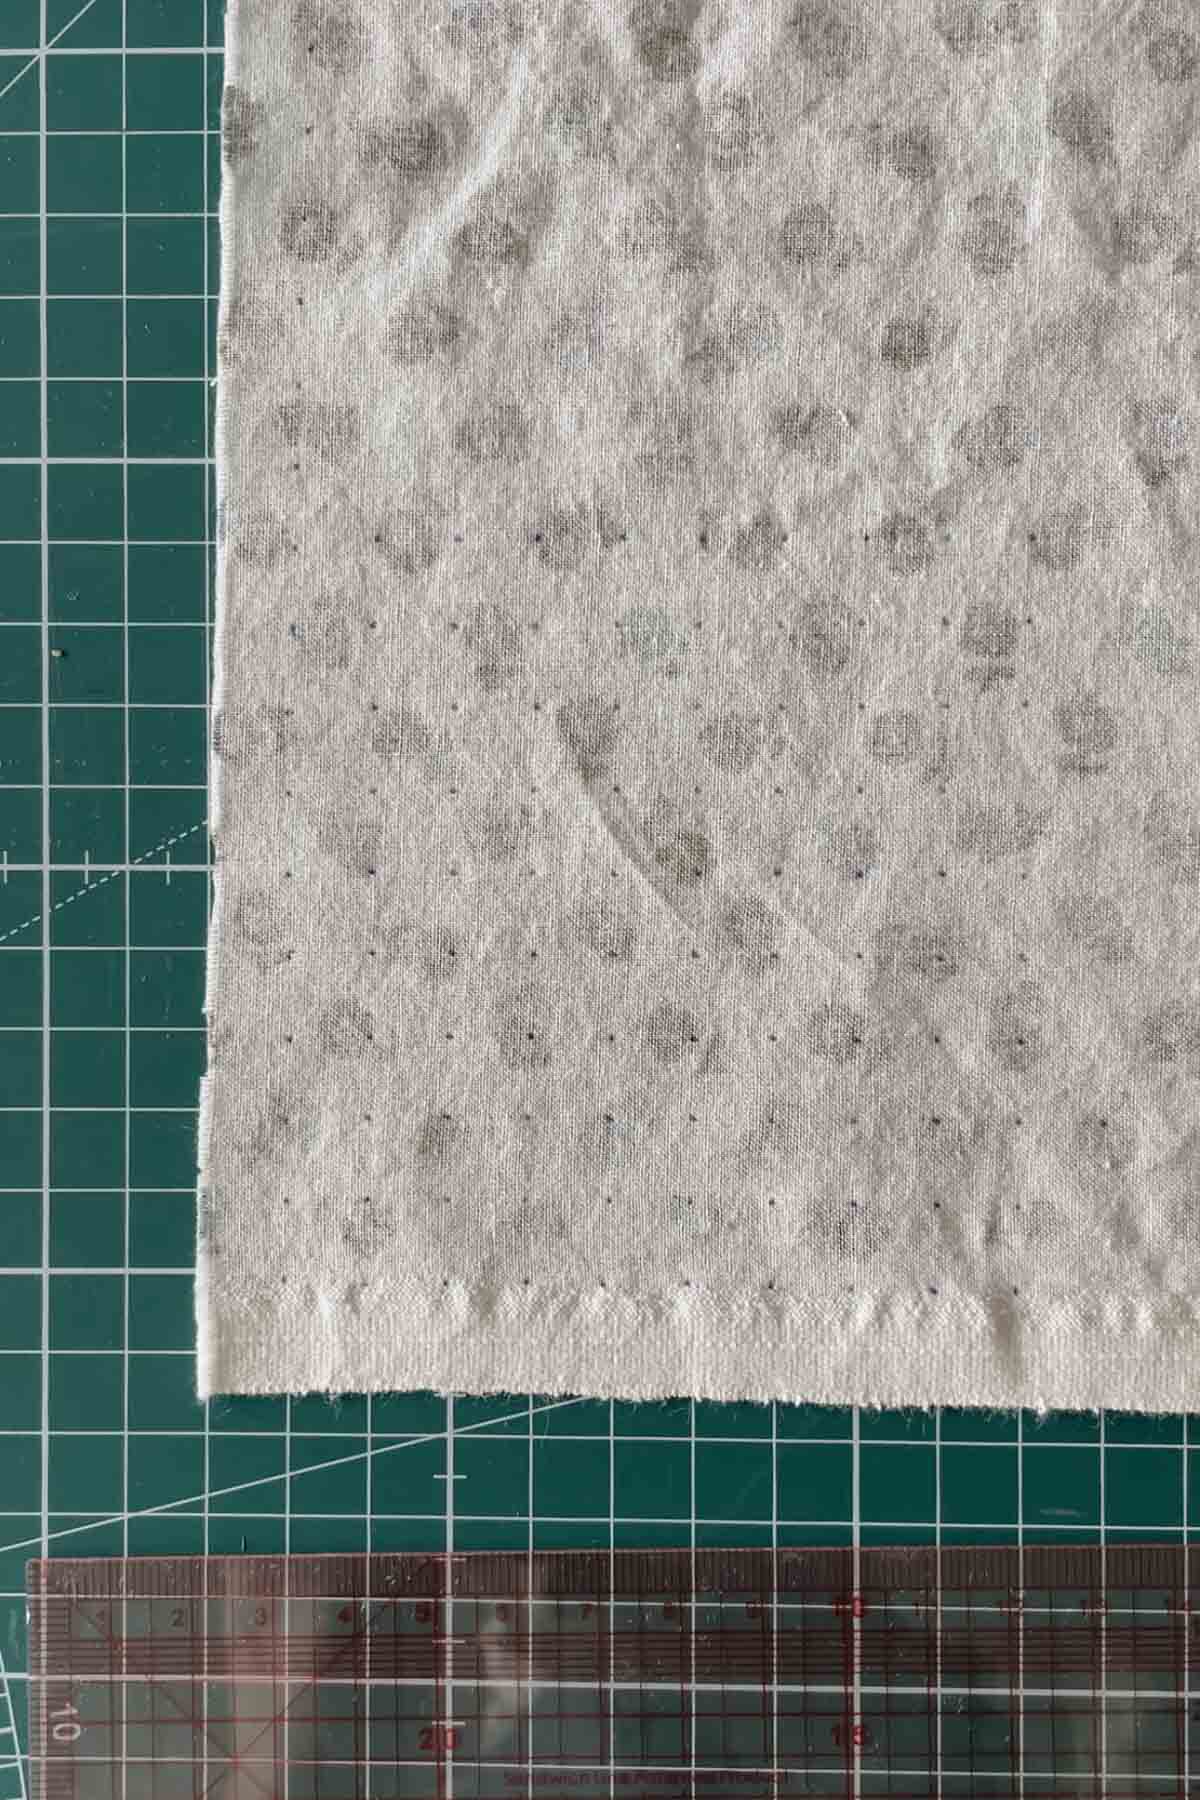
Step 1: Mark Your Pleating Dots
To pleat your fabric, you’ll need to mark dots on your fabric in a grid pattern, 1cm apart. The quick way to do this is to use dot transfer paper, but you can also do it manually with a ruler and an erasable pen (but beware, this is tedious!!)
Cut a rectangle of fabric with a nice, straight line at the top. Starting at the top corner of the square, use your ruler to make dots 1cm apart. Once you’ve completed the first row, mark as many rows of dots down as you need.
Make sure to mark two extra rows on top of what you plan for your design. These are known as holding rows and help to keep the smocked panel straight and even.
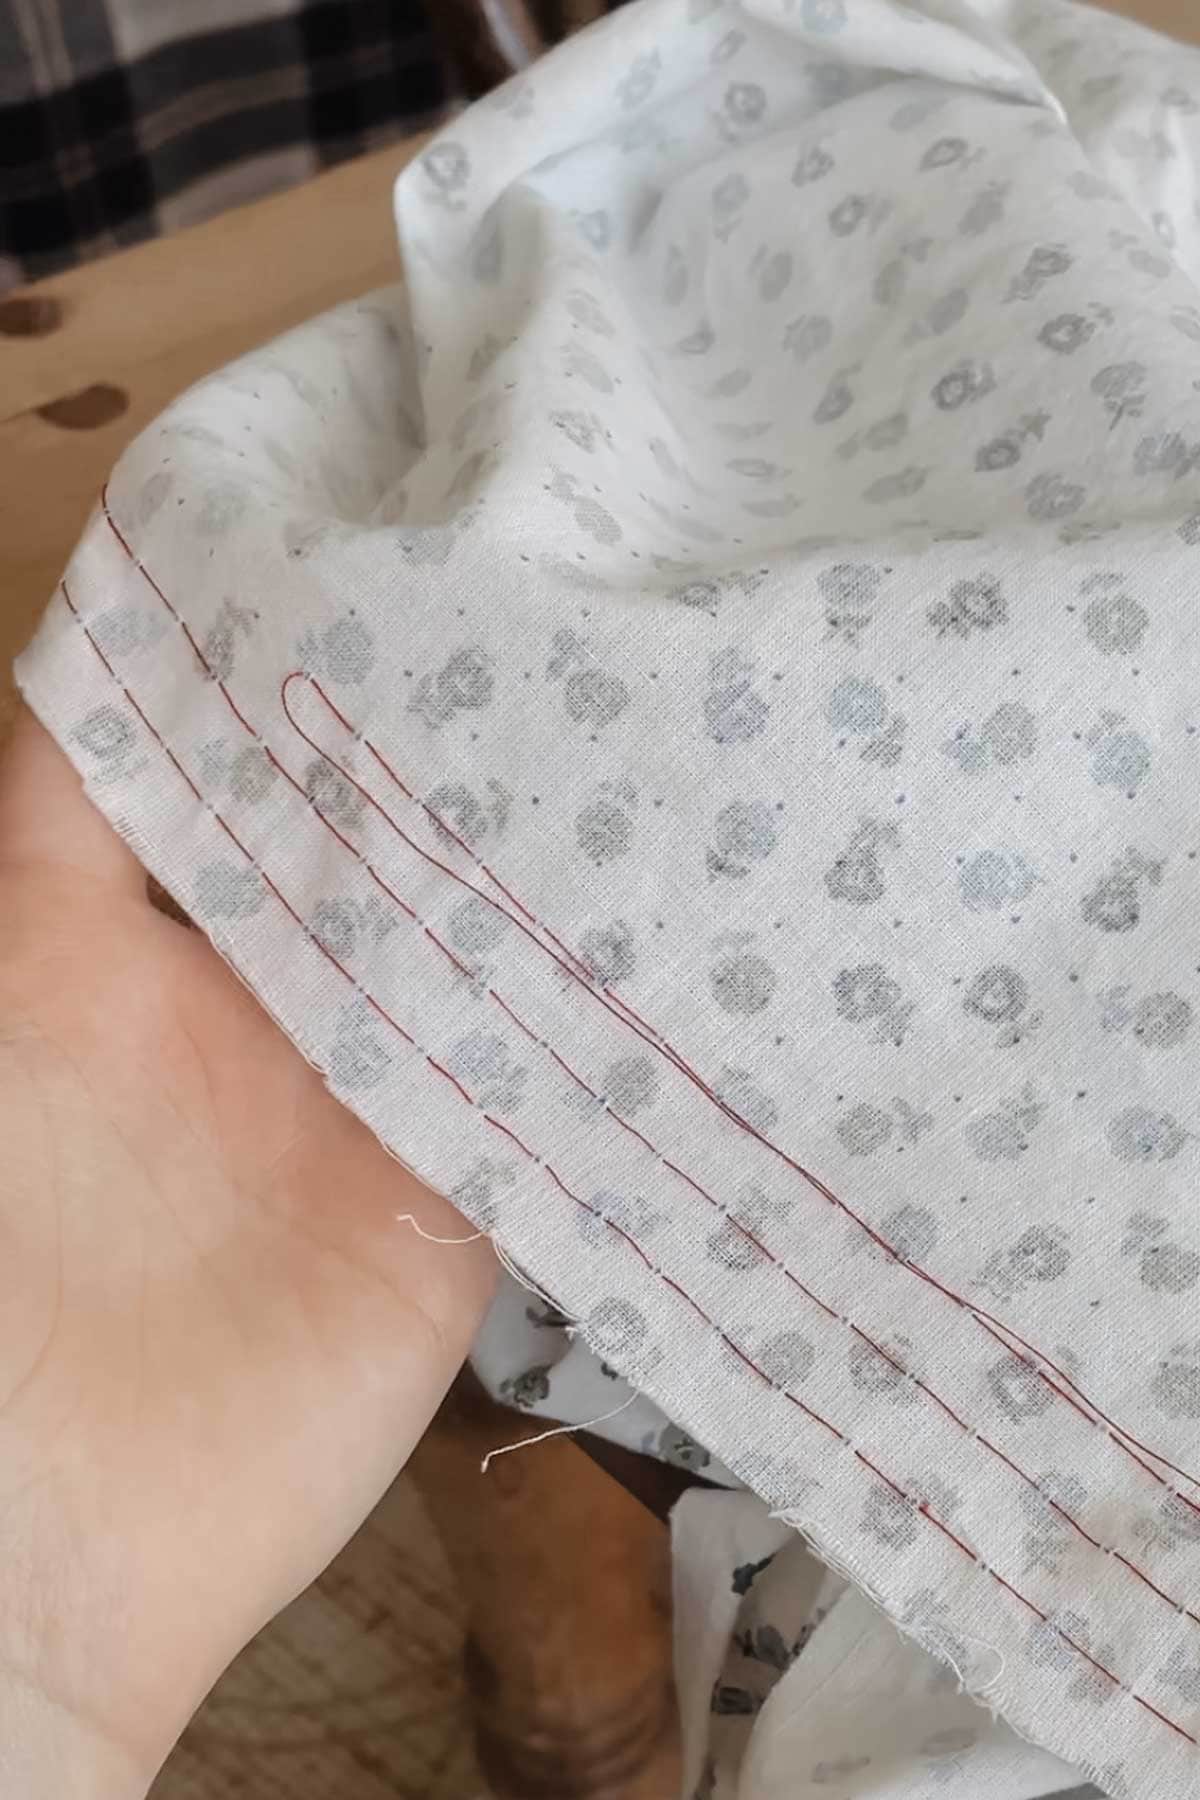
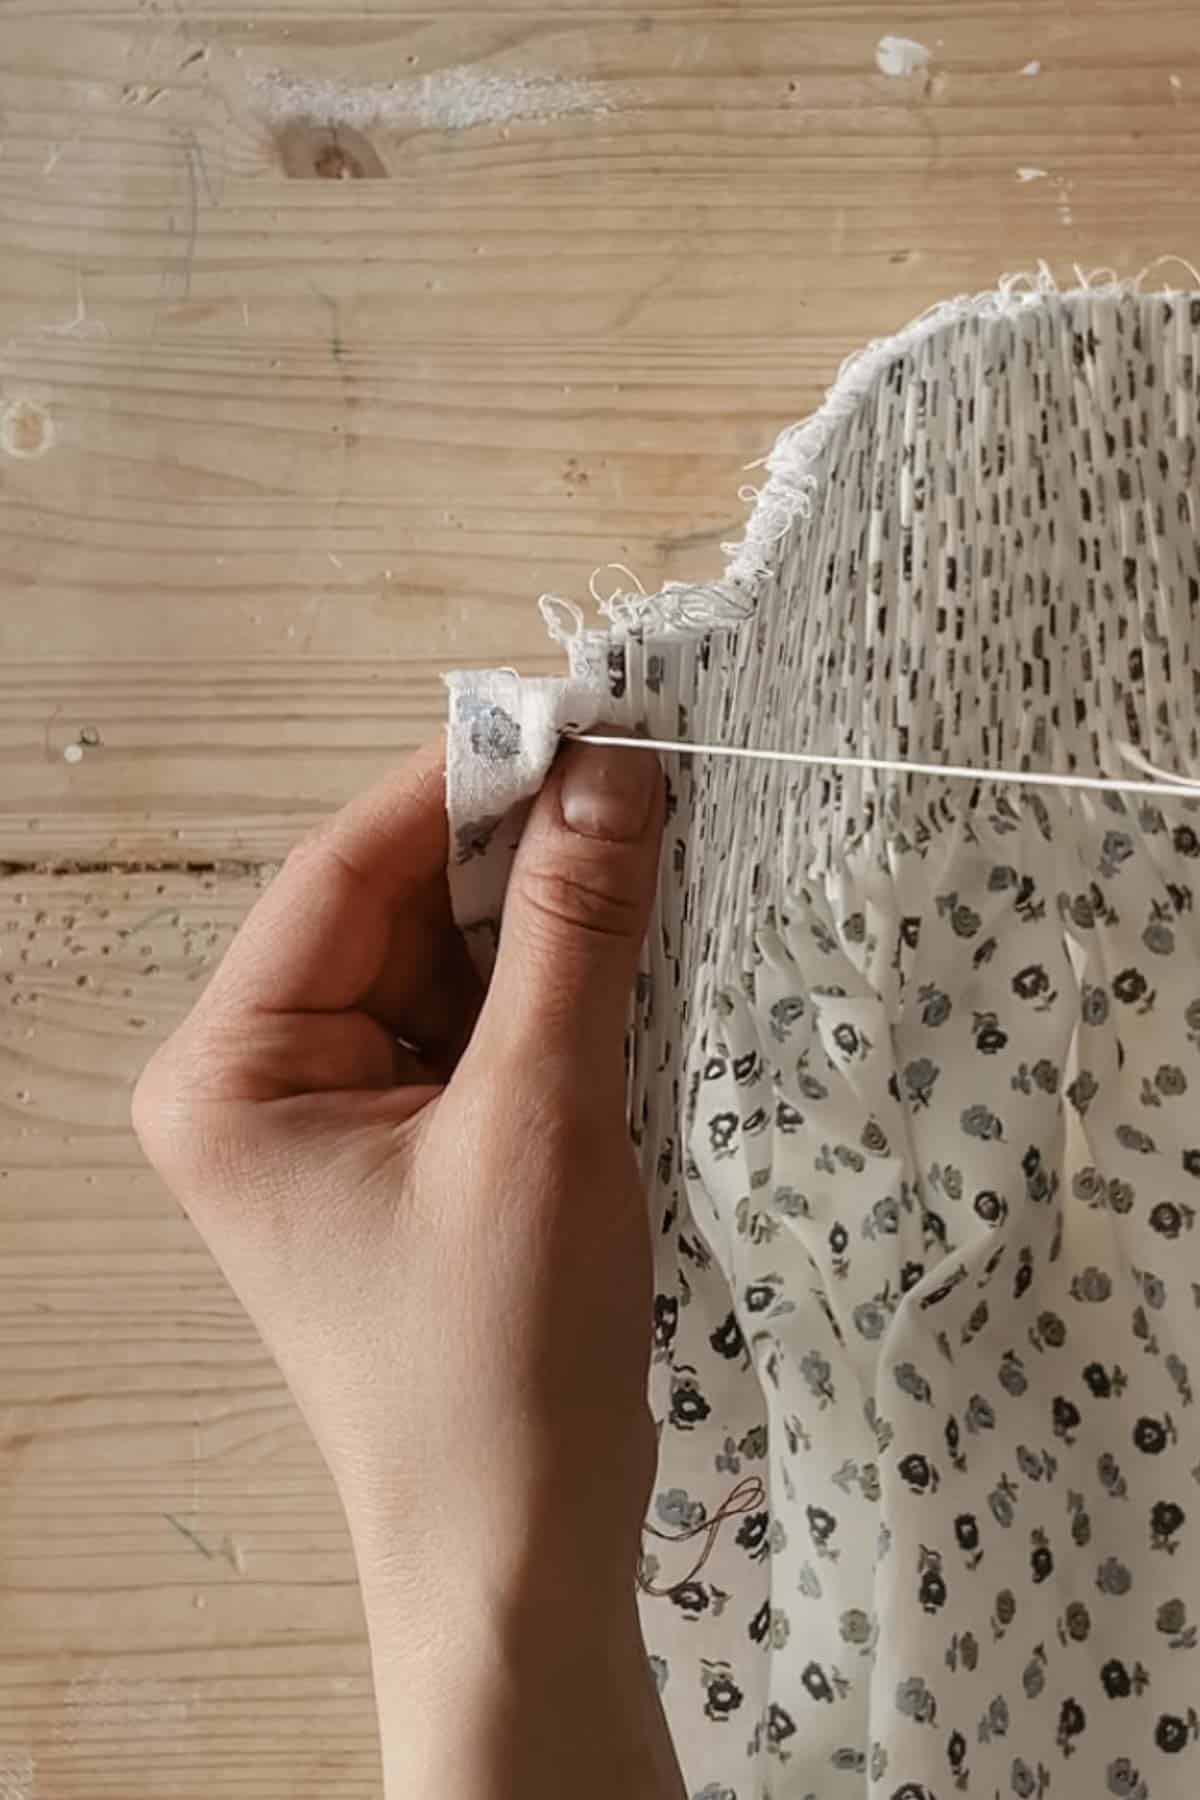
Step 2: Sew Your Pleating Rows
When your dots are marked, take a needle and thread, knot the end, and then sew along the rows of dots, going down in the fabric just to one side of the first dot and coming back out on the other side of the first dot.
Continue to the next dot and along the whole row, then cut your thread leaving about a 10cm tail. Repeat this for all your rows of dots.
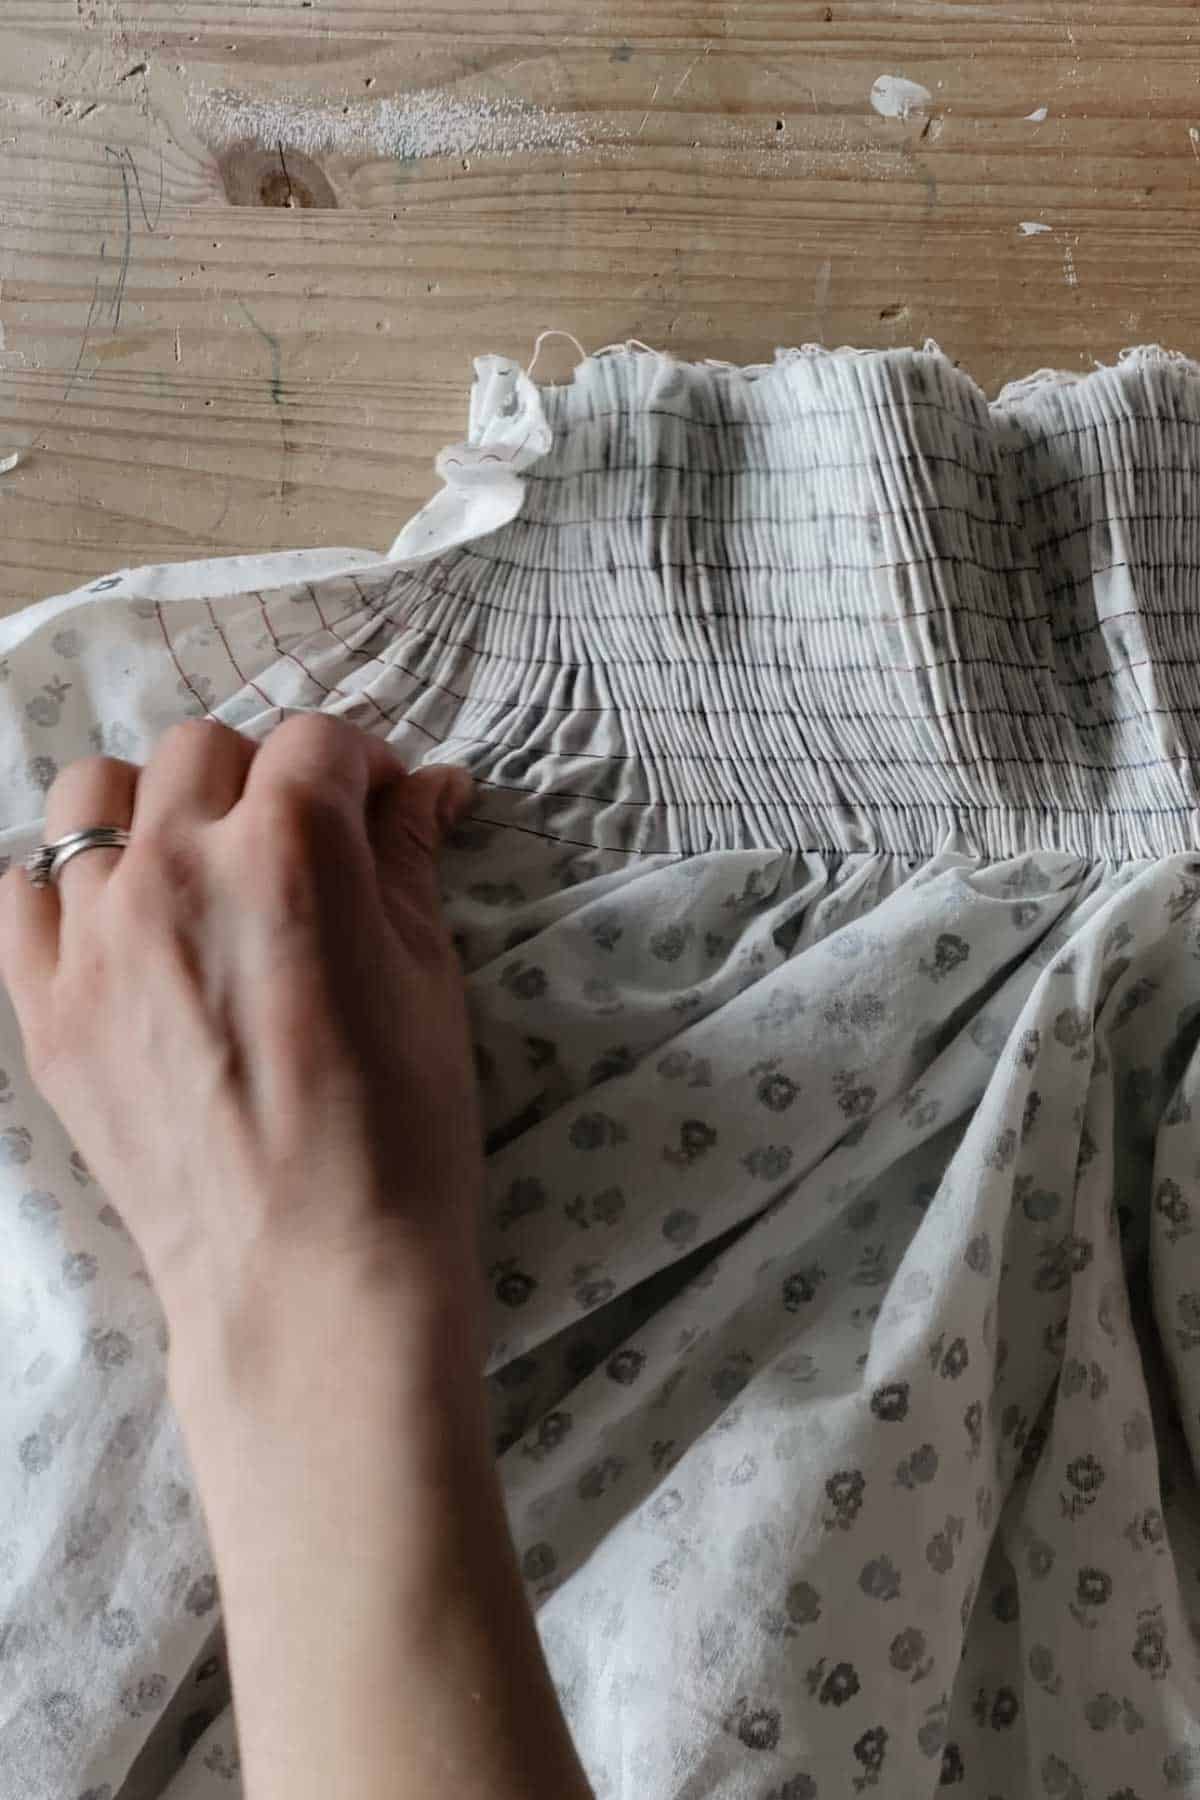
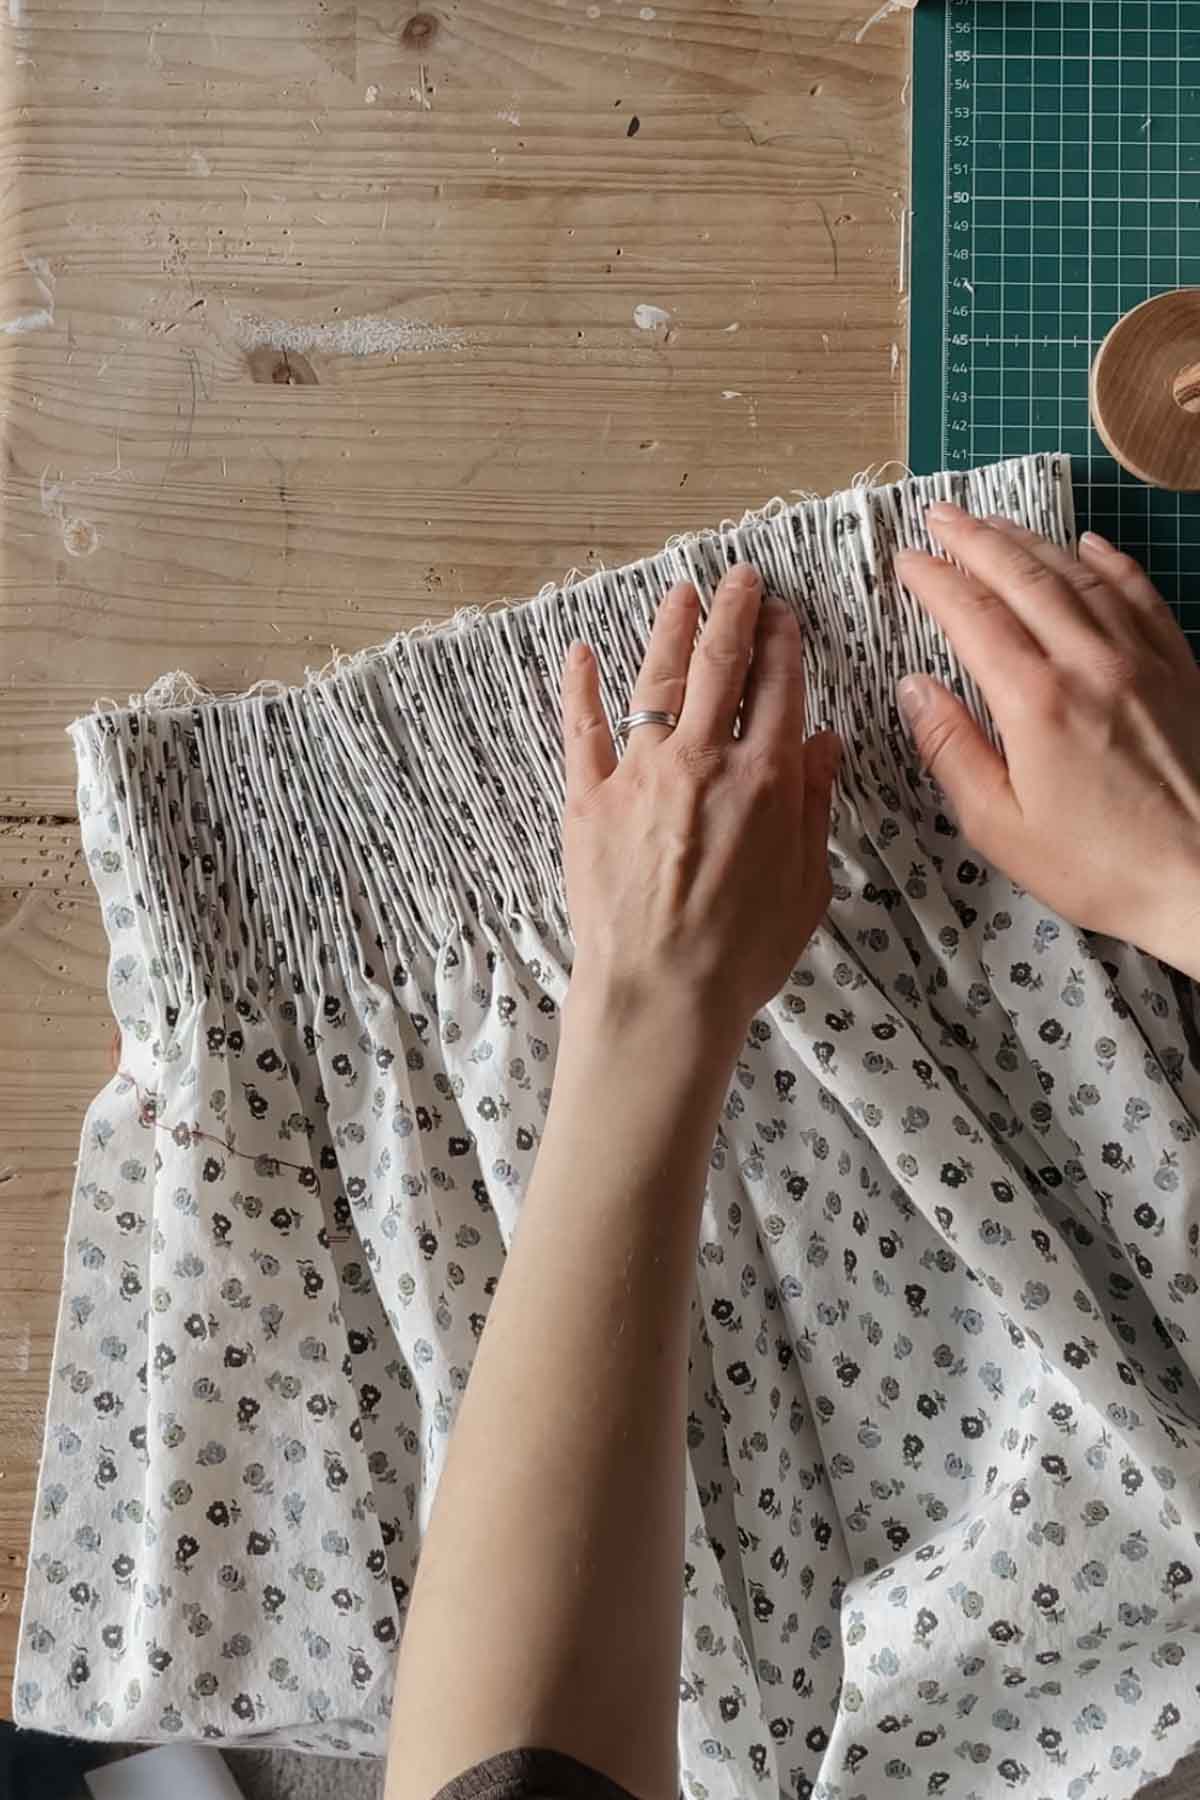
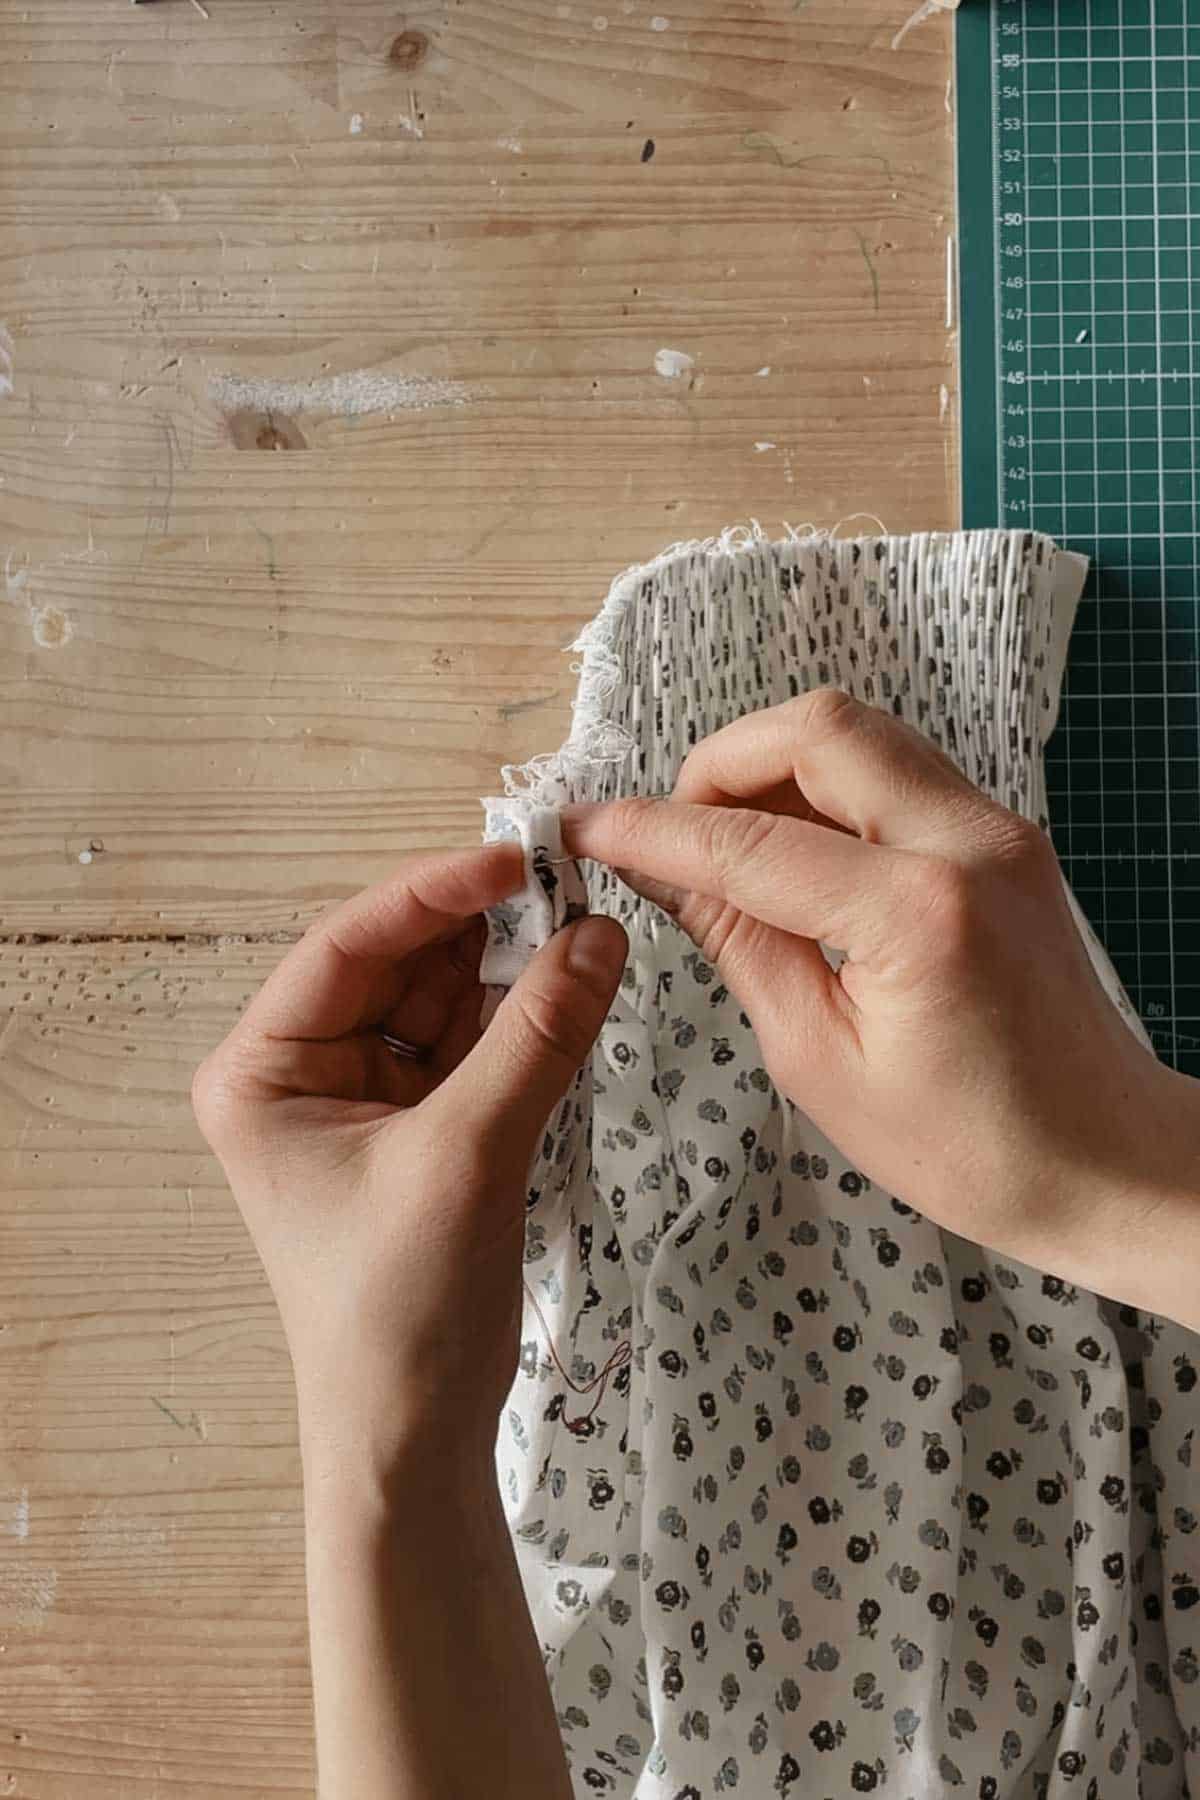
Step 3: Gather the fabric
Once all your rows of thread are complete, gently pull on the thread tails to draw up the pleats. Arrange them neatly, making sure your pleated fabric is the right width for your final piece, then tie off the ends of the threads to hold everything in place. Adjust and neaten your pleats so they are straight and sit nicely.
If you’d like to make this whole process a breeze, you can use a smocking pleater, though they are quite pricey!
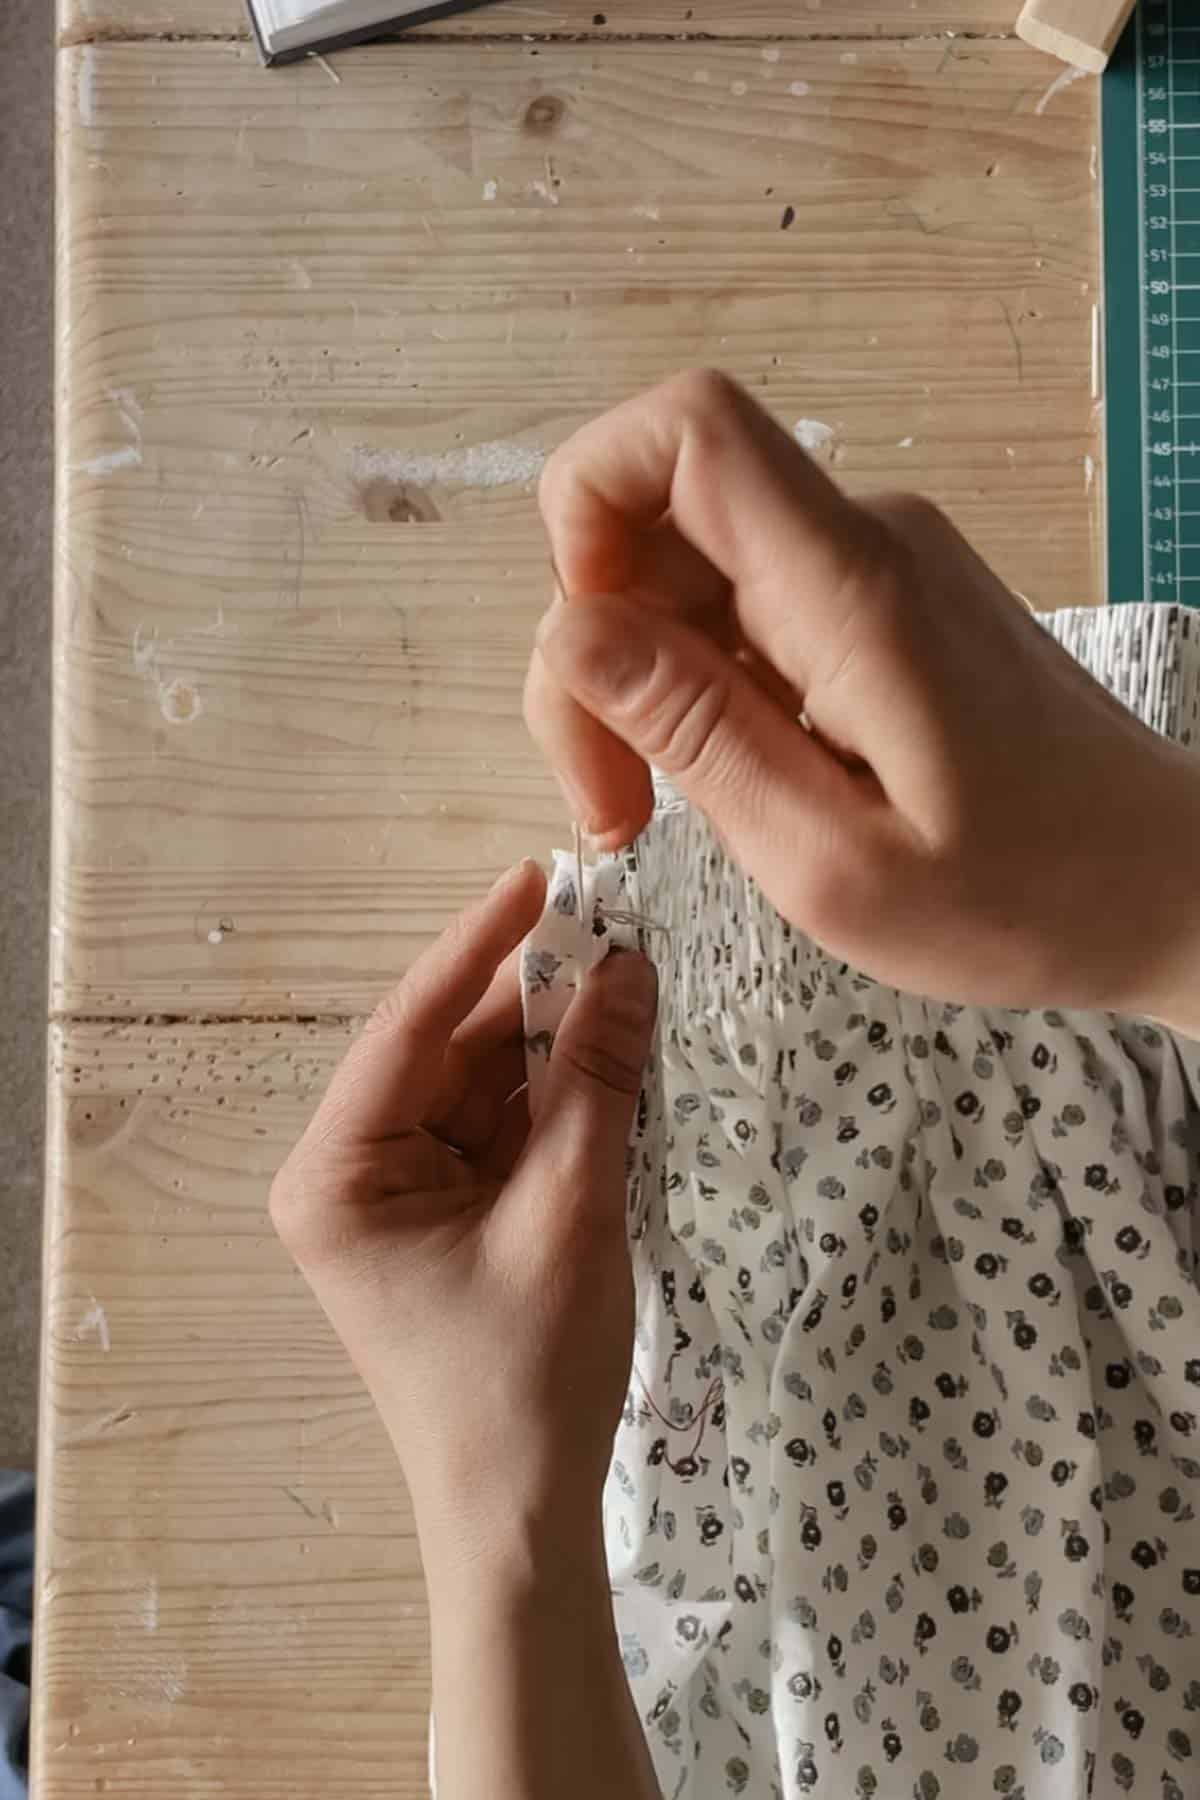
Step 3: Start Your stem Stitch
Thread your needle with a length of embroidery floss or coton perle thread, and knot the end.
To make your first stitch, bring the needle up in the valley between the first and second pleats, in line with the first second row of dots.
Then take a small stitch through the front of the first pleat (so you’re going back on yourself), about a third of the way into the depth of the pleat.
Next, take a small stitch through the second pleat, from right to left, keeping the thread below the needle. Again, you want this to be about a third of the way down the pleat.
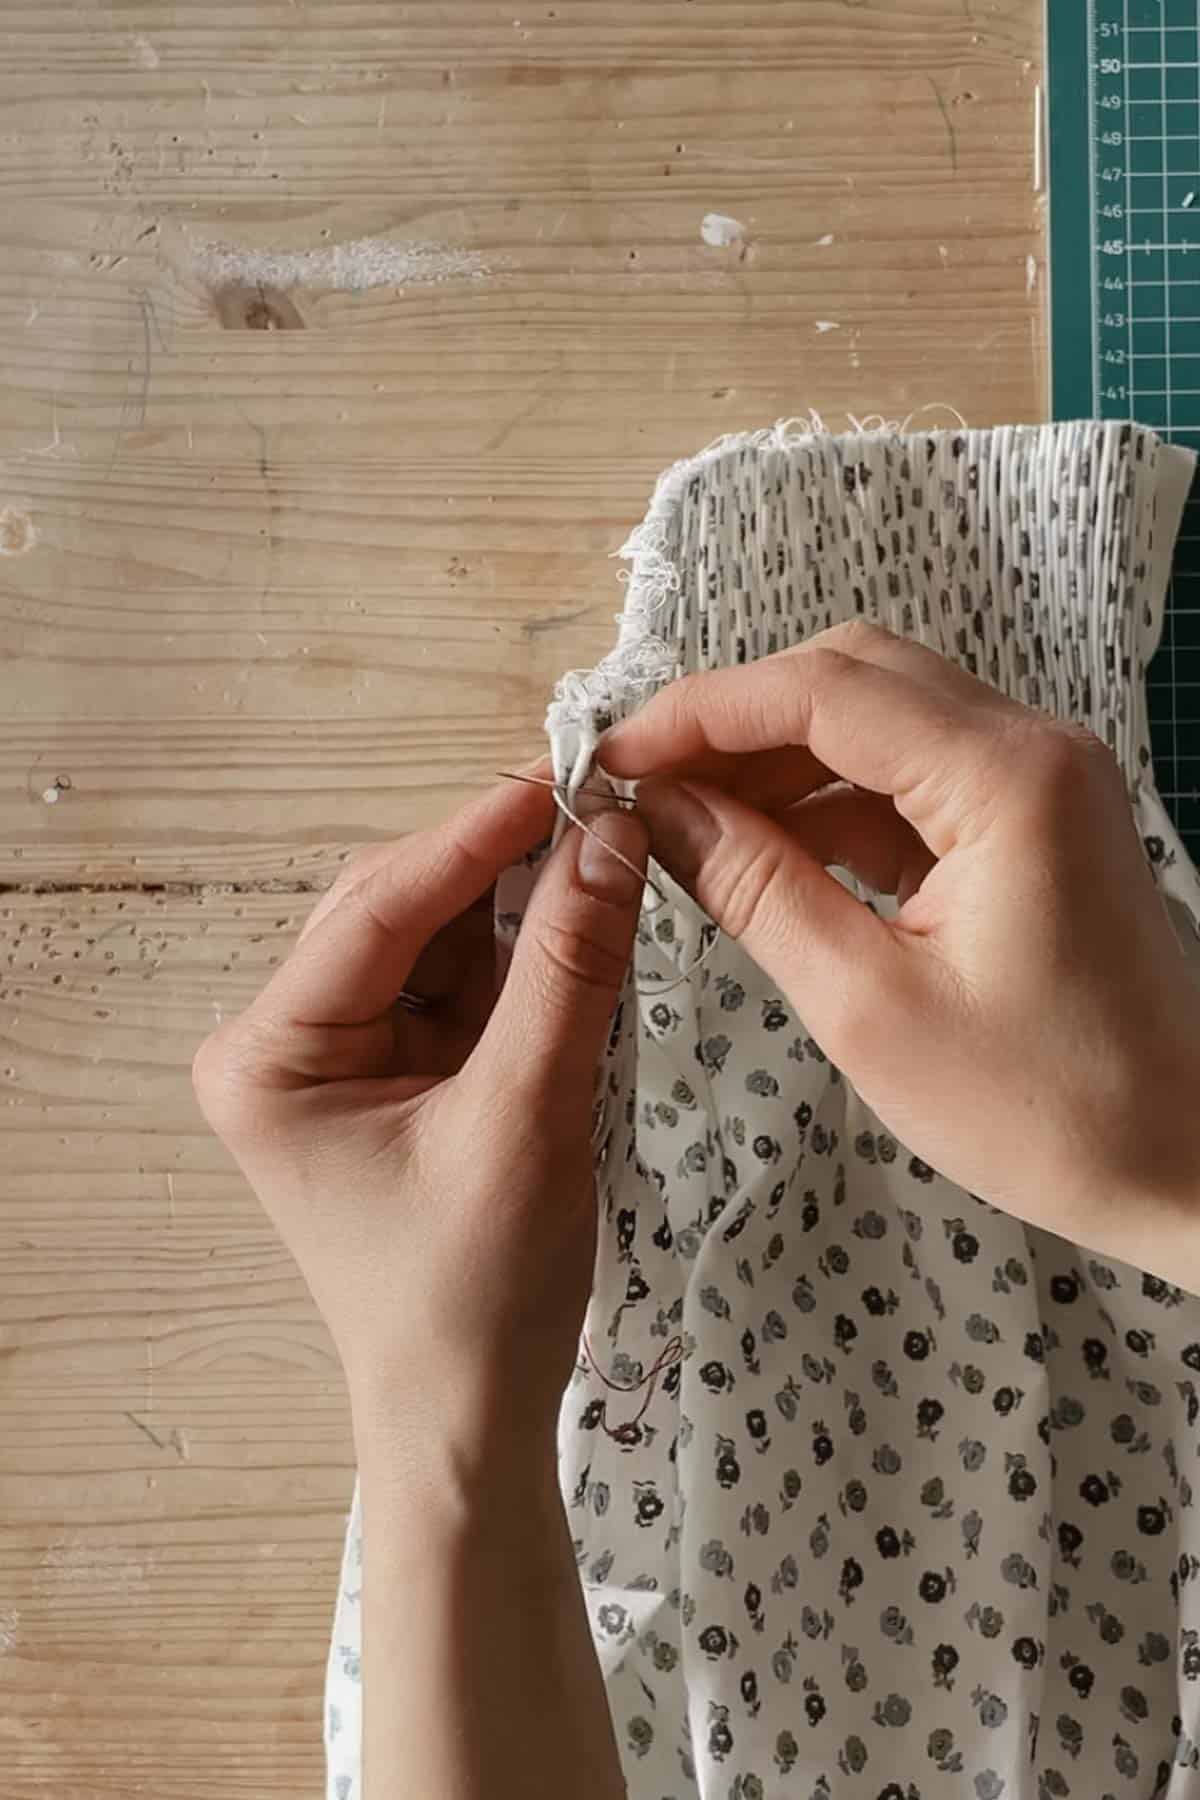
Continue making a stitch in each pleat, making sure to always keep the thread below the needle.

Step 4: Finish your smocking
When you reach the final pleat, stitch down between the last two pleats to the back of the fabric and tie off.
Step 5: Block your work
In order to insert your smocking project into whatever piece of clothing you’re planning, you’ll need to cut it to the right size. This is called blocking. The best method I’ve found for this is to use freezer paper. Sarah’s Classic Sewing has an excellent tutorial on how to do this which you can find here.

If you try smocking using the tips here, I would love to see what you make! Drop me a DM or tag me on Instagram @aboderie.


So beautiful Innes! x
Thank you! 🥰
How many rows would you recommend for a child’s top?
It depends on how much of the top you want to be smocked really! 10 rows will work if you want to do something similar to what I did here ☺️
Thank you for this! I love this dress, is there a pattern for it?
I used the Holly pattern by Flora Child Co, but hacked it quite a lot!
I have a similar smocked dress but want to add waist ties in the back. Any suggestions with that?
I would insert them into the side seams!