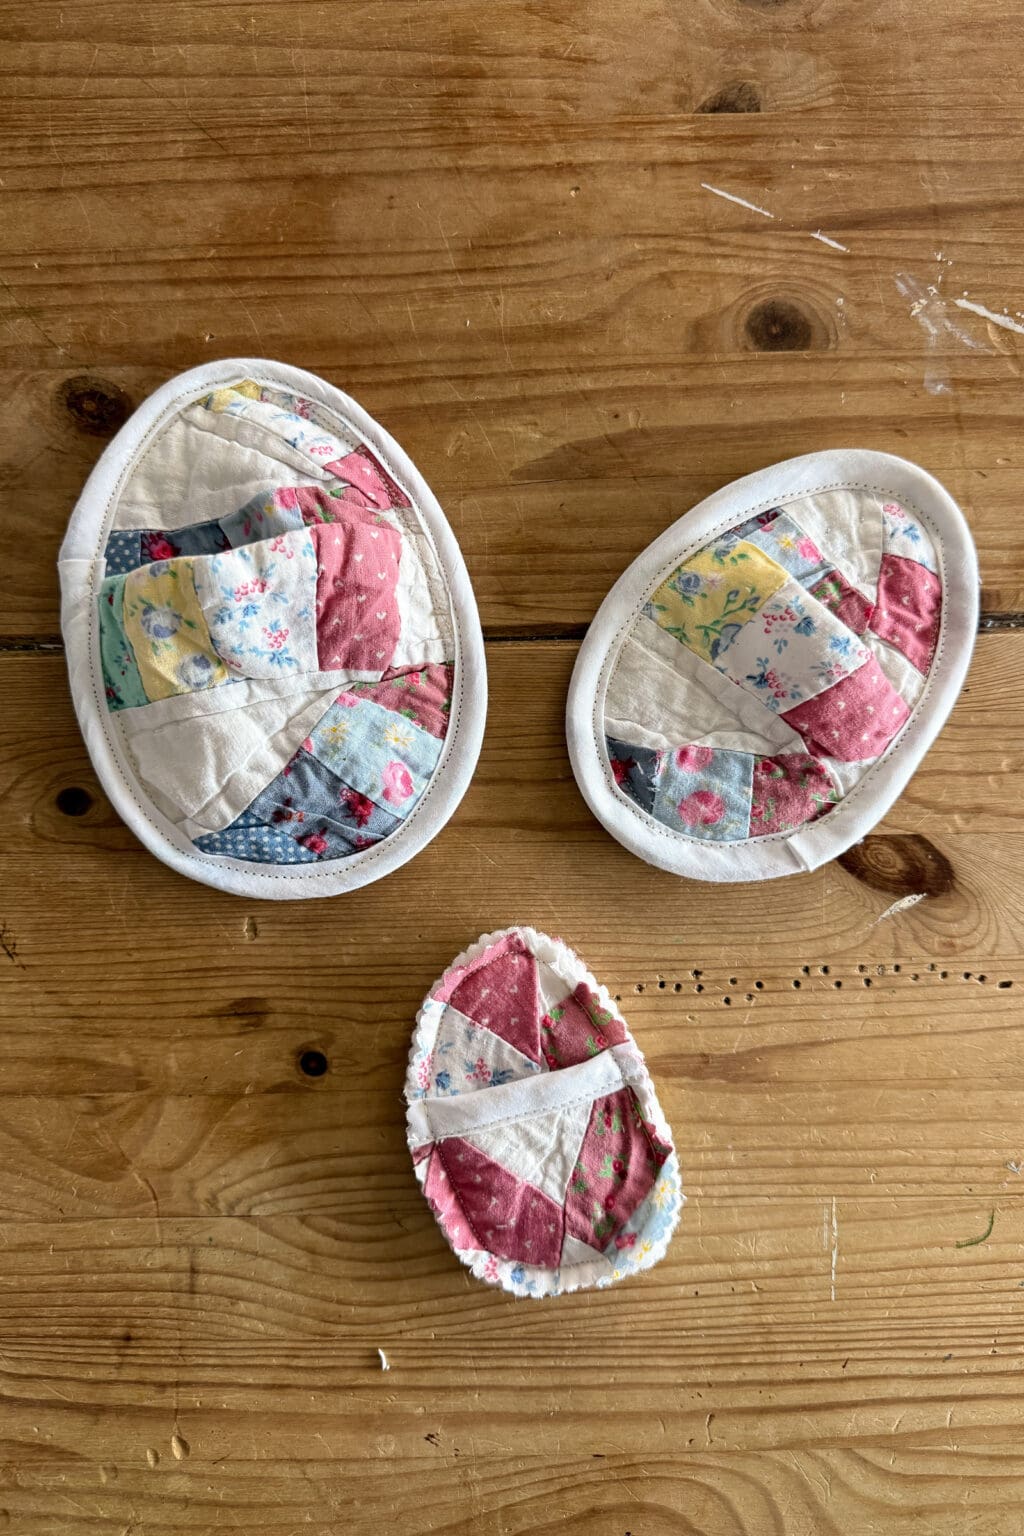
DIY Quilted Fabric Eggs (Free Pattern for Easter!)
Make reusable quilted fabric Easter eggs with this free sewing pattern. Perfect for Easter baskets, egg hunts, and — yes — snuggling Merry Mice. Three sizes included.
This page contains affiliate links, which earn me a little bit of commission if you make a purchase, at no additional cost to you. Thank you for supporting my little corner of the internet!
When I was little, Easter was marked with little more than a shop-bought Easter egg.
Now don’t get me wrong – I love a Cadbury’s Twirl egg as much as the next girl, and I was always delighted when my mum pulled those colourful boxes from the cupboard. If you’re planning to get your kids a bag of Mini Eggs and not much more, that is a-ok!
But as I’ve grown and begun to think more intentionally about Easter, I find myself wanting it to feel like something.
Not in a grand, performative way – just in the way that a table laid with care feels different to one that isn’t. The way a handmade thing carries weight that a bought thing doesn’t, not because it’s superior, but because it’s evidence of time and thought given to someone you love.
So I’ve been quietly accumulating little Easter traditions. Things my children might actually remember. Things I make with my hands, which is (let’s be honest) always going to be my first instinct for solving any problem.
These reusable fabric eggs are one of those things. A handmade alternative to plastic eggs that you can fill, hide at an Easter egg hunt, tuck into an Easter basket, or use year after year. Simple, beautiful, and a hugely satisfying afternoon’s make.
And they also happen to fit the Merry Mice perfectly, but we’ll get to that…
Here’s how to make quilted fabric Easter eggs!
Get Your Free Fabric Egg Pattern Here!
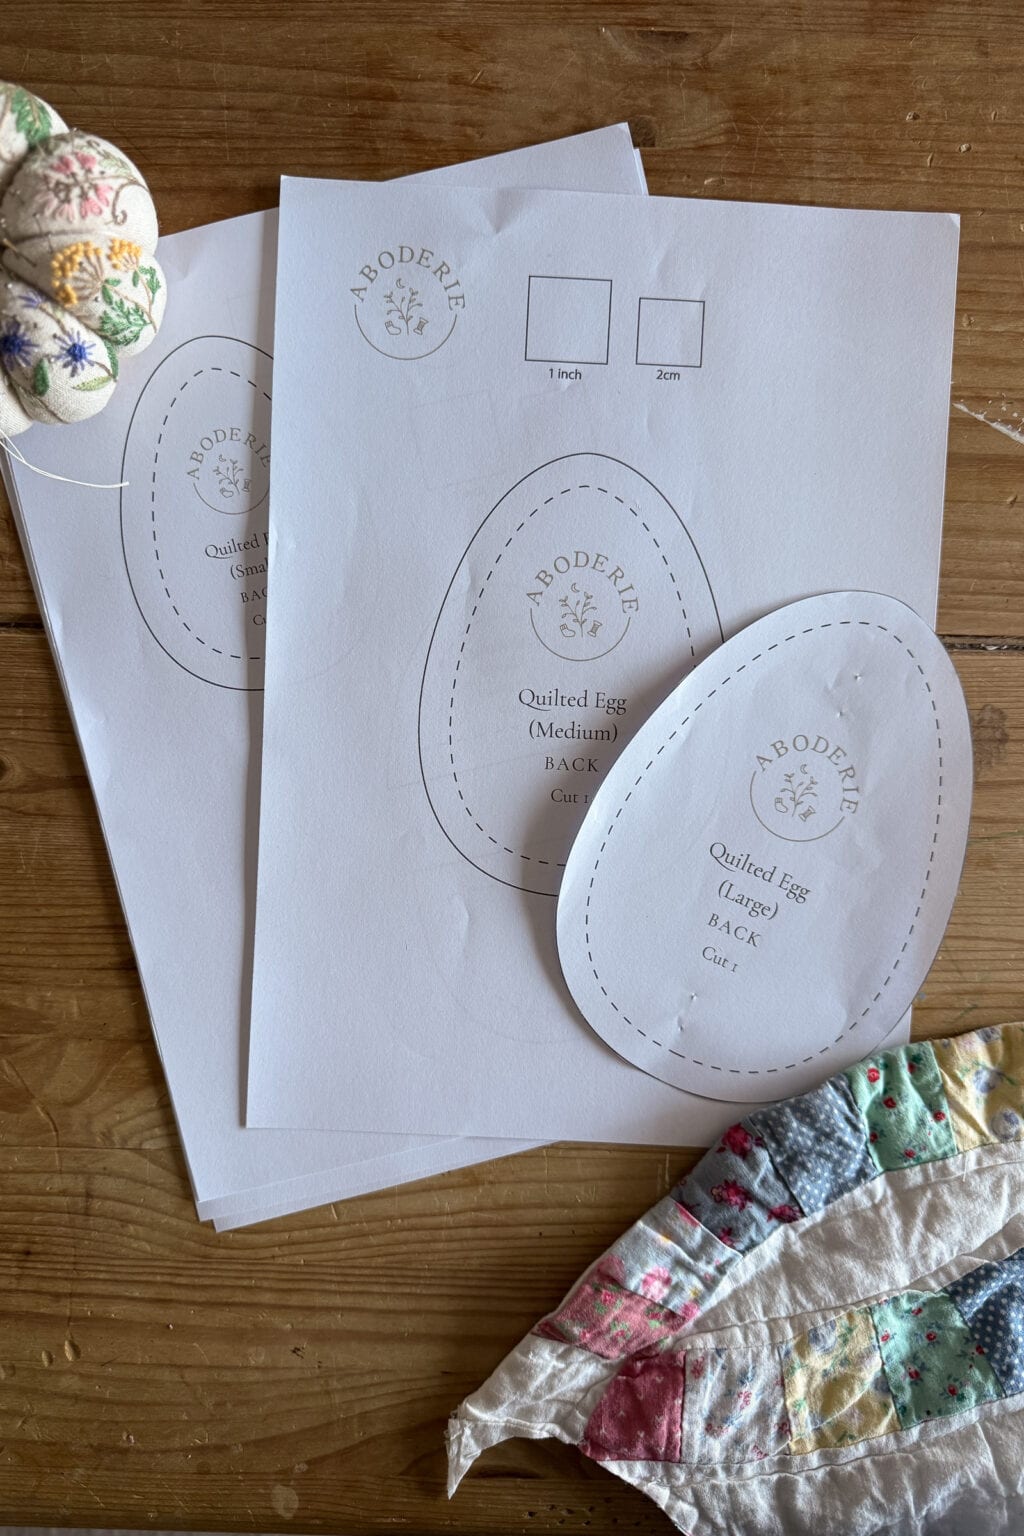
Before we get into fabric chat: you’ll need the egg template. It’s a free pattern – just pop your email below to sign up for emails and I’ll send it straight to you. It comes with three sizes: large, medium, and small, so you can make a whole bunch of eggs in different fabrics without any faff.
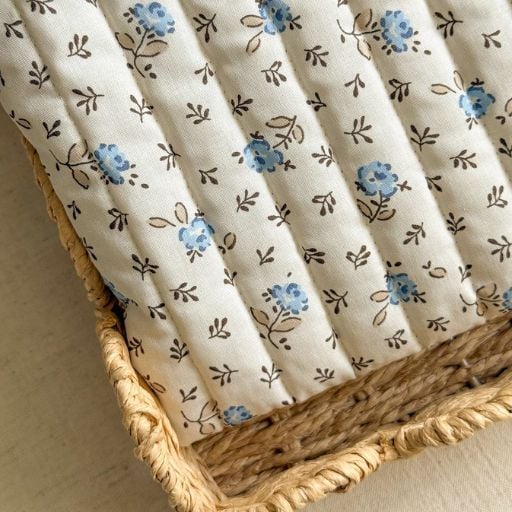
Finding the Perfect Quilted Fabric for Your Eggs
If there’s one thing I can’t get enough of, it’s a beautifully wrinkly patchwork quilt.
But despite scouring charity shops on the reg, the perfect antique quilt can be hard to come by. So here are a few different options for your fabric eggs, whether or not you have a pretty quilt stashed away.
Why a Damaged Quilt Might Be Your Best Material
Like I said, this is my favourite route. Old quilts – the ones you find in charity shops with a questionable stain in one corner or a patch that’s worn thin – are perfect for this project.
You’re only cutting small fabric pieces, so a quilt in just about any state will do.
If the raw edge of your quilt happens to be in good shape, you can use that as your finished edge on the egg front pieces and skip the finishing there. Otherwise, a little bias tape handles it neatly (more on that in a moment).

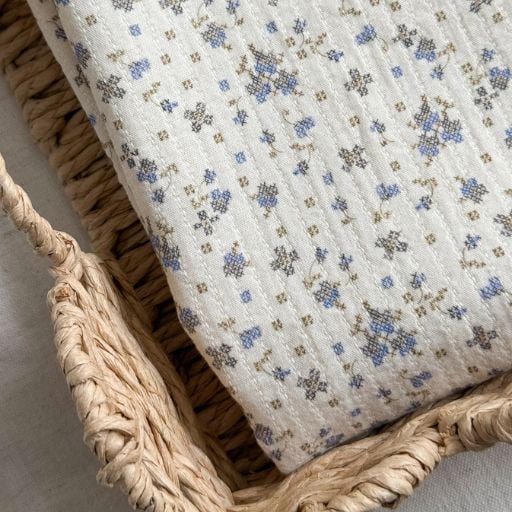
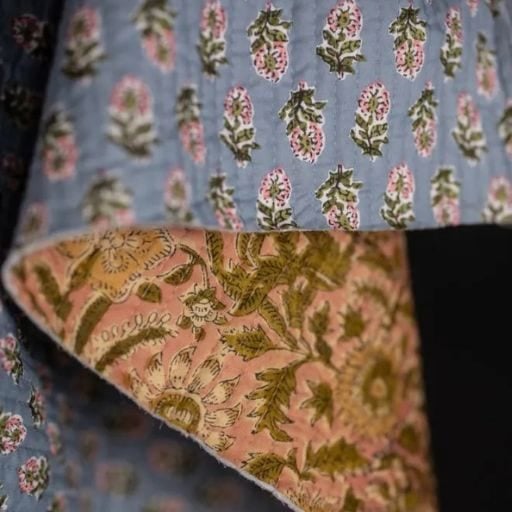
The Best Places to Buy Quilted Fabric Online
If you’d rather start with something fresh, quilted fabric by the metre comes in some genuinely beautiful options and saves you a bunch of time quilting your own fabric.
Here are a few of my personal favourites:
SHOP THE PROJECT
Quilted Fabric Recommendations
Some of my favourite quilted fabrics!
Can You Quilt Your Own Fabric for this? (Yes, and Here’s How)
If you want to make something completely one of a kind you can quilt your own fabric.
The basic process is sandwiching a layer of wadding between two layers of fabric and stitching through all three layers in a grid or pattern. There are brilliant tutorials all over YouTube if you want to go down that rabbit hole.
It’s super satisfying, and it means your eggs can be made entirely from fabrics you love.
Bias Tape: The Finishing Touch That Makes All the Difference
There are about as many ways your could finish the raw edges of these eggs as there are fabrics in my cupboard, but bias tape is probably the neatest of them all. It gives you a beautiful polished edge and looks particularly lovely in a contrasting colour.
Ready-made bias tape is easy to find at most haberdasheries and online, though you might not find particularly fun prints.
Making your own bias tape is simpler than it sounds, especially if you have a bias tape maker. There are two main types:
- The Simplicity bias tape machine — a dedicated gadget that’s quick and satisfying to use
- Small metal bias tape makers — you can get these cheaply on Amazon in various sizes. You feed the fabric through, press as you go, and you’re done. Fiddly for the first thirty seconds, then really quite meditative.
Making your own means you can match or contrast the tape to your quilted fabric exactly, which adds a bunch of personality.


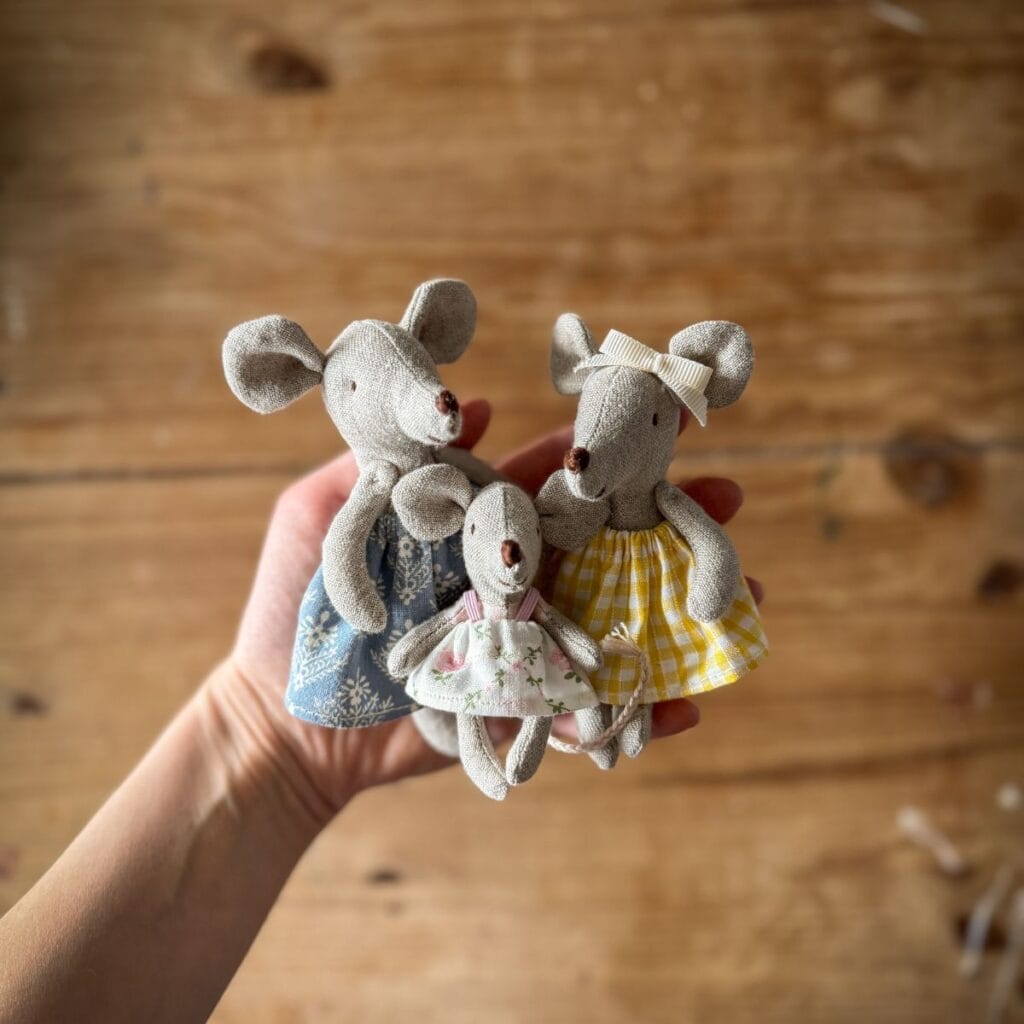
Wait, These Fit the Merry Mice Perfectly
Here’s the thing I’m inordinately pleased about: the three egg sizes in this Easter egg pattern correspond exactly to the three sizes of mouse in my Merry Mice sewing pattern!
- Large fits the adult mouse perfectly
- Medium fits the child mouse
- Small fits the baby
Which means you could make a little Easter set — a reusable fabric egg per mouse — and tuck them into a basket together. Or use the eggs as a kind of sleeping bag situation for young children who want to play with their mice and need somewhere cosy to keep them. Either way, it works.
If you’ve been thinking about the Merry Mice pattern, this feels like a very good excuse.
Meet the Merry Mice!
A detailed and super satisfying sewing pattern that shows you how to make your very own little family of mice 🐭
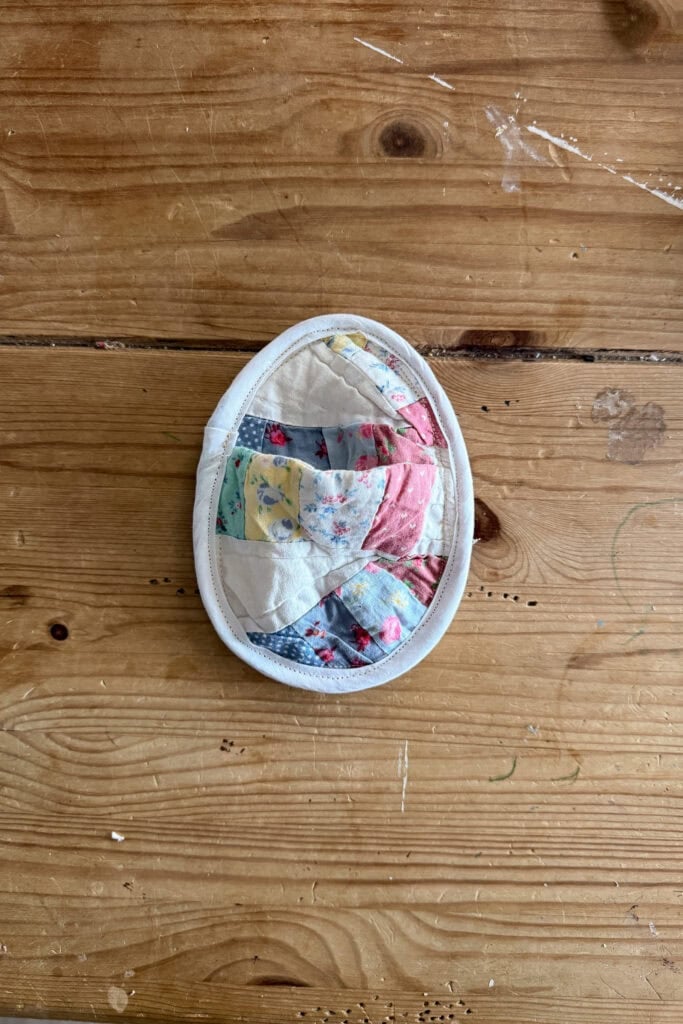
How to Make Quilted Fabric Eggs
What you’ll need
- The free egg template (three sizes: large, medium, small)
- Quilted fabric
- 1cm (1/2″) double fold bias tape (ready-made or homemade)
- Fabric scissors
- Pinking shears or scalloped shears
- Pins
- Sewing machine with walking foot
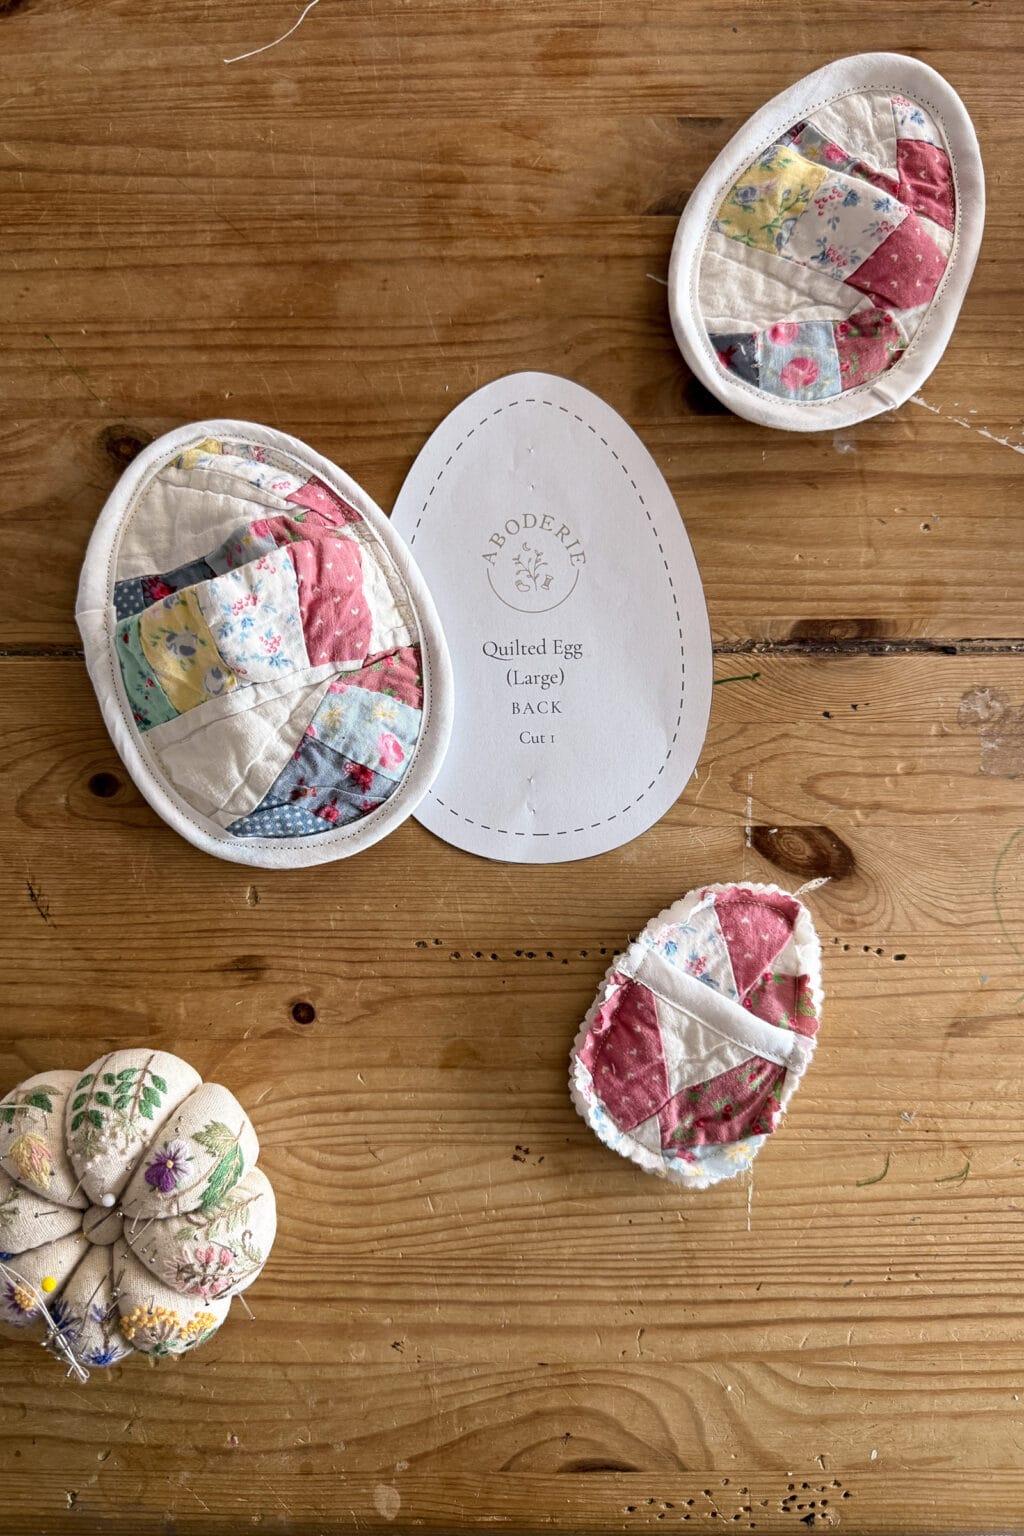
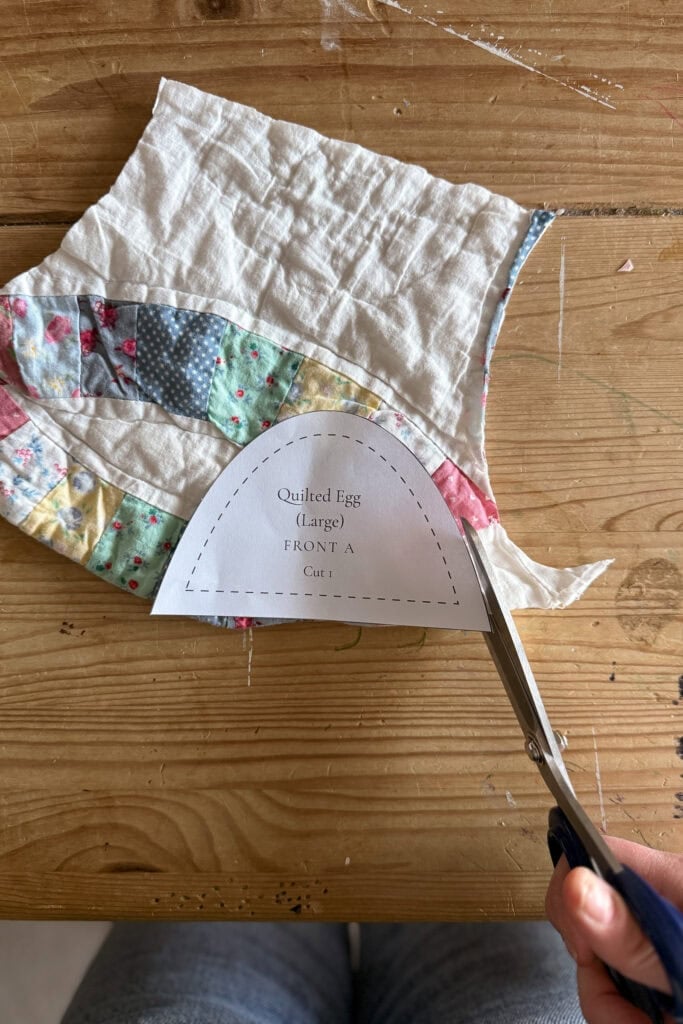
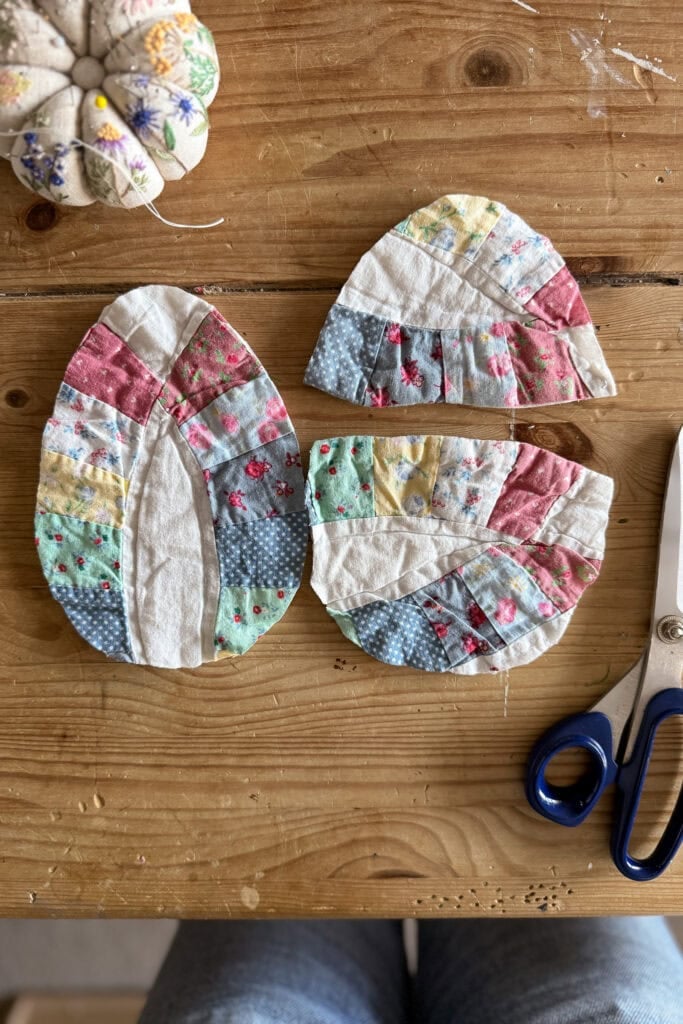
Step 1: Print the fabric eggs template and cut out your pieces
Download and print the free pattern, then cut out the pieces – one back piece and two front pieces – for each egg.
If you’re making a regular sized egg, use the medium template – it’s the most versatile.
If you’re cutting your front pieces from a quilted fabric with a finished edge (like the edge of an old quilt), you can use that as your finished straight edge and skip to Step 3.
If not: the two front pieces each have a straight edge that will need finishing before you assemble the egg.
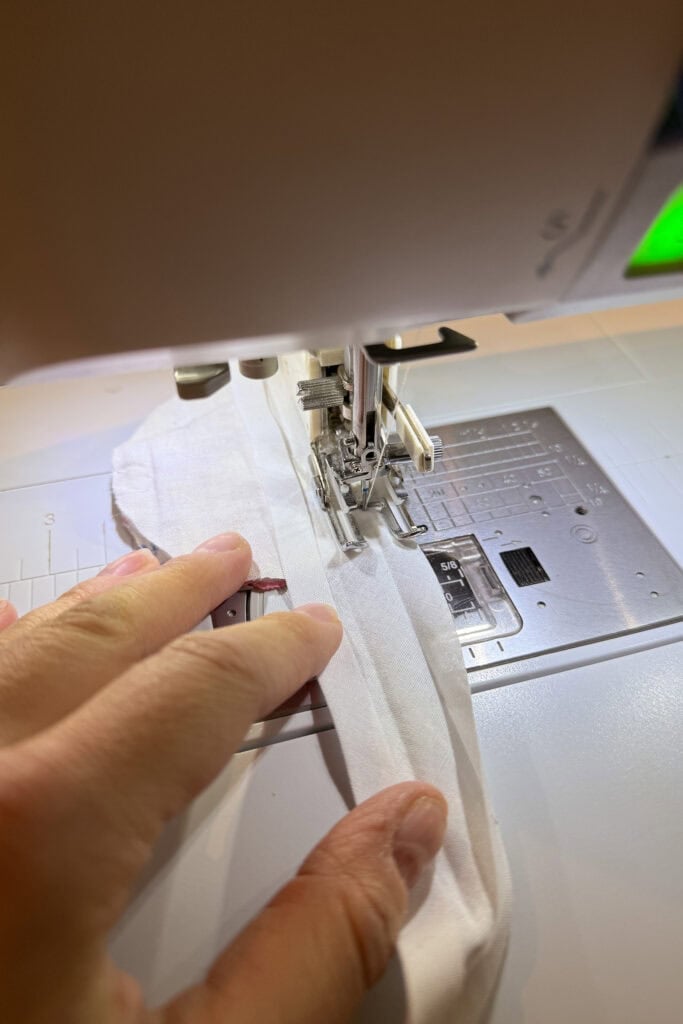
Step 2: Finish the straight edges of the front pieces
If the straight edges of your front pieces need finishing, you’ll need to do that now. If not, you can skip this step.
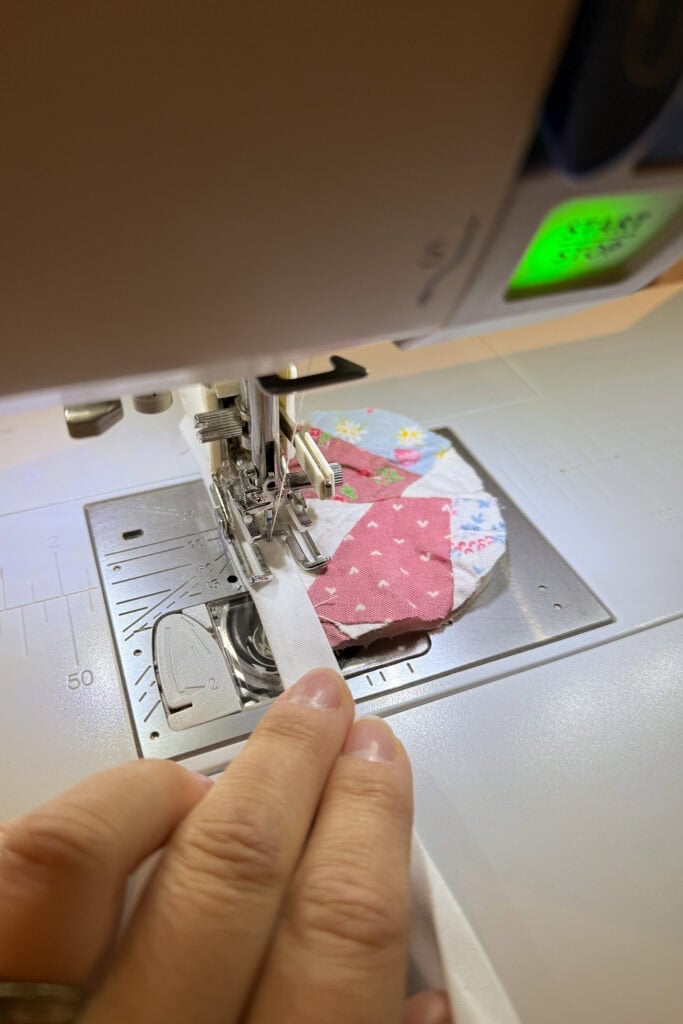
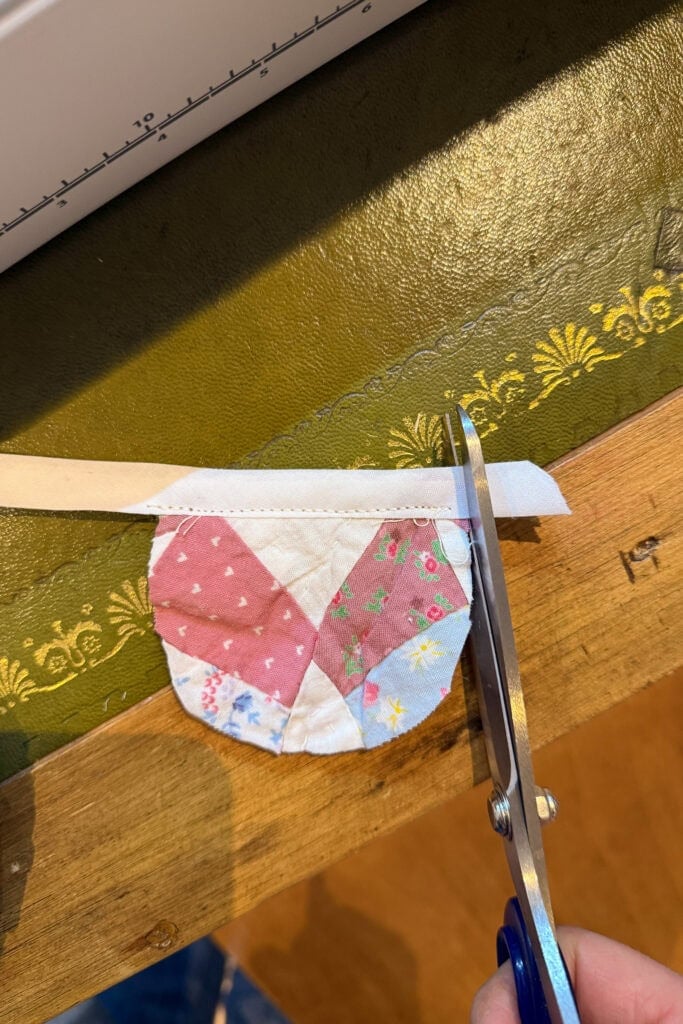
Open out the bias tape and sew it onto the straight edge on the wrong side of each front piece with a 1cm (½”) seam allowance. Fold it over to the right side, topstitch to secure and cut off any overhang.
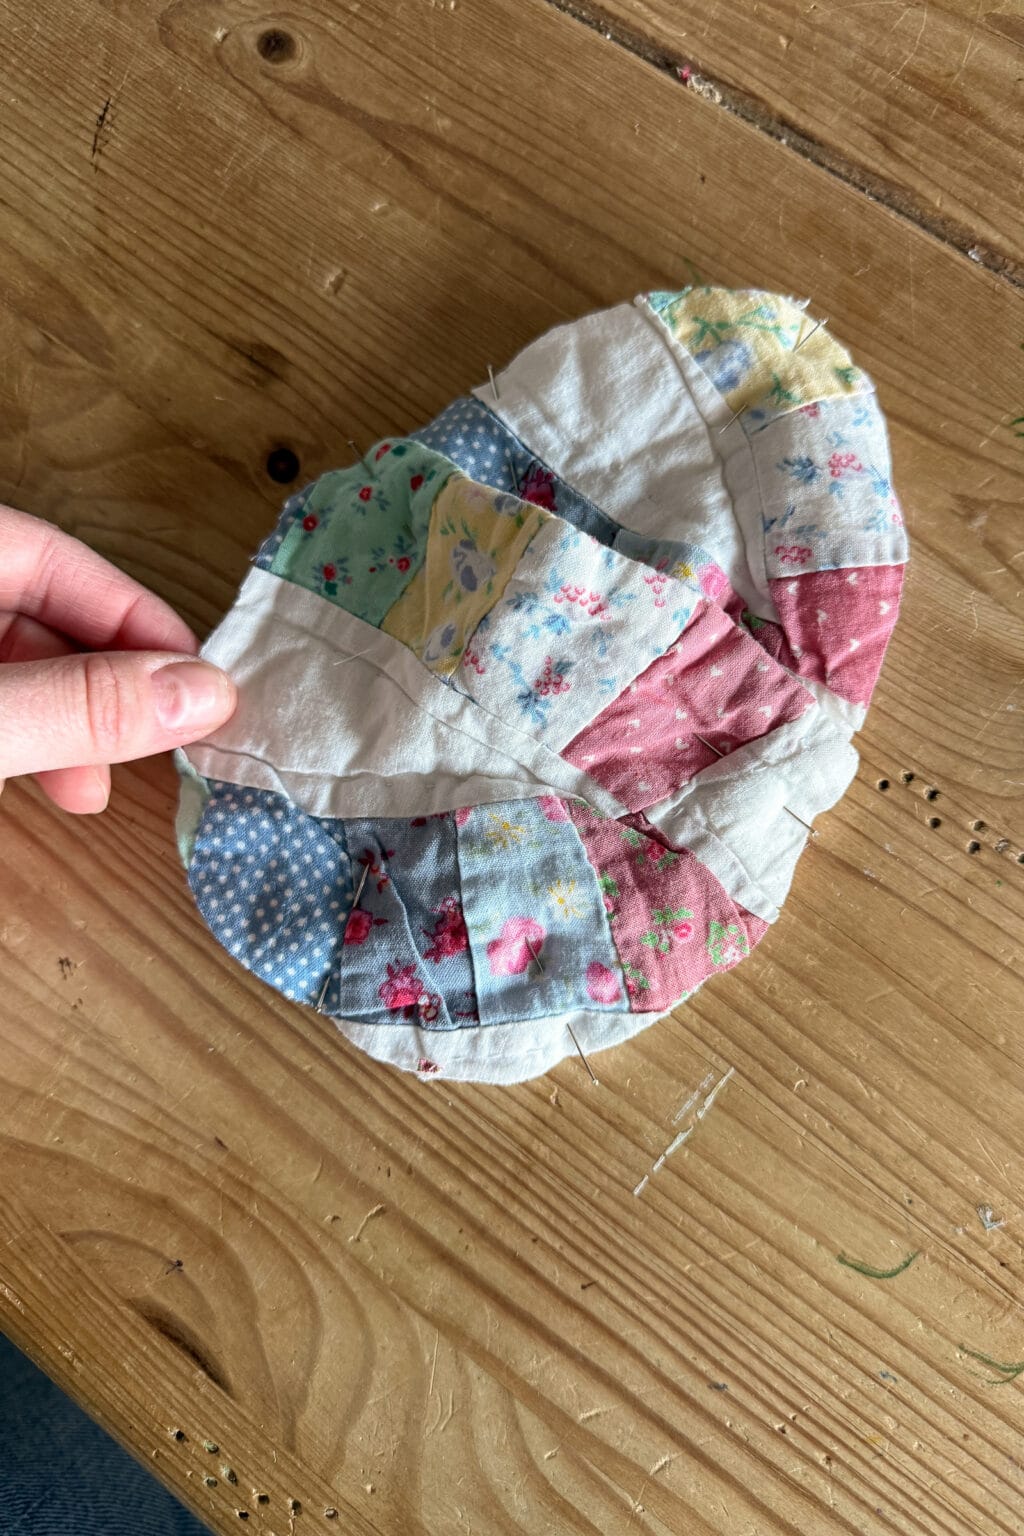
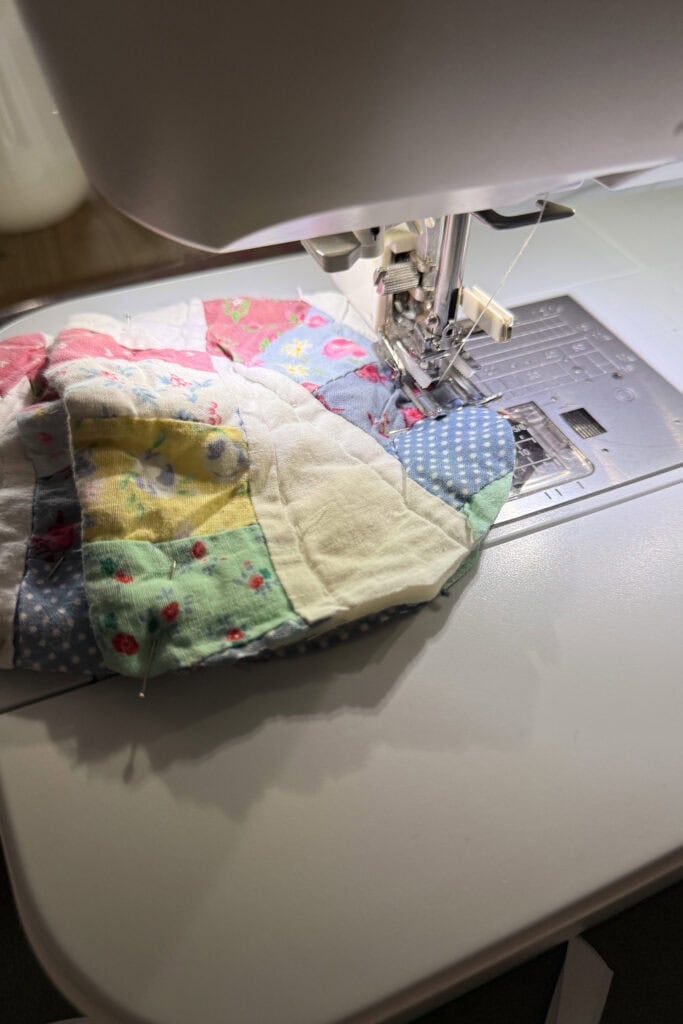
Step 3: Pin the pieces together
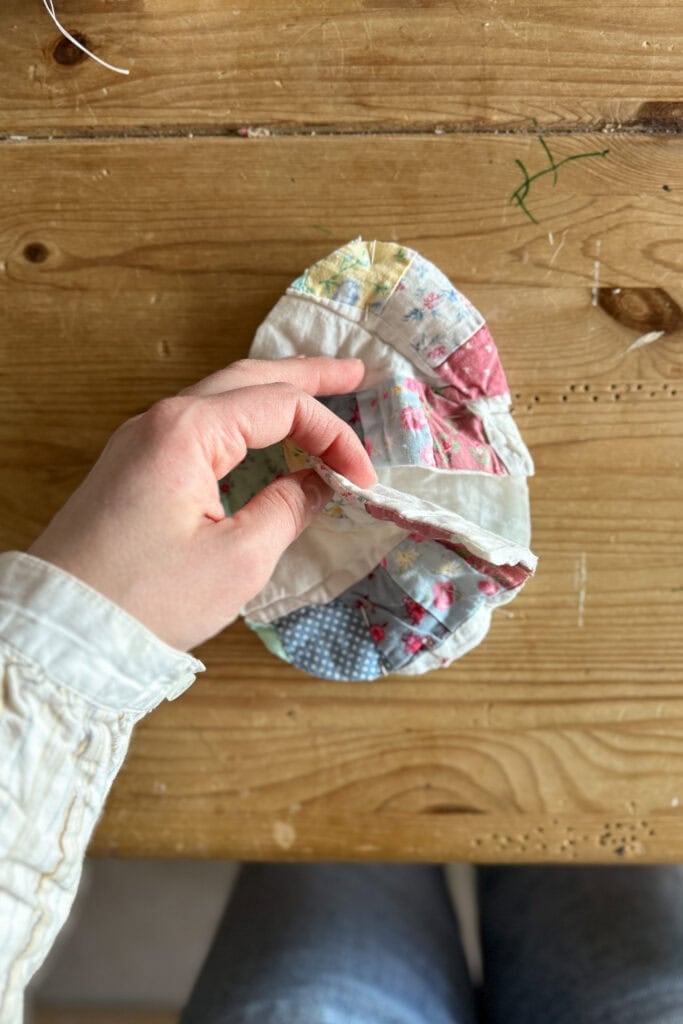
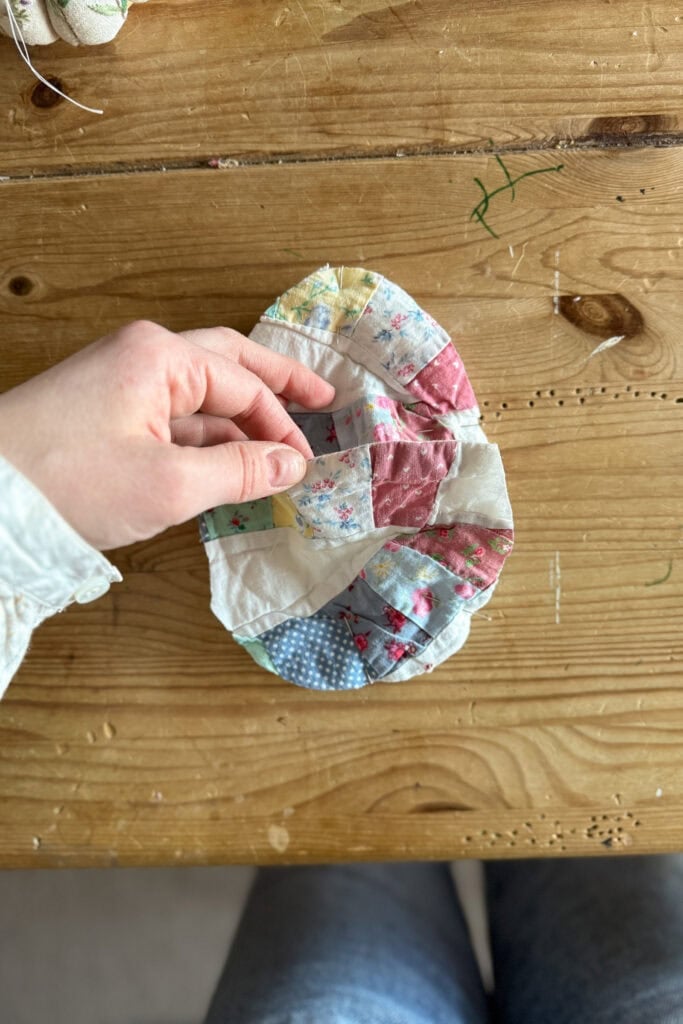
Lay your back piece flat with the right side facing down. Place your two front pieces on top with their right sides facing up, so all the fabric pieces are wrong sides together.
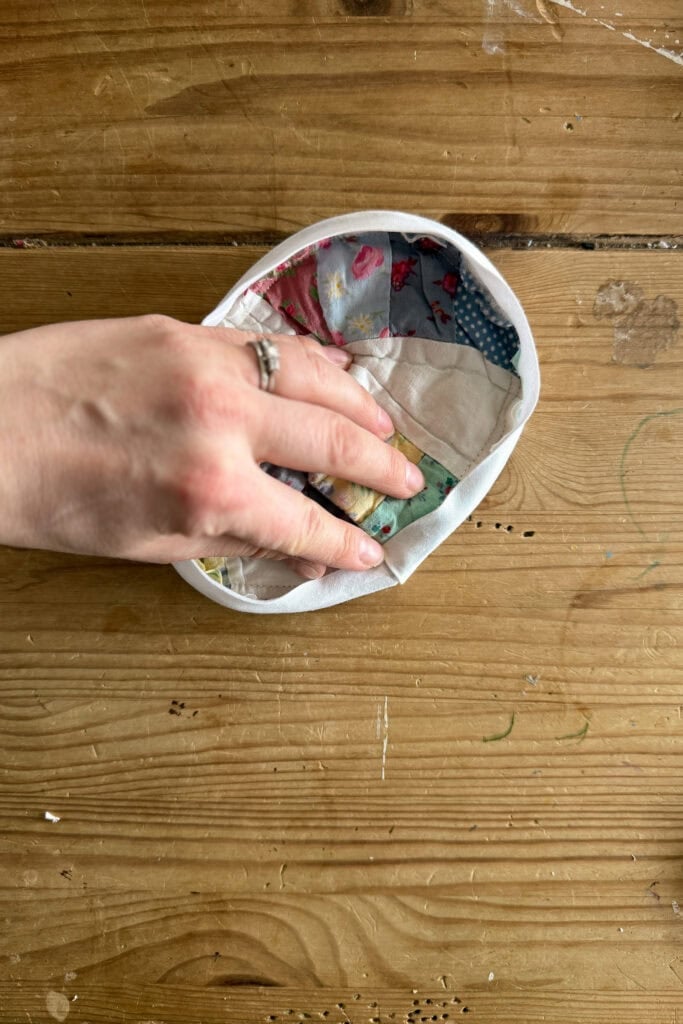
The front pieces will overlap slightly in the middle. I like to have the bottom front piece overlapping the top front piece. You might notice that the front pieces are slightly wider than the back piece. This is so that you can put something inside the egg without it warping.
Pin all the way around the outer edge.
Step 4: Sew around the edge
Using a walking foot and a stitch length of 3, sew all the way around the outer edge with a 1cm (½”) seam allowance.
The walking foot is genuinely worth it here – quilted fabric is thick, and it helps everything feed through evenly without the layers shifting.
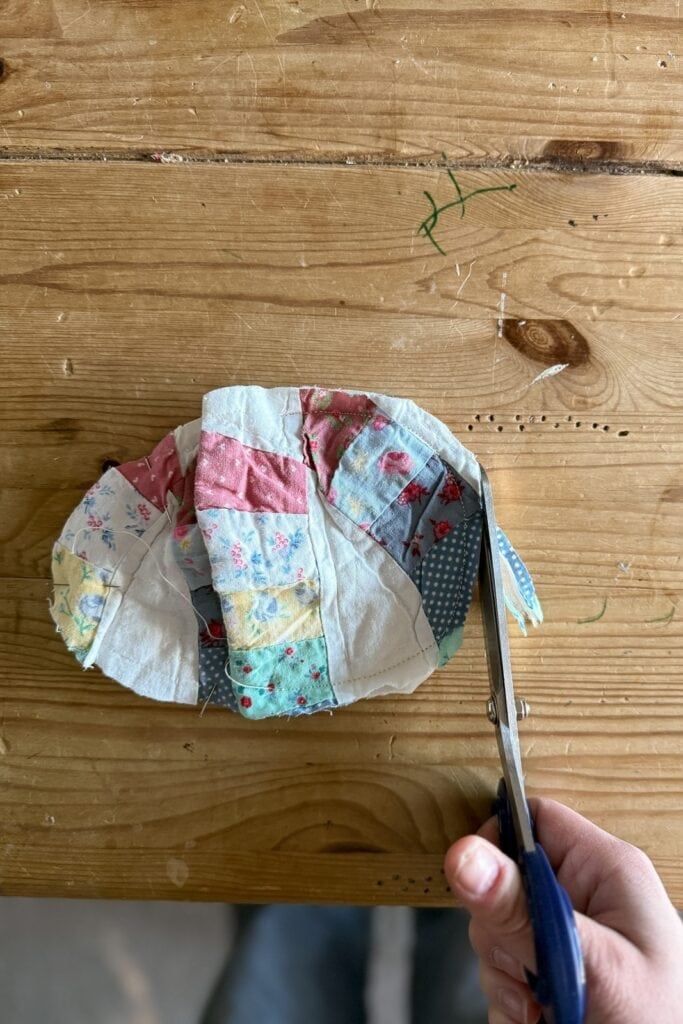
Trim the seam allowance to 5mm (1/4″).
Step 5: Finish the outer edge
There are two options here:
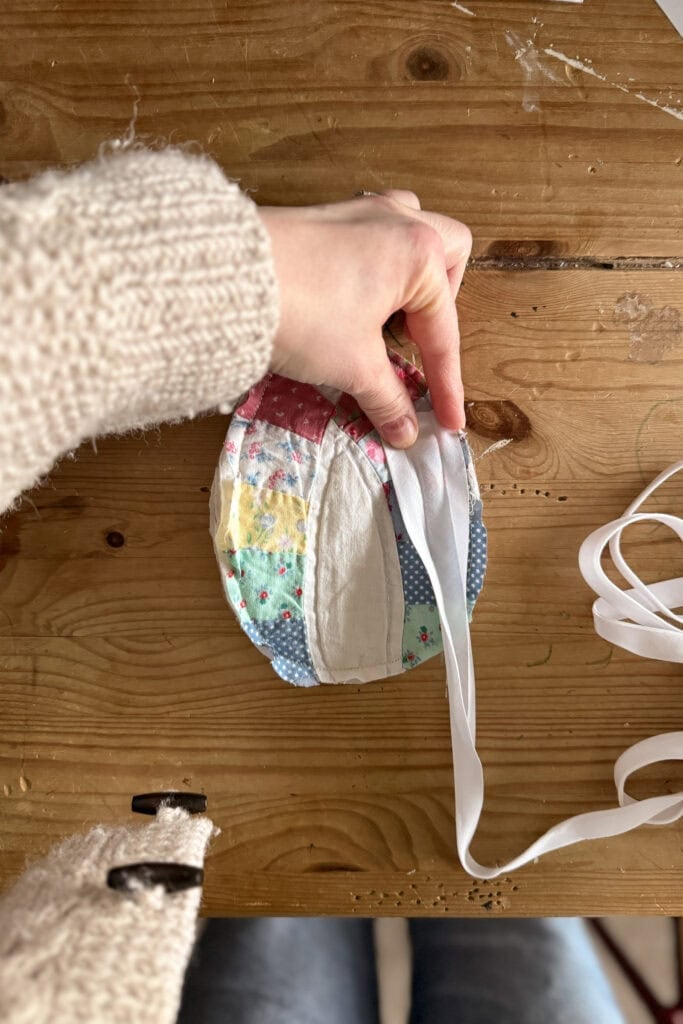
Option A — bias tape
For the tidiest finish, open out the bias tape and sew it all around the edge of the back of the egg with a 1cm (½”) seam allowance. Fold the bias tape over to the front.
Fold one of the raw ends and tuck the other raw end under it, then topstitch all the way around the bias tape. It takes a bit of patience around the curves but the result is lovely.
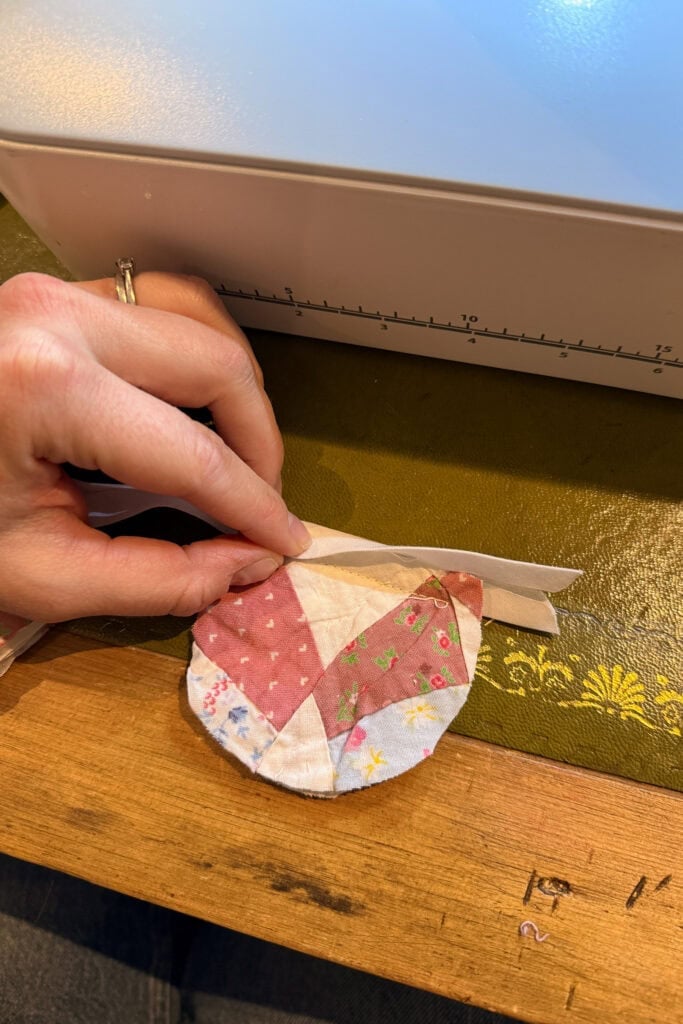
Option B — pinking or scallop shears
Trim around the outer edge of the egg with your shears. No extra sewing required, and the scalloped edge gives the egg a kind of decorative frilliness that’s very fitting for Easter. This is the quicker option but still looks delightful.

Is This the Easiest Easter Tradition You’ll Ever Start?
Honestly, I didn’t expect to feel this strongly about fabric eggs. And yet…
Here we are.
If you make them, I’d love to see. And if you’ve been thinking your fabric Easter eggs need some Merry Mice to snuggle into them — the pattern is here.
You might also like: